How to read a tape measure and what different markings mean
Knowing how to read a tape measure is straightforward. But you need to know what the markings mean. Here we help you get the best from your tool

Bring your dream home to life with expert advice, how to guides and design inspiration. Sign up for our newsletter and get two free tickets to a Homebuilding & Renovating Show near you.
You are now subscribed
Your newsletter sign-up was successful
If you don’t know how to read a tape measure then you have come to the right place. Here we breakdown the different elements you will find on a standard UK imperial/metric tape measure. We reveal what each of the measurement markings and other difficult to decipher marks mean.
Most of the action on a tape measure sits at the end that first makes an appearance when you use it, which makes perfect sense. Alongside the default measurement marks you will probably be wondering what is the diamond on a tape measure and what do the roman numerals mean among other questions.
Here we tell you what they mean and how to use them to make sure your measurements are up to the mark.
How to read a tape measure for meticulous measuring
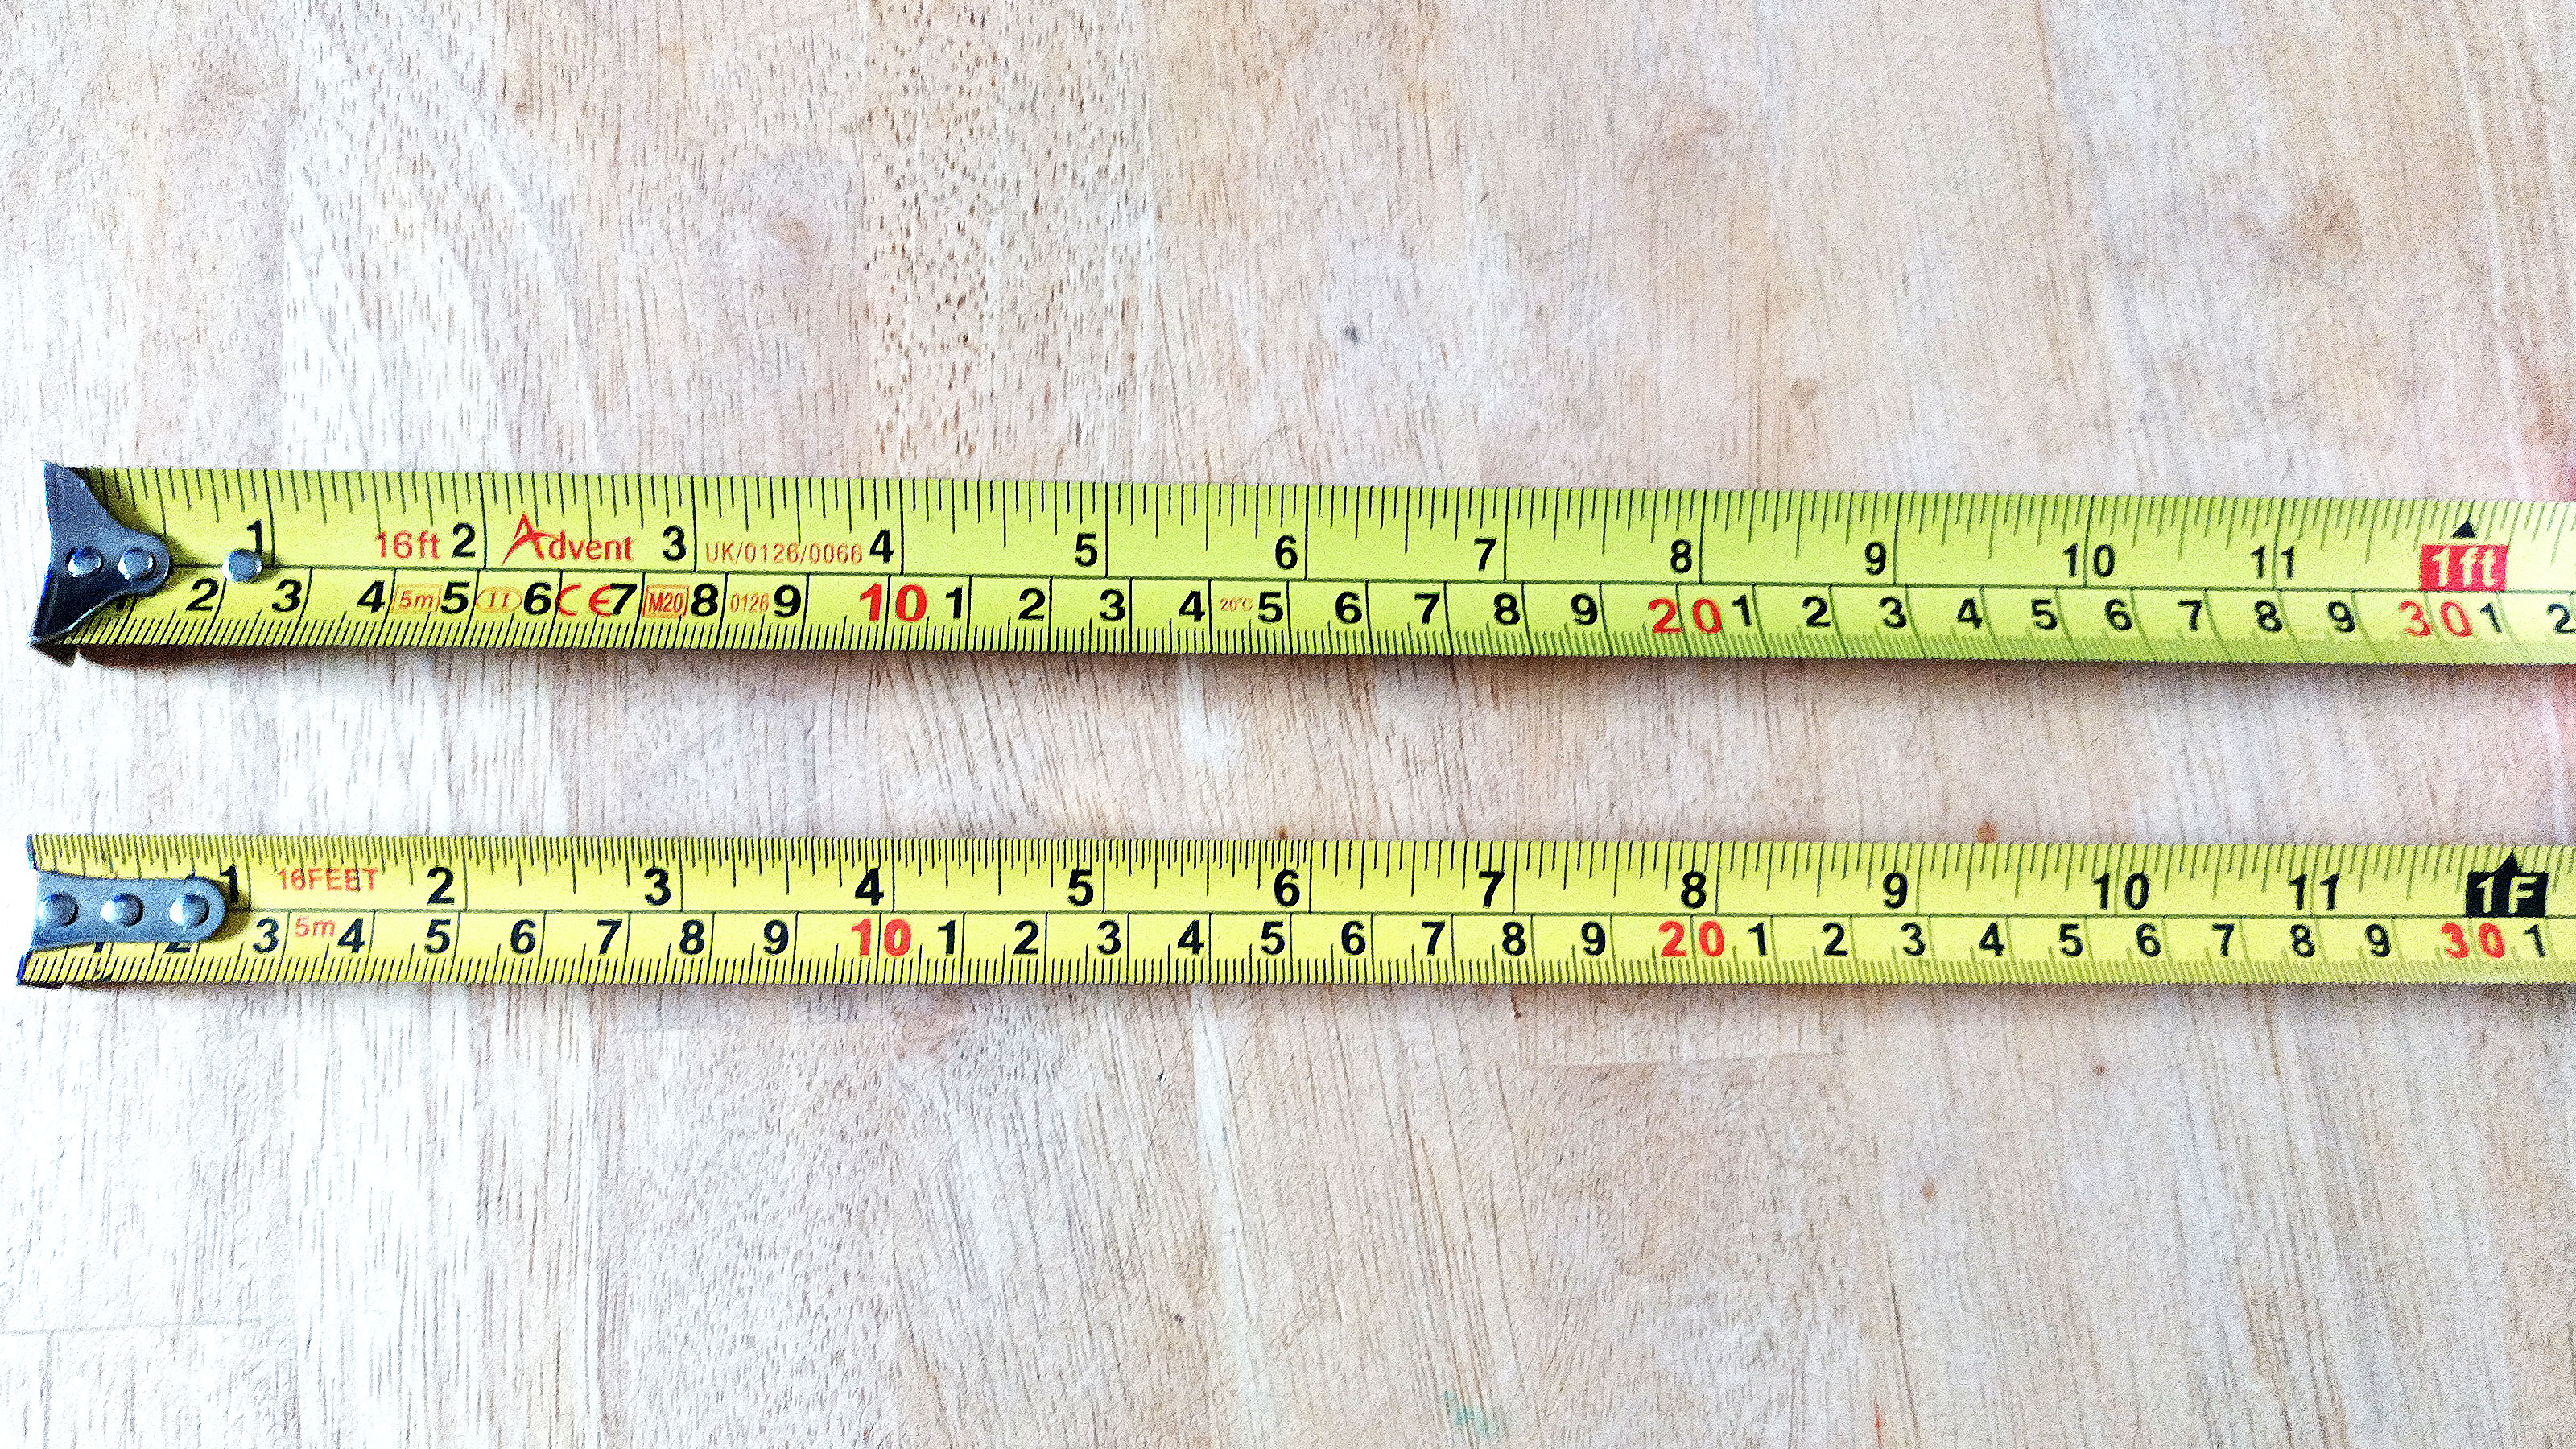
The top edge of a measuring tape typically contains the imperial measurements. These are divided into feet, inches and smaller increments. Each numbered mark i.e. 1, 2, 3 are set an inch apart with red marks typically representing each 12 inches with a foot mark. Past the ‘1ft’ mark each inch is marked with a smaller marking i.e. 1-5 to inform that the mark is 1 foot and 5 inches.
Each inch is broken down into sixteenths of an inch with the eighth of inch mark being longer than the sixteenth, the quarter of an inch mark is longer than both and the half inch mark is the longest of all. This helps make it easier to identify the different marks.
The metric scale along the bottom of the tape works in a similar fashion. This is divided into millimetres, centimetres and metres. The scale is marked at every centimetre with every 10 cm (100mm) marked in red. Each 100 cm (1000mm) is marked – typically in red – to indicate each metre. Each centimetre is divided into 10 millimetre marks with the half a centimetre (5mm) mark being longer than the other marks.
Millimetres is the typical choice for tradesmen when measuring up. For example, kitchen units typically come in 150mm, 300mm, 600mm etc sizes, while different types of radiators usually range from 500mm - 600mm in height and 300mm - 1800mm in width.
Why are there different types of tape measures?
When looking for a new tape measure you will notice that the majority of them in the UK will have a mixture of imperial and metric measurements. Though you will find metric and imperial only, these are not as common.
Including both helps keep down manufacturing costs and accommodates those who still like to work in imperial, but also need to work with metric measurements. It also gives the tape more universal appeal with Europeans typically working in metric while the US typically works in imperial.
How accurate is my tape measure?
Tape measures are divided into three classes of accuracy, EC Class I, EC Class II and EC Class III, with Class I and II being the common options found on UK and European tape measures.
Tape measures that adhere to the standard will have a mark i.e. I or II, representing its accuracy. Class I is the most accurate, these have a 0.001% margin of error, or 1.1mm on a 10m tape. Class II is not quite as accurate having a 0.002% margin of error, or 2.3mm on a 10m tape.
Cheaper tape measures often don’t have an accuracy marking, but are generally still good enough for DIY projects where you don’t need definitive accuracy.
What is the metal end of a tape used for?
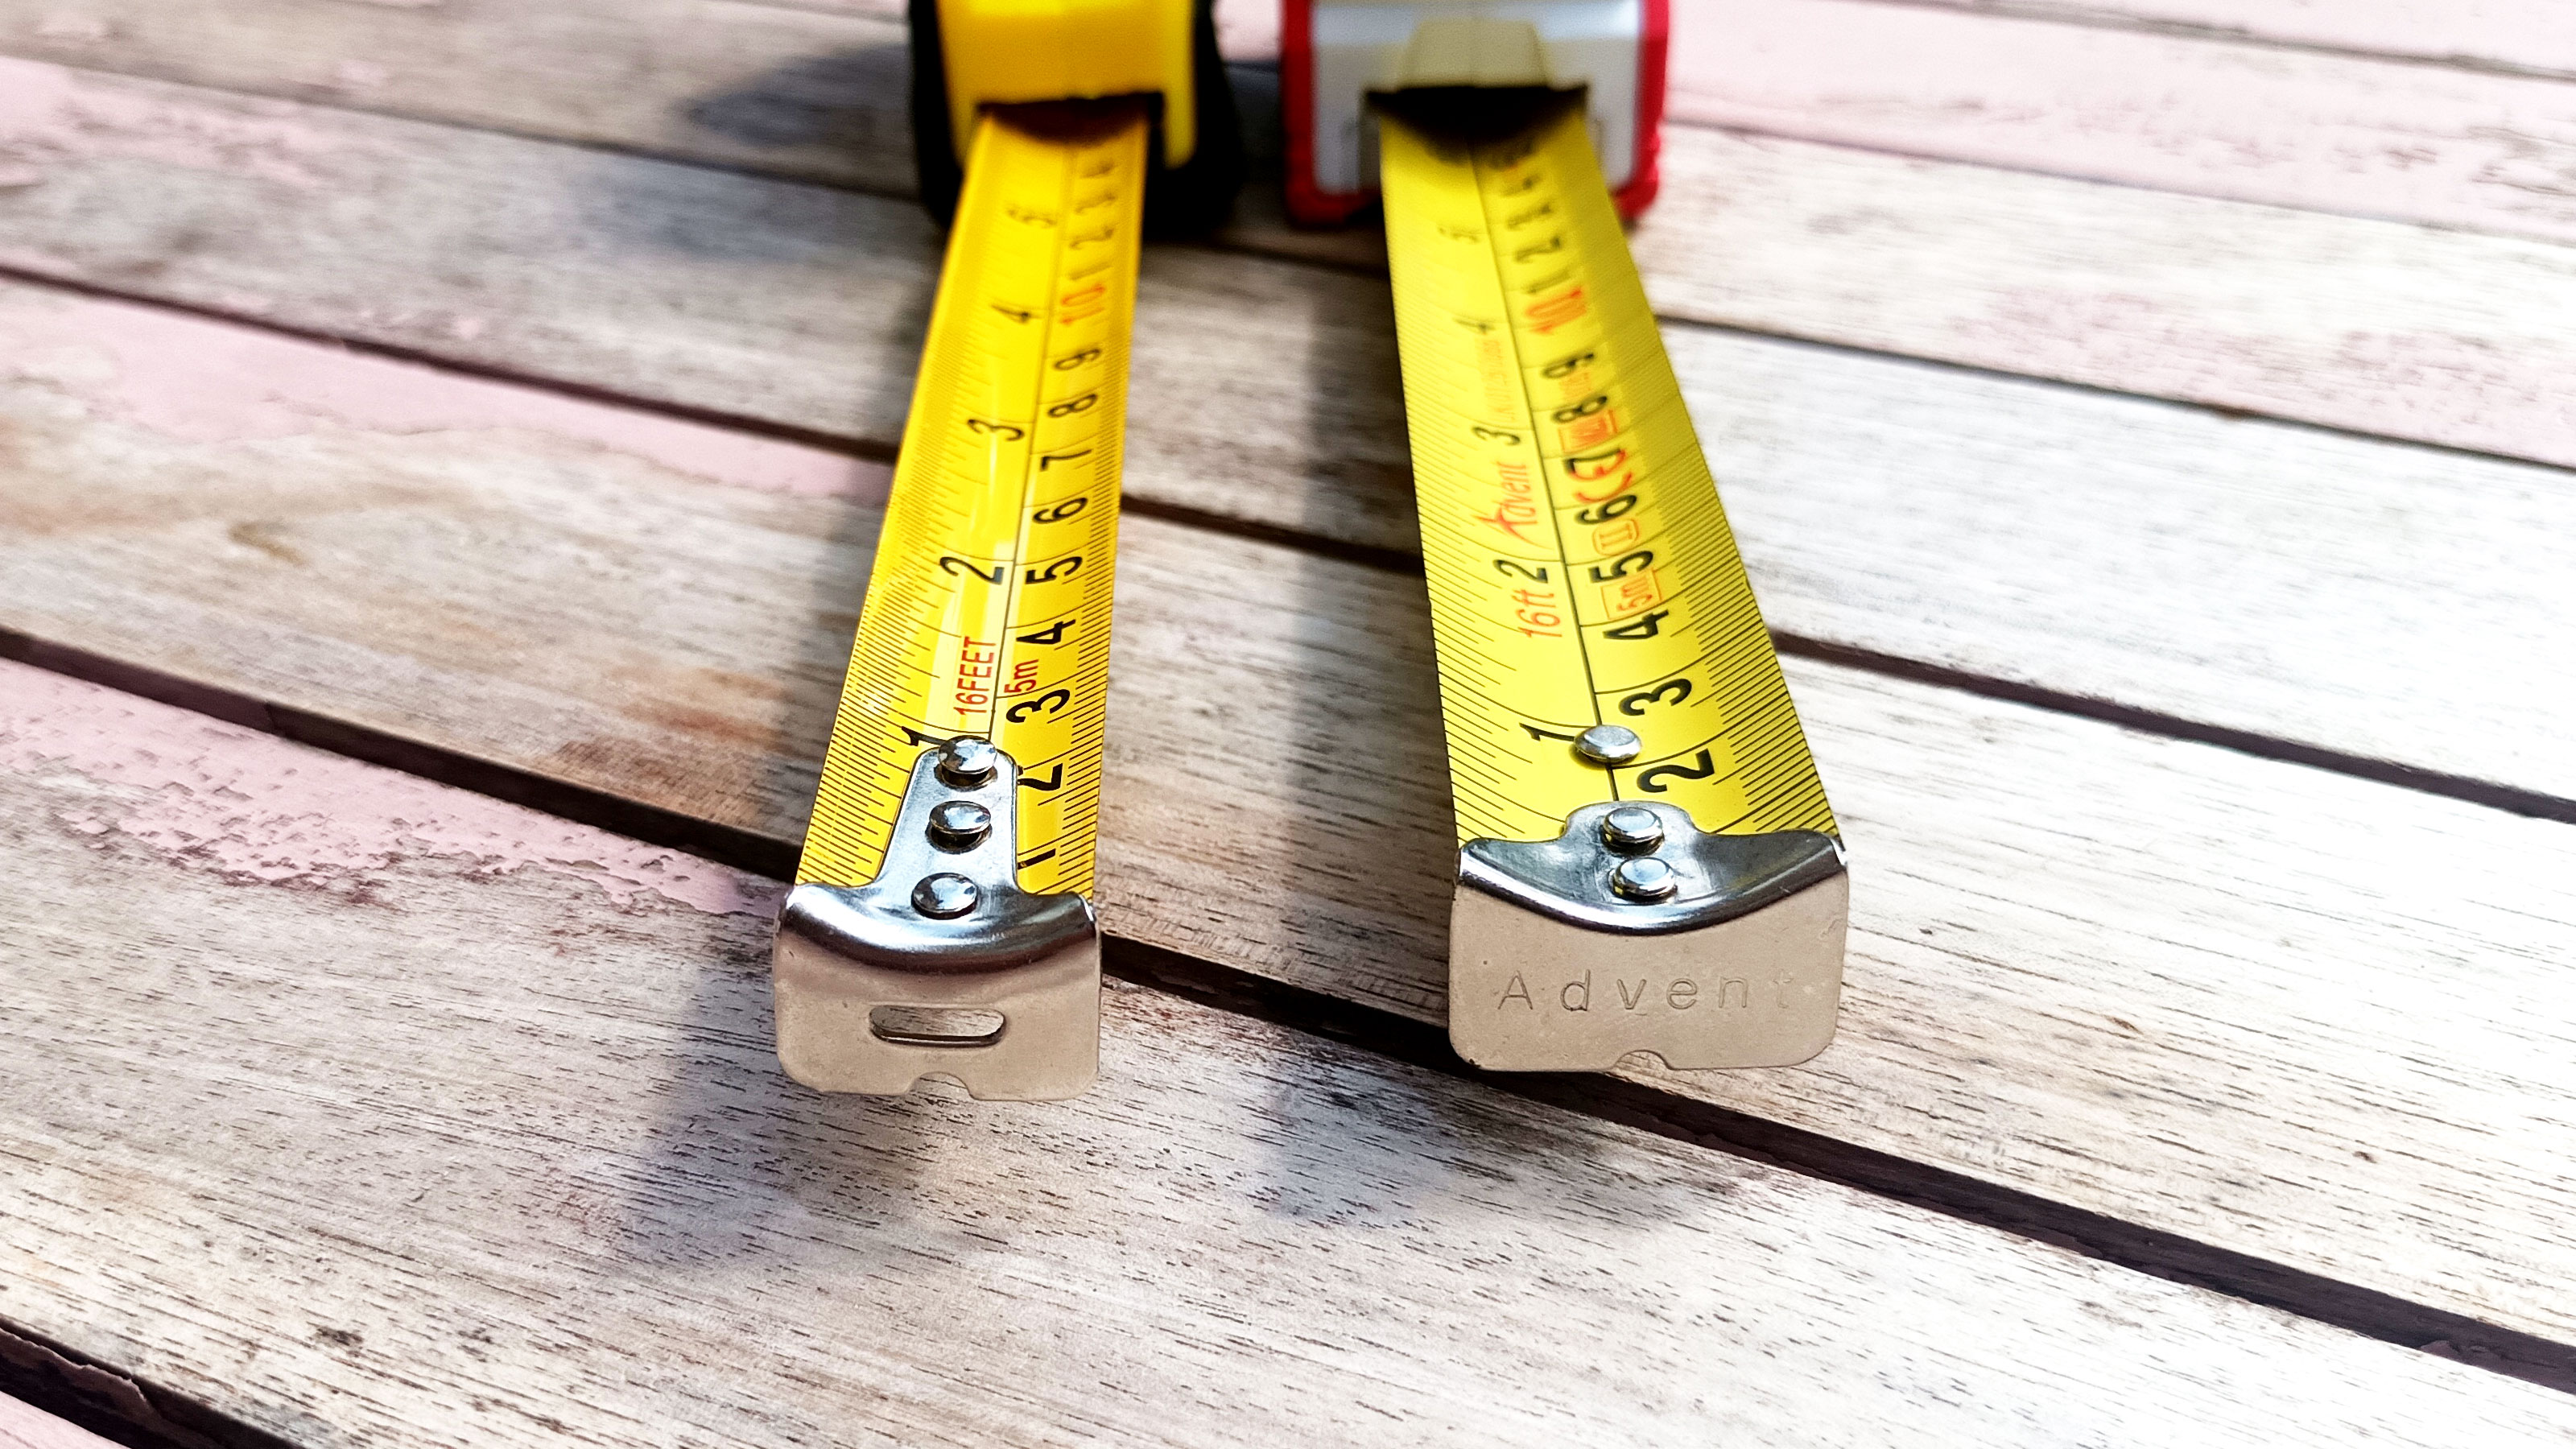
The metal end on a tape measure is known as a hook and gets its name from the fact that it hooks onto the end of a surface allowing you to pull out the tape so you can measure and mark where needed.
Bring your dream home to life with expert advice, how to guides and design inspiration. Sign up for our newsletter and get two free tickets to a Homebuilding & Renovating Show near you.
While the hook performs the same task it will differ slightly from brand to brand. You may see a hole in the hook, which allows you to grab the head of a nail or screw, ideal when there isn’t an edge to hook onto. Others have teeth which allow you to scribe the surface if you don't have a pencil to make a mark.
The hook is also loose, this isn’t a manufacturing error, it is meant to be like this. The tape is short by a sixteenth of an inch, which is the width of the metal hook. When you measure the inside of a surface – like measuring the the inside of a window for blinds after you have just finished painting a bathroom – the hook pushes up against the tape to get an accurate measurement. When you measure the outside of a surface you pull the tape which extends the tape by a sixteenth of an inch.

What length tape measure do I need?
Common sizes for a tape measure range from 3 metres (10 feet) to 10m (33 feet), but which you need depends very much on your needs. The popular choices for most DIYers are 5m and 8m tapes. These can accommodate the length and height of most rooms, but obviously if you need one for larger projects consider getting a 10m tape.
One point to consider is the strength and width of the tape itself. The longer the tape extends the more likely it is to twist. So if you are going to be using a tape measure by yourself, look for a tape like the STANLEY FATMAX 8M Tape Measure from Amazon. This has a wider blade and an impressive 3.3m standout (the distance a blade can extend before it will bend).
What's a quick way to convert cm to inches or vice versa?
There’s a lot of mental arithmetic involved in converting imperial to metric or vice versa. But if you are up to the challenge, converting inches to centimetres is easier – in our opinion. An inch is approximately 2.5 centimetres, so you simply multiply by 2.5. For example, 4 x 2.5 = 10, so four inches is ten centimetres. To convert centimetres to inches divide by 2.5.
But for complete accuracy you need to multiply by 2.54 inches, which makes the mental arithmetic a little more stressful. A quicker option is to use the calculator on your phone, or use an online conversion tool like this Centimeters to Inches Converter from RapidTables
Steve Jenkins is a freelance content creator with over two decades of experience working in digital and print and was previously the DIY content editor for Homebuilding & Renovating.
He is a keen DIYer with over 20 years of experience in transforming and renovating the many homes he has lived in. He specialises in painting and decorating, but has a wide range of skills gleaned from working in the building trade for around 10 years and spending time at night school learning how to plaster and plumb.
He has fitted kitchens, tiled bathrooms and kitchens, laid many floors, built partition walls, plastered walls, plumbed in bathrooms, worked on loft conversions and much more. And when he's not sure how to tackle a DIY project he has a wide network of friends – including plumbers, gas engineers, tilers, carpenters, painters and decorators, electricians and builders – in the trade to call upon.

