
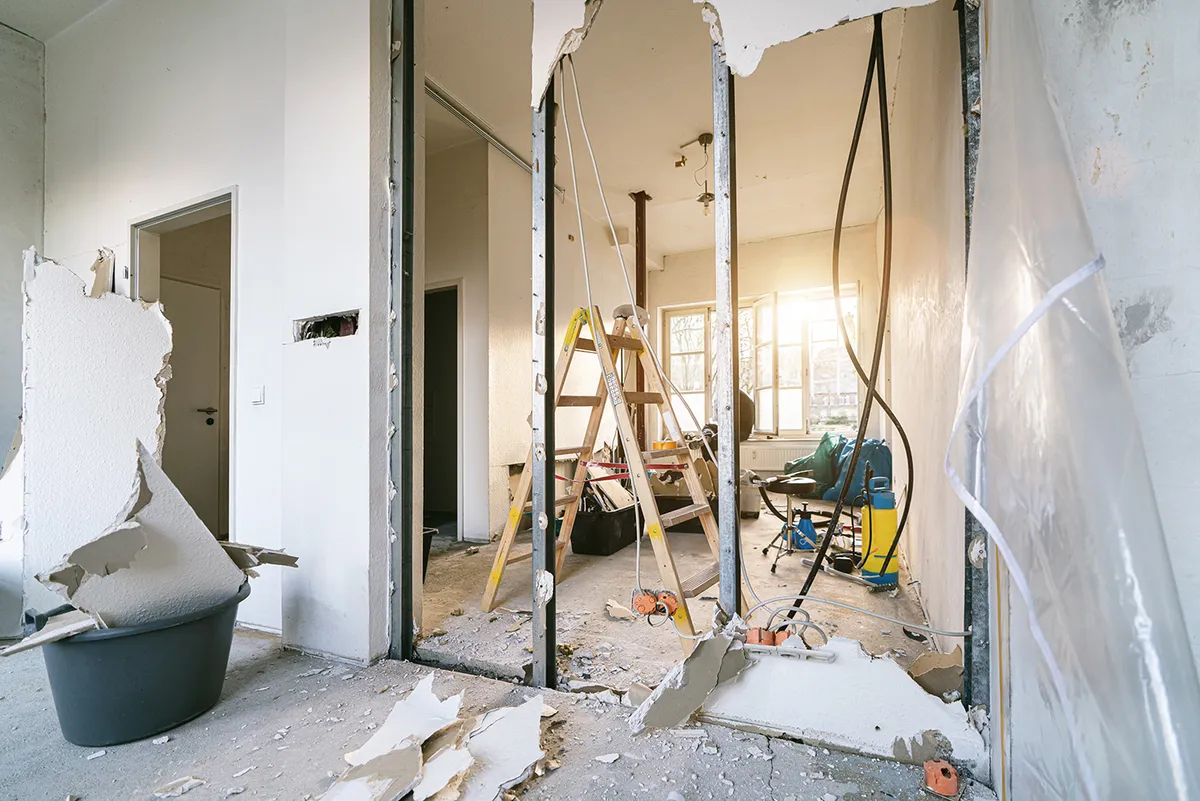
Knocking down internal walls is often top of the list of jobs when renovating a house. And although there's no doubting the transformative effect it can have on dark and gloomy rooms, it's not a job to be taken lightly.
Although it can be easy to assume it's simply a case of taking a hammer to a wall, there's plenty you need to take into account before you forge ahead – not least of all whether the wall has any structural importance or not.
In our guide to knocking down walls, structural engineer, Ian Rock, explains everything you need to know about from tools and techniques through to how to make sure you adhere to rules and regulations surrounding load-bearing walls.

Knocking down internal walls: Where to start

Need more advice or inspiration for your project? Get two free tickets to the Homebuilding & Renovating Show
The most important starting point for any project that involves knocking down internal walls is identifying if the work involves removing load-bearing walls.
Load bearing walls play an important structural role in the construction of a house as they support another element of the house, such as the roof or a wall on an upper storey.
Non-load bearing walls, as the name suggests, carry no loads and are simply there to divide up the interior spaces into separate rooms – these are relatively straightforward to alter or remove, although care still needs to be taken.
However, before jumping to conclusions about what type of wall you are dealing with, it's not a simple case of knowing the difference between stud vs solid walls.
Forget the myth that simply knocking on a wall to see if it sounds hollow is sufficient enough to identify a load bearing wall. Some stud walls (timber frames covered with plasterboard) are load bearing, whilst solid masonry internal walls aren’t always ‘structural’ – some were built as simple partition walls.
It is always best to check with a builder or structural engineer before removing any wall. They will be able to tell you whether or not the wall is load bearing or not.
Once you've identified which type of wall you're knocking down and followed the appropriate steps regarding beams and support (which we'll cover later on), you should also take into account the following:
- Dirt levels: Removing internal walls creates a huge amount of dust and debris – ask your builders to put up dust screens to contain the mess
- Additional costs: Factor in the costs of repositioning of any radiators, switches and electrical sockets and ensure all necessary plastering and decoration to areas of exposed masonry is included in the price
- Matching joinery: Take care not to damage original features and ensure original skirting boards are retained so that everything matches when the joinery is made good
- Establish if you need 'nibs': When removing a load bearing wall, the new steel beam that will take the load it once supported will have to rest on something at each end. A small end section of the original wall (known as a ‘nib’) may need to be left in place
- Doors vs walls: Don't forget that for new door openings, the upper part of the old wall will be left in situ above the new opening (known as the downstand)
Will you need building regulations approval?
In most cases, knocking down an internal wall will require building regulations consent, although there are times when it may not be required.
When removing internal walls, building regulations will usually apply if the walls are providing any protection in the case of a fire. They will also likely apply to load bearing walls, chimneys, fireplaces or walls around staircases, especially in the instance of a loft conversion for example, where the walls around the staircase offer protection, allowing you to escape in the event of a house fire.
Removing these walls would require consent, even if the walls aren't not load bearing.
The importance of lintels and beams for load-bearing walls
When removing load bearing walls – where a wall above is being supported by the wall beneath – it is vital that a suitable lintel or beam or some other supporting structure is fixed above the new opening to ensure the loads are safely transmitted to the ground. A structural engineer will be able to calculate the type and size of lintel required.
“Specifying steel members that are safe requires expertise that will be beyond the capabilities of most self builders,” says chartered structural engineer Simon Pitchers.
“A professional steel beam design from a chartered structural engineer can be purchased for a few hundred pounds. Many manufacturers of proprietary steel lintels will employ engineers who can design their products to suit specific situations. They will often provide this service free of charge, again avoiding the need for a self-builder to attempt this specialist exercise."
Before any demolition work is started, the masonry above the wall must be temporarily supported while a slot is cut to take the new beam or lintel that will be required.
This slot will usually have to extend either side of the opening with a bearing of at least 150mm. To spread the load, additional support will be needed under the ends of the lintel. Once the lintel is in place, the new opening can be cut out underneath.

Types of beams you will need
The type of beam your structural engineer will recommend very much depends on your home, the span of the new opening and how much load it needs to take. Beams are typically made of steel or concrete, but this is not always the case explains Amy Willis, Homebuilding & Renovating's website editor, who knocked down walls during her cottage renovation.
"A flitch beam was recommended for my load bearing wall, which consists of a sandwich of structural-grade timber joists and steel plates bolted together. This is an unusual choice, but was specified because it would be holding up another beam," says Amy.
"An oak beam was my initial preferred option," she adds, "but the new oak would not have matched the historic oak in the room, and could have looked out of place. A simple steel was also out of the question because building regulations consider steel to be not ideal in a fire. This means it requires a fairly thick amount of fire-proofing, and in my build's case, this would have considerably impacted head height."
"Steel beams will need fire protection if they support floors or walls above and usually a cradle formed around them covered with 12.5mm thick fire-rated plasterboard (or two 9.5mm layers) and a plaster skim finish giving 30 minutes’ protection is the minimum," confirms author and building control expert, Paul Hymers.
For smaller openings, concrete beams are often preferred, and concrete is the only acceptable choice in a chimney or above a log burner or open fire as steel or wood are no longer considered acceptable.

Amy is website editor for Homebuilding & Renovating, having joined the publication in 2022. Before this, she spent more than a decade working at media outlets including ITV, The Daily Telegraph, ESPN, MailOnline, Metro, Yahoo and AOL. She has been renovating and extending her historic home in the Suffolk countryside for over three years, overhauling the kitchen, living room, upstairs bedrooms and bathroom. She is currently installing a new driveway with a garage conversion and utility room extension planned too.
Tools for knocking down an internal wall
For the purpose of this article, we'll explain how to knock down an internal wall based on the example of a concrete wall made from a mixture of concrete blocks and bricks.
It has electrical cables and gas pipes, and will require a large steel joist or RSJ to support the ceiling or rooms above. A structural engineer has made a recommendation for the size and strength of the RSJ, which is ready to be installed once the structure ha been safely removed.
In order to complete the task, you'll need the following tools and kit:
- A lump hammer
- A bolster
- A kango breaker
- A broom
- A shovel
- Wheelbarrow and rubble buckets
- Spirit level
- Tape measure
- Steel toe cap boots
- Safety glasses
- Safety gloves
- Dust mask
- Dust sheets
- Gaffa tape
- Plastic sheeting
- Ladder or step up
- Accrow supports
- Strong timber lengths
- Handsaw
- Drill
- Crowbar
Where to buy tools and kit for demolition

Made from hardened and tempered drop forged alloy steel, with a solid core fibreglass handle

Ensure accurate measurements with this 3 in 1 tape, laser and cross laser measure

Protect the other rooms in your house from dust with this pre-taped masking film sheet

Clear up the mess with this heavy duty brush designed for dealing with rubble

Protect your eyes from dust and dirt with these safety googles that will also fit over your existing glasses

Reach heights safely with this 5 in 1 combination ladder that includes a platform
12 steps to knocking down an internal wall
1. Decommission the cables and pipes in the wall
This ensures they're no longer live and in use.
2. Make sure your rooms are protected from dust.
Spread dust sheets over your floor and tape up internal doors with plastic sheeting to ensure no dust escapes into the rest of the house. Brick dust is invasive and you'll need to minimise its spread.
3. Remove ceiling plasterboard
To access the wall, you'll need to remove some of the existing ceiling plasterboard. Cut into this with your hammer and bolster and remove around 18 inches of board right up to where the ceiling joins the wall that's being removed.
This will expose rafters, cables and pipes. Ensure all proud nails and screws are removed or hammered flush into these rafters on both sides of the wall.
4. Insert the acrow supports
Once your rafters are exposed, you'll be able to insert the acrow support bars. Lift a length of timber roughly the same size as the room into position against the rafters. Secure temporarily with a couple of woodscrews. Raise your acrows supports into position, one at each and depending on how wide your room is, one or two in the centre.
These should be exactly vertical and as tight as possible, taking the full weight of the ceiling off the supporting wall. You'll need acrows on both sides of the wall.
Position screws through the end of the acrow and into the timber for an extra precaution. You may find that the acrows lift the ceiling slightly, causing coving to split.

5. Remove door frames and architrave
You can remove any door frames and architrave if you have them. Use a handsaw to cut into the frame and then you can crowbar the frame away from the door.
6. Start removing the wall
Now we're going to start at the top of the wall structure slowly removing everything from above head height as this is the danger area. Bricks and blocks may fall onto your flooring so ensure it's covered to prevent any damage and also make sure you've got your steel toe cap boots on. Using your hammer and bolster hack away the plaster from the top of the doorway to expose the lintel. It's likely to be moulded concrete and will be extremely heavy and strong.
7. Remove the lintel
Using your Kango or your hammer and bolster, chip away all the brickwork surrounding the lintel until it's disconnected from the rest of the wall.
8. Demolish the wall
Once it's disconnected it can be lifted clear and disposed of. You'll probably need at least two people to lift and carry it away. We can now start to remove the brickwork at the top of the wall, cleaning as we go to avoid large piles of rubble. Using your Kango or hammer and bolster, you can start to demolish or remove bricks and mortar.
Working each course of brickwork, strip the bricks or concrete blocks away one by one, stripping the plaster as you go. The pipework and cables in the wall can be worked around until they're in a position to be removed. The blocks can be removed all the way down to the floor level.
9. Make space for the RSJ
Remove brickwork in the side walls to allow access for the RSJ and the pad stones upon which it sits.
Lay the pad stones down horizontally so there's room to position the RSJ, before they're flipped into a taller vertical position.
10. Lift in the RSJ
You'll need many hands for this, and one person giving instructions to control the movement and path of the joist. You should all know exactly how the joist is being moved.
Once it's sitting on the horizontal pad stones, it's then lifted again before the pad stones are flipped to raised it to the final height. Extra timber can be added to raise it even higher.
Once in position, measure the distance of the joist from both ends to the wall parallel and ensure that it's perpendicular. Use your spirit level to ensure that it's sitting level.
11. Lift RSJ against the rafters
Once in position, add further acrow supports under the RSJ, lifting it tight against the rafters where it can fully take the weight of the ceiling. Hammer wedges in any gaps between the joist and rafter.
12. Repair the brickwork
Once in position repair the holes in the brickwork, bricking it into position. Finally, re-plaster.

Making good after knocking down an internal wall
Once the wall is removed, there are a number of things to consider, in particular how any remaining walls, ceiling and exposed floor will look.
And, if you've removed a load-bearing wall, it's important to realise that the new supporting beam will often be visible. As stated, steel beams typically need to be boxed in with plasterboard in order to comply with fire safety Building Regulations.
Or, if you would prefer the look of a continuous ceiling, one common solution is to build a new suspended ceiling in order to conceal the beam.

You might also need to think about how to level a floor. In old houses, the floor heights often vary between rooms so removing an internal wall can leave it obvious that the floor levels in the newly conjoined rooms are not the same.
In the case of large differences in floor level, a split-level design can become a design feature, but where the difference is small (millimetres or centimetres, for example) some floor levelling work will need to be undertaken.
Costs for knocking down a wall
The costs of knocking down an internal wall do depend on the wall in question and who will be doing the work, However, for a ‘typical’ opening up project, removing a load-bearing wall of around 4m width, Checkatrade estimate costs to be arou d £2,700. For smaller openings the costs are less, but in general, you'll need to make sure your quote includes:
- temporary support of the structure (through Acrow props and ‘strong boy’ masonry supports)
- demolition
- building in of required padstones and supports for the new structural steelwork
- insertion of the RSJ or beam
- fireproofing (if using steel)
- a skim coat of gypsum plaster
- making good finishes at wall, floor and ceiling junctions
When dealing with a load-bearing wall, you'll also need to account for some professional fees.
The HomeOwners Alliance suggests structural engineer’s fees will range from £350 - £450 plus VAT for a basic project, and if you need to apply for building regulations approval for removing a load-bearing wall, you'll need to include this cost too, which can all start adding up if you're attempting to renovate on a budget
However, if you are undertaking a large home renovation project, it's likely you will be making one application for a variety of alterations, including knocking down an internal wall.
"Costs might also be higher if you intend to open up an internal masonry wall – a brick wall in a period home, for instance – which is likely to be a labour-intensive task," notes Claire Lloyd, brand development editor of Homebuilding & Renovating.

FAQs
Do I need planning permission to knock down an internal wall?
Planning permission is not usually required when knocking down internal walls – however, there are exceptions. Although this is a job that commonly falls under permitted development this is not always the case.
If your house is a listed building you will almost certainly need planning permission.
For even more advice, information and inspiration delivered straight to your door, subscribe to Homebuilding & Renovating magazine.
Do I need a completion certificate?
With no completion certificate to prove that the internal wall removal work was properly carried out, problems could lie ahead.
Even if the work complies with all the relevant building regulations, without building control approval you could face complications when you come to sell.
Contact building control and arrange an inspection as soon as you can. The worst case scenario is that you will be asked to obtain a Regularisation Certificate, which is the equivalent to making a retrospective building regulations application.
This normally requires a certain amount of physical opening up of the work to establish that it is structurally sound and verify compliance; the cost of making good afterwards will be down to you.
Do I need a Party Wall Agreement?
You will only need a Party Wall Agreement if the removal of the wall in question will affect your neighbour's property.
In the case of many terraced or semi-detached houses, the new beams required to support the walls where walls have been knocked down, may need to rest on party walls that separate your house from the neighbours'. In this case it is advisable to consult a specialist Party Wall surveyor to ensure compliance with the relevant legislation.
In some older properties, party walls are not strong enough to support any new loadings – some were only single skin (one-brick thick or about 100mm). If this is the case in your property, it will be necessary to build new brick piers or install steel columns to support the new beam – which could mean having to excavate small foundations internally, adding significant expense and disruption.
How long does it take to knock down an internal wall?
Assuming there are no unusual structural complications, once you have all the relevant structural calculations and approvals, removing an internal wall should take no longer than a week – although obviously this will vary depending on the size of the wall, access etc.
Removing an internal wall, along with the insertion of a joist, can be done in a day or two, while plastering of the newly exposed sections of wall and boxed in joist should take no more than another day. Finally, painting can be carried out.
Will my home insurance policy cover the work?
Your existing home insurance policy may not cover works undertaken as part of a major home improvement project, such as removing internal walls. Check before work begins to ensure you are covered. You may need to speak to a specialist insurance company such as Self Build Zone to obtain a bespoke solution.
Once you've completed the task of knocking down internal walls, make sure you take a look at our guide to types of plaster and how to apply them before making good your new space. And, if the purpose of removing it is to create a larger living room, check out these open plan living room ideas to make the most of your new space.

