If you’re a home renovator or DIYer, it’s likely that most of the sanding you’ve done is dry sanding. This means sanding a surface such as wood or a painted wall directly using sandpaper or a sanding wood tool.
Another method, called ‘wet sanding’, involves wetting the material before sanding, usually with water (although some people add detergent). This is a less common approach, but as we’ll see, it’s a useful option for certain situations.
Please note that this article discusses wet sanding in the context of DIY and renovation. The advice given does not apply to wet sanding of automotive parts.

Clive Holland is the former host of Cowboy Trap on the BBC. Now a broadcaster on Fix Radio, the UK’s only national radio station for builders and tradespeople, Holland is one of the UK’s leading property and DIY experts.
What’s the difference between dry sanding and wet sanding?
“Wet sanding involves using water or a lubricant on the surface you’re working on, which traps dust and allows you to achieve an ultra-smooth finish,” says Clive Holland, a property expert and Fix Radio presenter.
“It’s particularly useful on painted surfaces, varnished wood, or plaster, because it reduces airborne dust and prevents sandpaper from clogging,” he adds.
“Dry sanding, on the other hand, is done without moisture, and is commonly used for bare wood, plaster, or filler.”
These two distinct forms of sanding are done using different tools:
Bring your dream home to life with expert advice, how to guides and design inspiration. Sign up for our newsletter and get two free tickets to a Homebuilding & Renovating Show near you.
- For dry sanding, you can choose from a wide selection of tools and materials that suit different tasks, including power tools like the best orbital sanders, belt sanders and detail sanders, as well as sandpaper and sanding blocks for manual use.
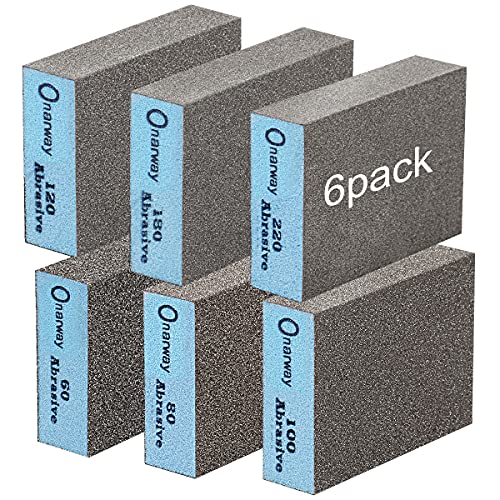
- For wet sanding, you would most likely use wet sanding blocks (sometimes referred to as ‘sanding sponges’) like these ones on Amazon, along with a bucket filled with water. Alternatively, it’s possible to wet sand using sandpaper. It is not safe to wet sand using an ordinary electric sander of any type.
Be sure to use a safe, suitable product for wet sanding or dry sanding...

I can personally recommend this BO5041 Makita random orbital sander for dry sanding (only). Powerful and corded, it’s ideal for sanding large areas such as wood floors and panelling.
Dry sanding vs wet sanding: the pros and cons
Results
Whereas dry sanding is used both for material removal and finishing, the main purpose of wet sanding is to apply a very fine, smooth finish to a surface.
If a surface wasn’t level to start with, then wet sanding wouldn’t be the best option to even it out. Instead, you’d dry sand it more vigorously with a low-grit sandpaper to take off any high points, before finishing with higher grits.
However, for suitable, even surfaces, finishing with wet sanding can produce particularly smooth, glossy results, as the water (or other liquid) traps dust which may have impaired the finish.
Winner: it depends on the project
Versatility
Wet sanding with a modest amount of liquid is a suitable approach for certain surfaces such as painted, varnished wood. However, it should not be attempted on raw wood or other surfaces which could be susceptible to water damage.
“It might be alright for some wood furniture to achieve a super smooth finish, but in general, wet sanding is only really done to smooth the lacquer or varnish, rather than penetrating the wood itself,” says Paul Hambidge, founder of Factory Direct Flooring.
“For wood floors, dry sanding is more widely used because they are susceptible to moisture. It gently roughs up the surface of the raw wood underneath the old finish, which helps your new finish ‘stick’ to the floor.”
Most DIYers will use dry sanding more often than wet sanding – but that doesn’t mean it’s always the best choice.
“Dry sanding is more versatile, but in practice, choosing between wet and dry sanding comes down to the surface you’re working on, your health and safety priorities, and the quality of finish you want to achieve,” says Holland.
Winner: dry sanding

Convenience
Holland advises that dry sanding tends to be the quicker choice for sanding suitable materials.
“When you’re wet sanding, the surfaces will need to dry before you continue with painting or varnishing, which adds to the time required,” he says.
Wet sanding also adds complexity to the sanding process (not including cleanup), as you’ll need to involve a bucket of water as well as your manual sanding tool. Dry sanding can be done efficiently using a power tool or sandpaper.
Winner: dry sanding
Clean-up
“One of the downsides to dry sanding is that it creates more dust, while wet sanding keeps dust levels low but can be messy,” says Holland.
“The airborne dust from dry sanding can irritate your lungs, and ultimately makes a bigger mess in your workspace.”
As anyone who has dry sanded a surface or workpiece at home can tell you, this is certainly true. Dry sanding even a small area can create a wide spread of fine particles.
Thankfully, there are ways to minimise the dust released by dry sanding – but you’re still going to have a big cleanup operation on your hands.
Wet sanding also makes a mess, but it’s a far less disruptive option for smaller jobs in a finished home, such as touching up patches of paintwork.
Winner: wet sanding

Paul Hambidge has 35 years of flooring industry experience from an installation, manufacturing, maintenance and design perspective. He has worked with some of the largest producers of wood flooring, vinyl flooring, LVT, SPC, and laminate floors.
Combining the techniques of wet and dry sanding
Dry sanding vs. wet sanding isn’t a binary choice. In fact, many professionals and skilled DIYers use both techniques, one after the other, to achieve superior results.
“Some DIY jobs benefit from using both wet and dry sanding in sequence,” Holland explains.
“When refinishing wooden doors, dry sanding can be used first to remove old paint or smooth rough edges quickly, followed by wet sanding to refine the surface and reduce dust between coats of varnish or paint.
“In plasterwork, dry sanding may level rough patches, with wet sanding afterwards producing a perfectly smooth, dust-free result.
“Using both methods on a suitable surface allows DIYers to combine the speed and efficiency of dry sanding with the greater precision and cleanliness of wet sanding, resulting in a high-quality, professional finish.”
The right approach to sanding always depends on the material and surface. Get clued up on some common applications with our guides to sanding floorboards, sanding skirting boards and sanding MDF.
Pete Wise is a freelance writer and keen DIYer from Leeds. Pete's tool reviews have featured in titles including Homebuilding & Renovating, Ideal Home and The Independent. He also writes features and news articles for publications such as The Guardian, BBC Good Food and T3. When he isn't busy writing, Pete can often be found at libraries, pubs and live music venues. He finds tile-cutting strangely zen.
