What is a French drain, do you need one and where should you put one?
Wondering exactly what is a French drain? We explain how this drainage system works and where it's best placed to help remove water from the ground

Bring your dream home to life with expert advice, how to guides and design inspiration. Sign up for our newsletter and get two free tickets to a Homebuilding & Renovating Show near you.
You are now subscribed
Your newsletter sign-up was successful
Summary of this article: A French drain is a sloped, gravel-filled trench laid with geotextile membrane and a perforated pipe to help direct surface and excess groundwater away from a property. It helps prevent problems such as flooding, damp and soil erosion by channelling the water to a more suitable outlet, such as a soakaway.
If you're exploring the ins and outs of drainage systems, you may have heard the term French drain. But what is a French drain, why might you need one and where do you put one to get the best results?
As with any type of drainage, a French drain will essentially help remove excess water. But, unlike some drainage, it's also a feature that can be added to existing homes, as well as incorporated into a new build project.
We asked the experts to explain the ins and outs of French drains so you can figure out if you need to include one in your plans or renovations.
What is a French drain?
French drains are used as a form of land drainage and are named after Henry French – a 19th-century farmer (and judge).
Unlike soakaways, which are a pit in the ground into which you run your rainwater drainage, French drains are used as a means of preventing too much surface water building up and causing problems.
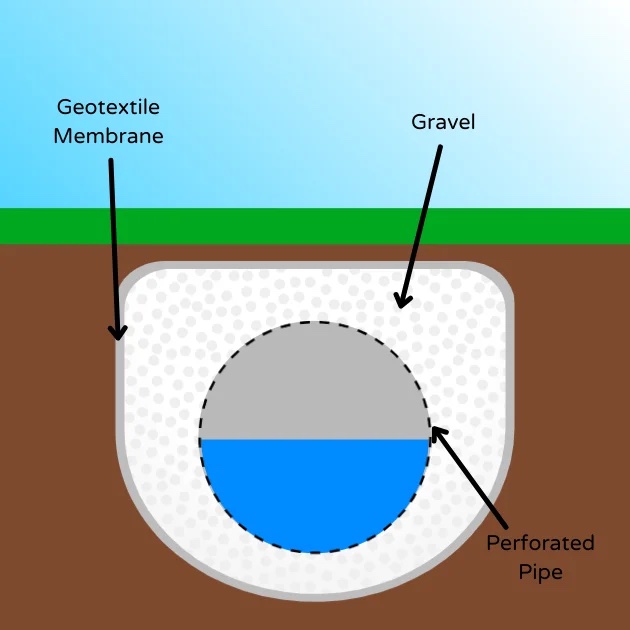
"A French drain is essentially a trench filled with clean gravel or stone. It contains a perforated pipe designed to drain surface water, or groundwater, away from a specific location to prevent pooling," explains self build expert, Mark Stevenson.
Bring your dream home to life with expert advice, how to guides and design inspiration. Sign up for our newsletter and get two free tickets to a Homebuilding & Renovating Show near you.
"The design of a French drain, which includes a sloped element, means it provides a free-flowing, gravel-lined route for water to follow, discharging it somewhere more suitable such as a soakaway at a lower level."
French drains are also sometimes referred to as trench drains or land drains.

Mark Stevenson has worked as a construction professional for over 30 years and regularly shares his knowledge at Homebuilding & Renovating Shows. Whilst Mark describes himself as a ‘professional builder’ as a result of his career in housebuilding and timber building system manufacturing, he has specialist knowledge of timber construction and extensive expertise in finding land and project management. Aside from Mark’s professional career, his skills also extend to practical building knowledge as a skilled joiner, hands-on renovator and serial self-builder of his own development projects.
How do French drains work?
The idea behind French drains is instead of excess water sitting around on the surface of the ground, it will instead seep down into the trench to be taken away to a drainage area.
"Think of a French drain like an underground gutter," says Mark Stevenson. "Water enters the trench either through the gravel (in the case of surface water) or from saturated ground (in the case of groundwater). From there, it seeps into the perforated pipe, which then channels the water away to a discharge point."
So why does it need the different elements such as membrane and pipes?
"The membrane acts as a filter to stop soil seeping into the gravel and pipework," explains Homebuilding & Renovating's DIY expert, Steve Jenkins. "The gravel helps water soak into the ground while the excess water rises through the holes in the pipe to run away."
But it's not just the trench that is lined with a geotextile filter membrane, such as DRAINTEX Drainage Geotextile Membrane Landscape Fabric from Drainage Superstore, the pipe is also sometimes wrapped in this to ensure all the soil and debris is prevented from entering into the pipe and clogging it up.


Steve is Homebuilding's resident DIY expert with over 20 years of experience in transforming and renovating homes. He has a wide range of skills gleaned from working in the building trade and is great source of knowledge for all DIY jobs both inside and outside the home.
What are the signs I need a French drain?
If you've experienced water pooling outside your home, you may have already seen the warning signs that you need a French drain say the experts.
"Water forming in areas around the home and taking too long to drain off is a classic example," confirms Steve Jenkins. "Waterlogged soil, damp on your foundations, and mould growth on walls can all be signs that you need a French drain."
"Check for boggy soil or pooling water next to a hard landscaped area after rainfall," says Mark Stevenson, "and you'll spot the classic sign of needing a French drain."
However, if you're building a new home, you of course won't see the signs, instead it's important to think about what you are building to establish if you might need a French drain.
"When building a new home, or an engineered structure such as a retaining wall, a French drain is a preventative ground water management measure, so its may be a key part of the overall drainage design solution in order to prevent structural failure or damp penetration," explains Mark.

Where is the best place for a French drain?
With regards to installing a French drain, in order to be most effective, your French drain needs to be installed at the lowest point of the flood-prone area you are dealing with, and in a position that means it can take the surface water to a drainage point elsewhere.
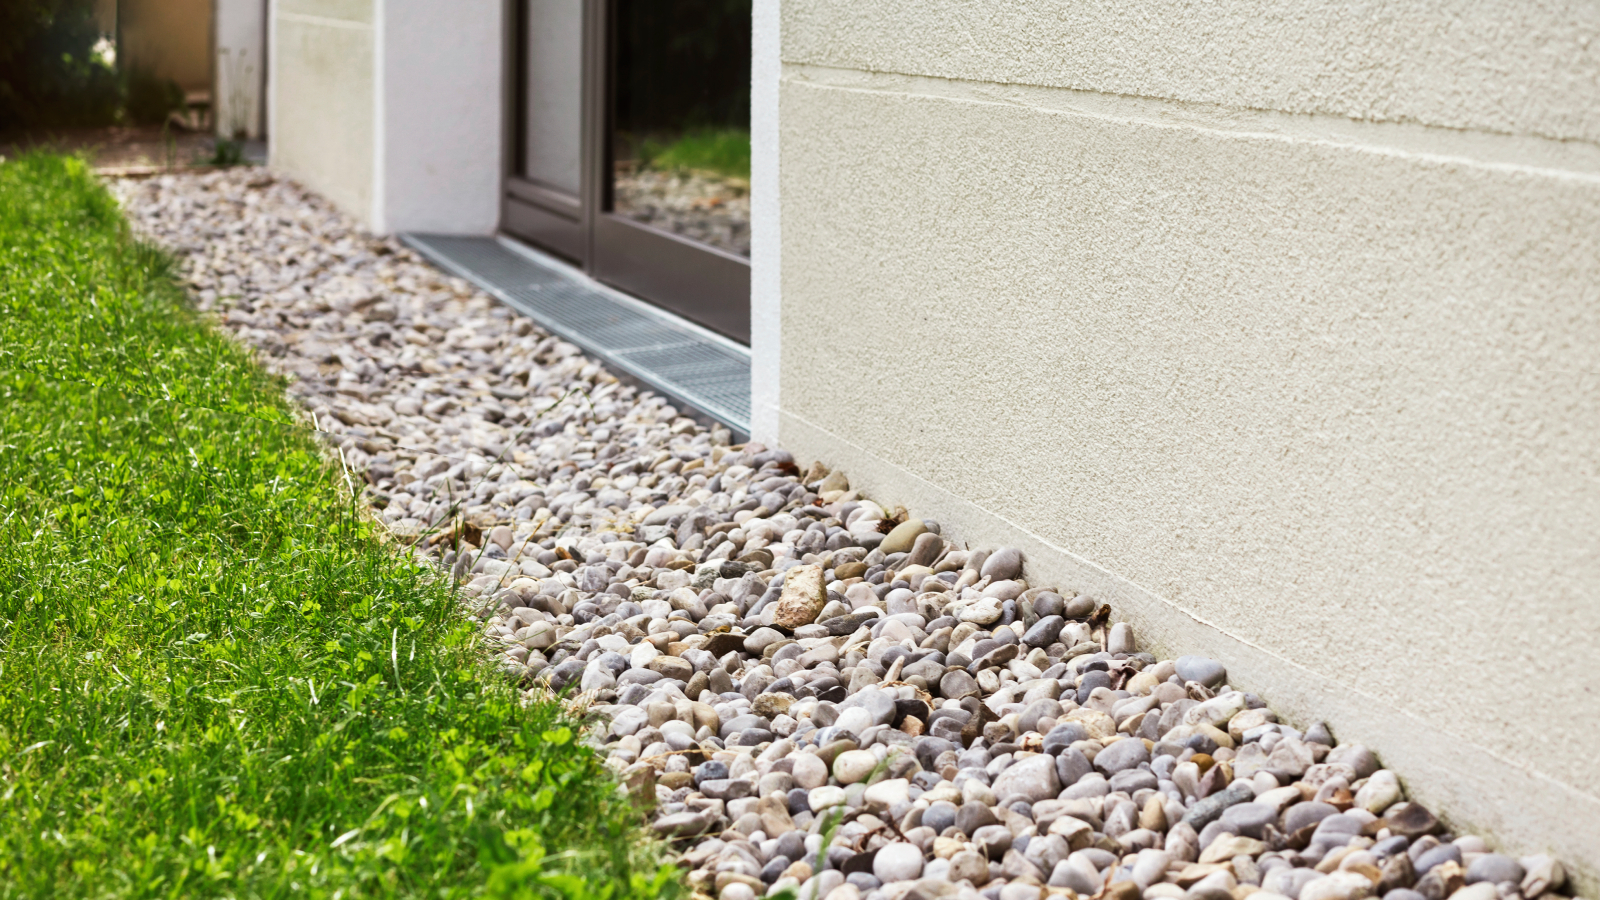
"French drains are typically installed near a home's foundation to prevent water pooling and direct it away from the structure," says Steve Jenkins. "They can also be used in outdoor areas susceptible to flooding."
"French drains are usually installed where water collects or where there’s boggy, saturated ground," adds Mark Stevenson. "This could typically be behind a retaining wall, saturated garden areas, next to hard paving or at the bottom of a slope where surface water tends to gather.
"In gardens, they’re commonly laid beneath waterlogged lawns or alongside hard landscaping to manage surface water runoff," he adds.
If adding one to an existing home, it is a job you can do yourself, but make sure that when planning on the route your French drain will take, you can be confident there are no pipes, cables or trees that could get in the way of the flow of water.
What size French drain do I need?
In order for your French drain to work effectively, you'll need to make sure you use the correct width and depth. But how do you calculate what you need?
"The size of a French drain depends on how much water you need to deal with, the type of soil, and how quickly the water needs to drain," says Mark Stevenson. "Some ground conditions will need the French drain to hold water so it will need to be sized to provide a designed ‘capacity’."
If however you are installing one on an existing property, "the basic steps are to firstly measure the length of the drain from its starting point to its drainage point. This indicates how much pipework you require," says Steve Jenkins.
"The depth and width should be approximately 30cm, then multiply these dimensions to determine the area needed for the membrane and gravel. Tools such as this French Drain calculator can assist in figuring out what you need," he adds.
"For residential garden use, a typical French drain is usually about 200mm wide and 450-600mm deep, depending on soil conditions," expands Mark Stevenson, "and a 100mm perforated pipe is usually sufficient for most landscaping scenarios.
"But, to calculate the size most accurately, you'll need to know how much area you're collecting water from, as well as the expected rainfall and estimated flow rate.
"It can be a bit complicated," warns Mark, "so for anything complex, such when using a French drain as part of an engineered structure such as a retaining wall, or to provide a method of surface water disposal from a building, it's best to consult an engineer who'll do a percolation test and the proper calculations."
It's also vital to remember that you will need to consider the fall when calculating the size of your French drain, with a slope of at least 1:50 from the highest end of the trench to where it eventually discharges. So, for every 1m of trench, it should fall 20mm. Note that this is the minimum fall you should aim for.
Not sure whether to tackle the job of adding a French drain yourself or call in an professional? Find out how much you can expect to pay for French drain costs before making your final decision.
Natasha was Homebuilding & Renovating’s Associate Content Editor and was a member of the Homebuilding team for over two decades. In her role on Homebuilding & Renovating she imparted her knowledge on a wide range of renovation topics, from window condensation to renovating bathrooms, to removing walls and adding an extension. She continues to write for Homebuilding on these topics, and more. An experienced journalist and renovation expert, she also writes for a number of other homes titles, including Homes & Gardens and Ideal Homes. Over the years Natasha has renovated and carried out a side extension to a Victorian terrace. She is currently living in the rural Edwardian cottage she renovated and extended on a largely DIY basis, living on site for the duration of the project.

