How to Fix a Dripping Tap: Guide for Mixers, Pillar Taps and Leaky Spindles
Our guide on how to fix a dripping tap has step-by-step instructions by our DIY expert
Bring your dream home to life with expert advice, how to guides and design inspiration. Sign up for our newsletter and get two free tickets to a Homebuilding & Renovating Show near you.
You are now subscribed
Your newsletter sign-up was successful
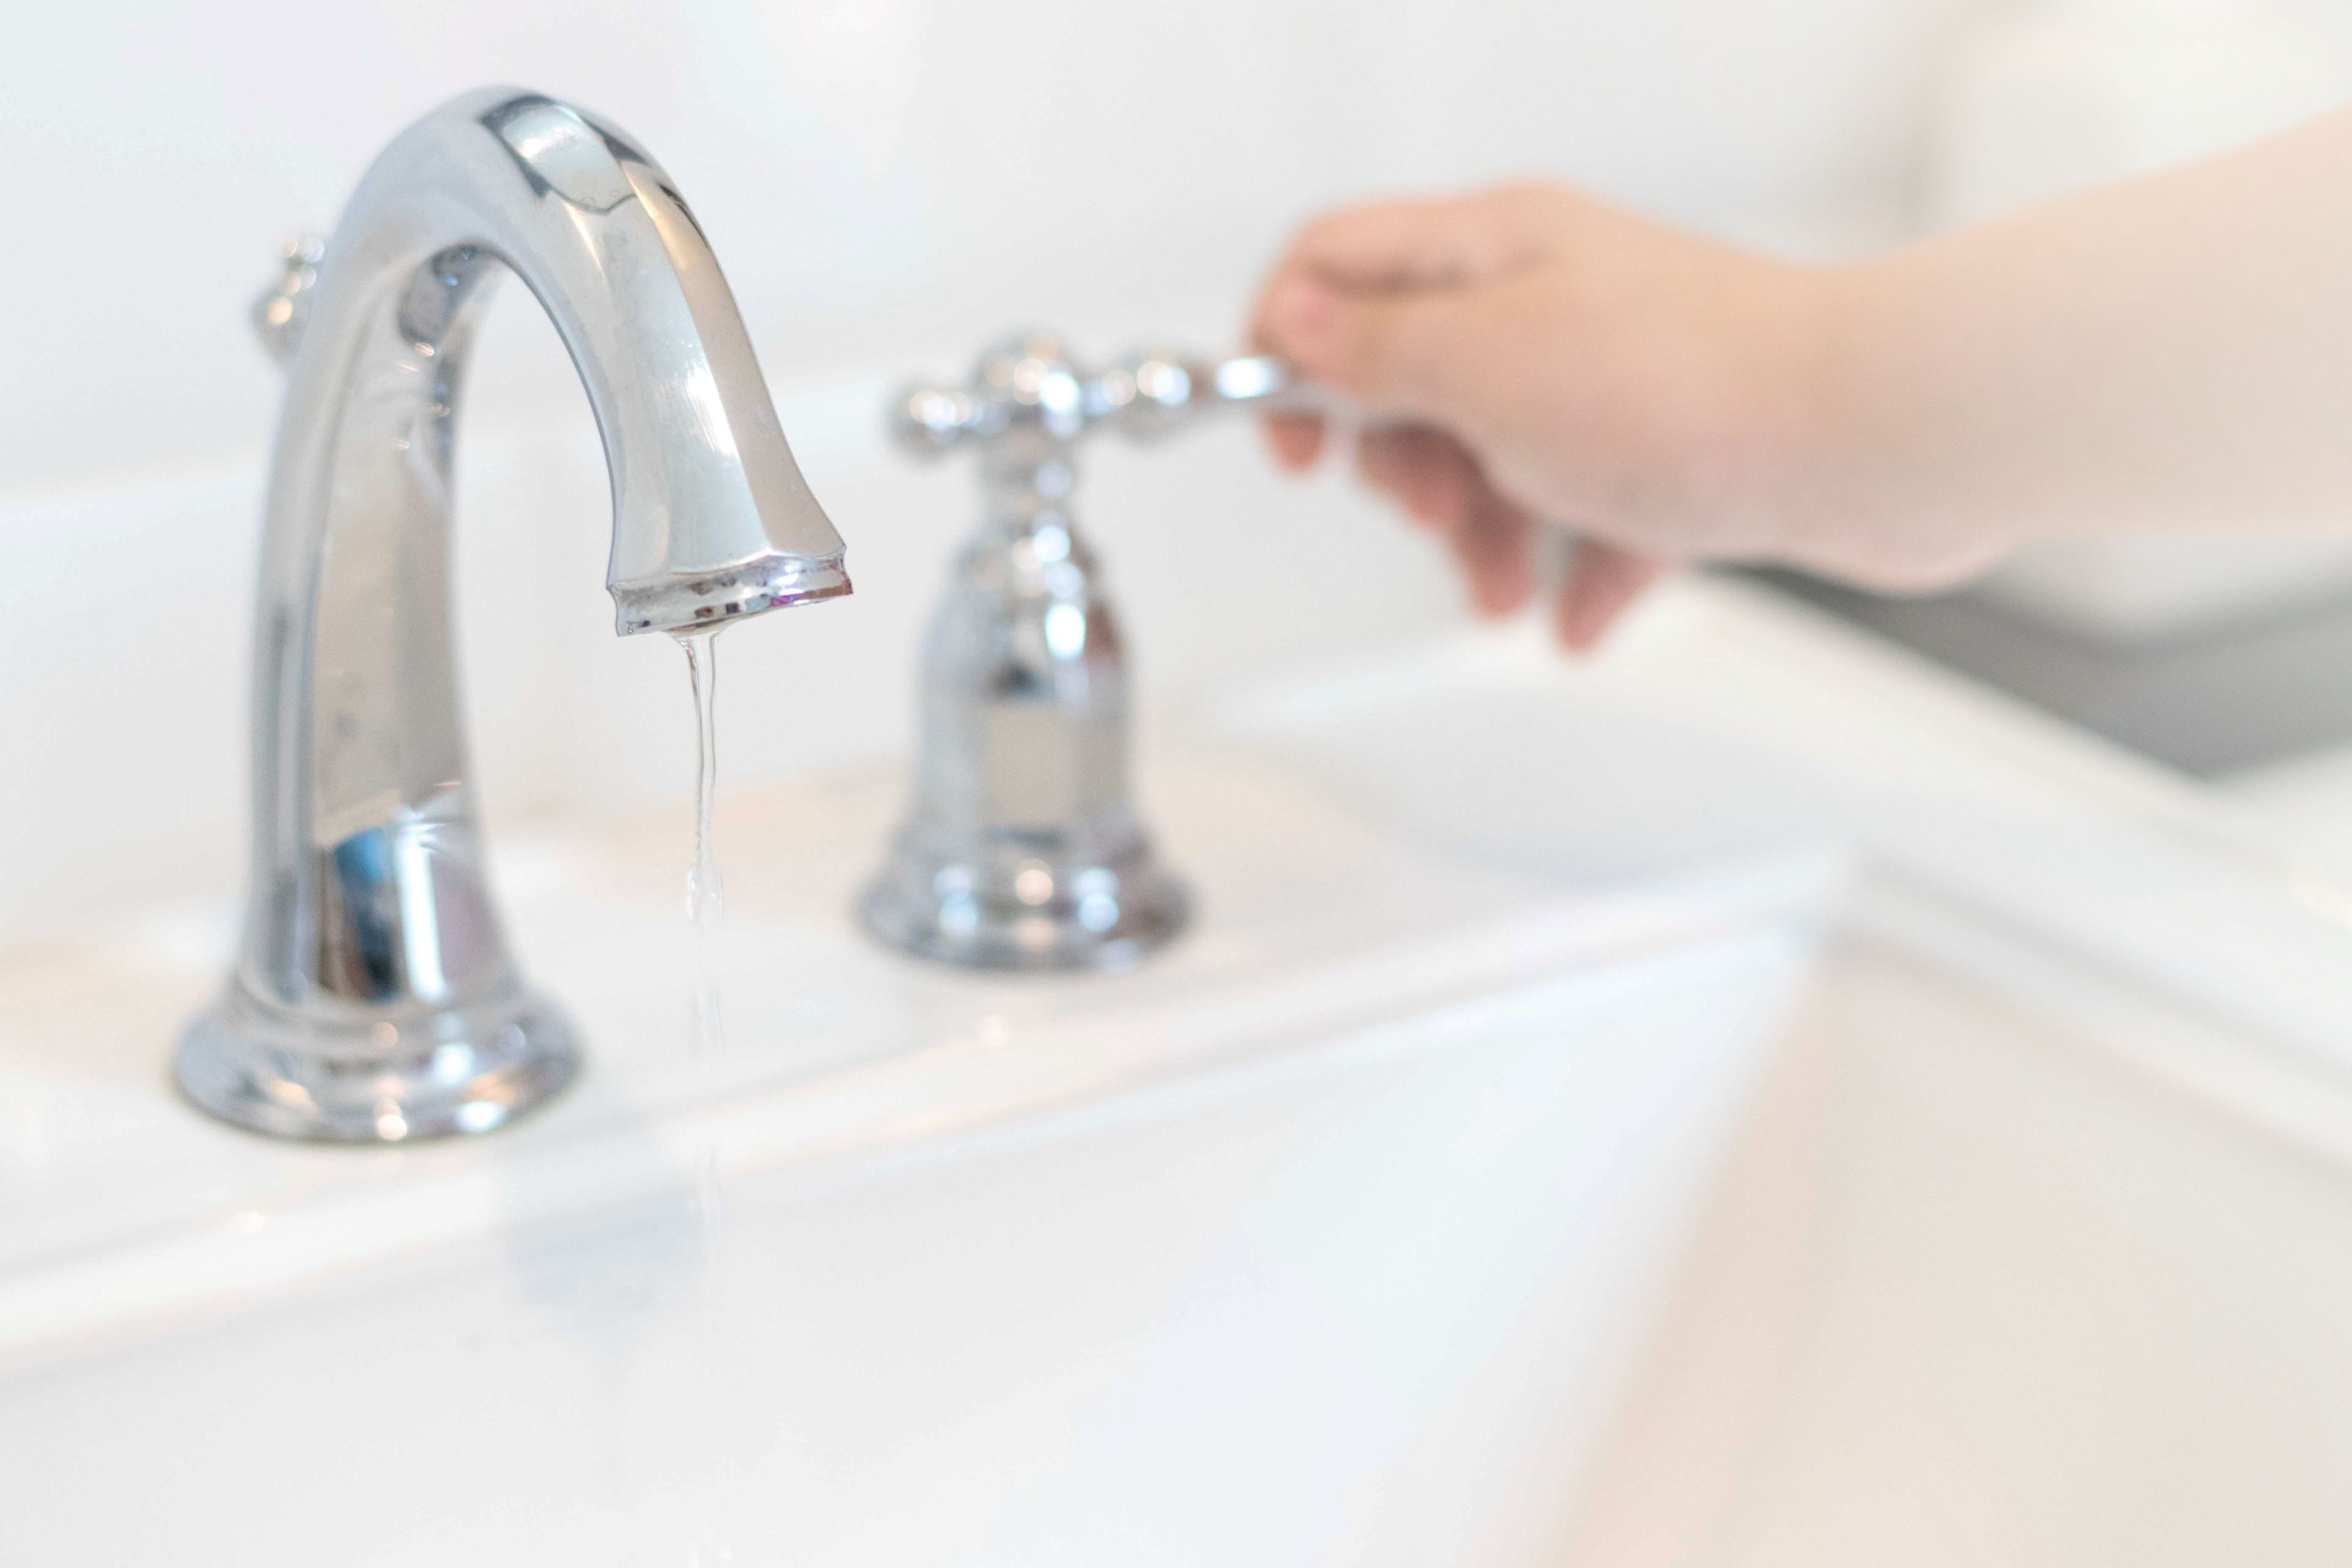
Knowing how to fix a dripping tap requires some DIY skills and a few tools.
Fixing a leak can be surprisingly inexpensive if you know how to do it yourself and is far cheaper than buying a new tap. Once you understand how to do it for both mixer taps and pillar taps, it is also a problem that can be fixed quickly, without expensive labour costs.
Dripping taps are not only annoying for householders but it can increase your water costs. Leaks can also be a nuisance in having to repeatedly clear up water spillages or having to listen to the sound of the drip constantly falling into your sink.
Fortunately, stopping a dripping tap is not too difficult a task to solve, whether tackling one on as part of a kitchen or bathroom design project, or a standalone DIY job.
If you feel competent, follow our step-by-step guide on everything you need to know about how to fix a dripping tap.
How to Fix a Dripping Tap: Mixer Taps
Before delving in with your screwdriver to stop your tap from dripping, it's important to understand its anatomy.
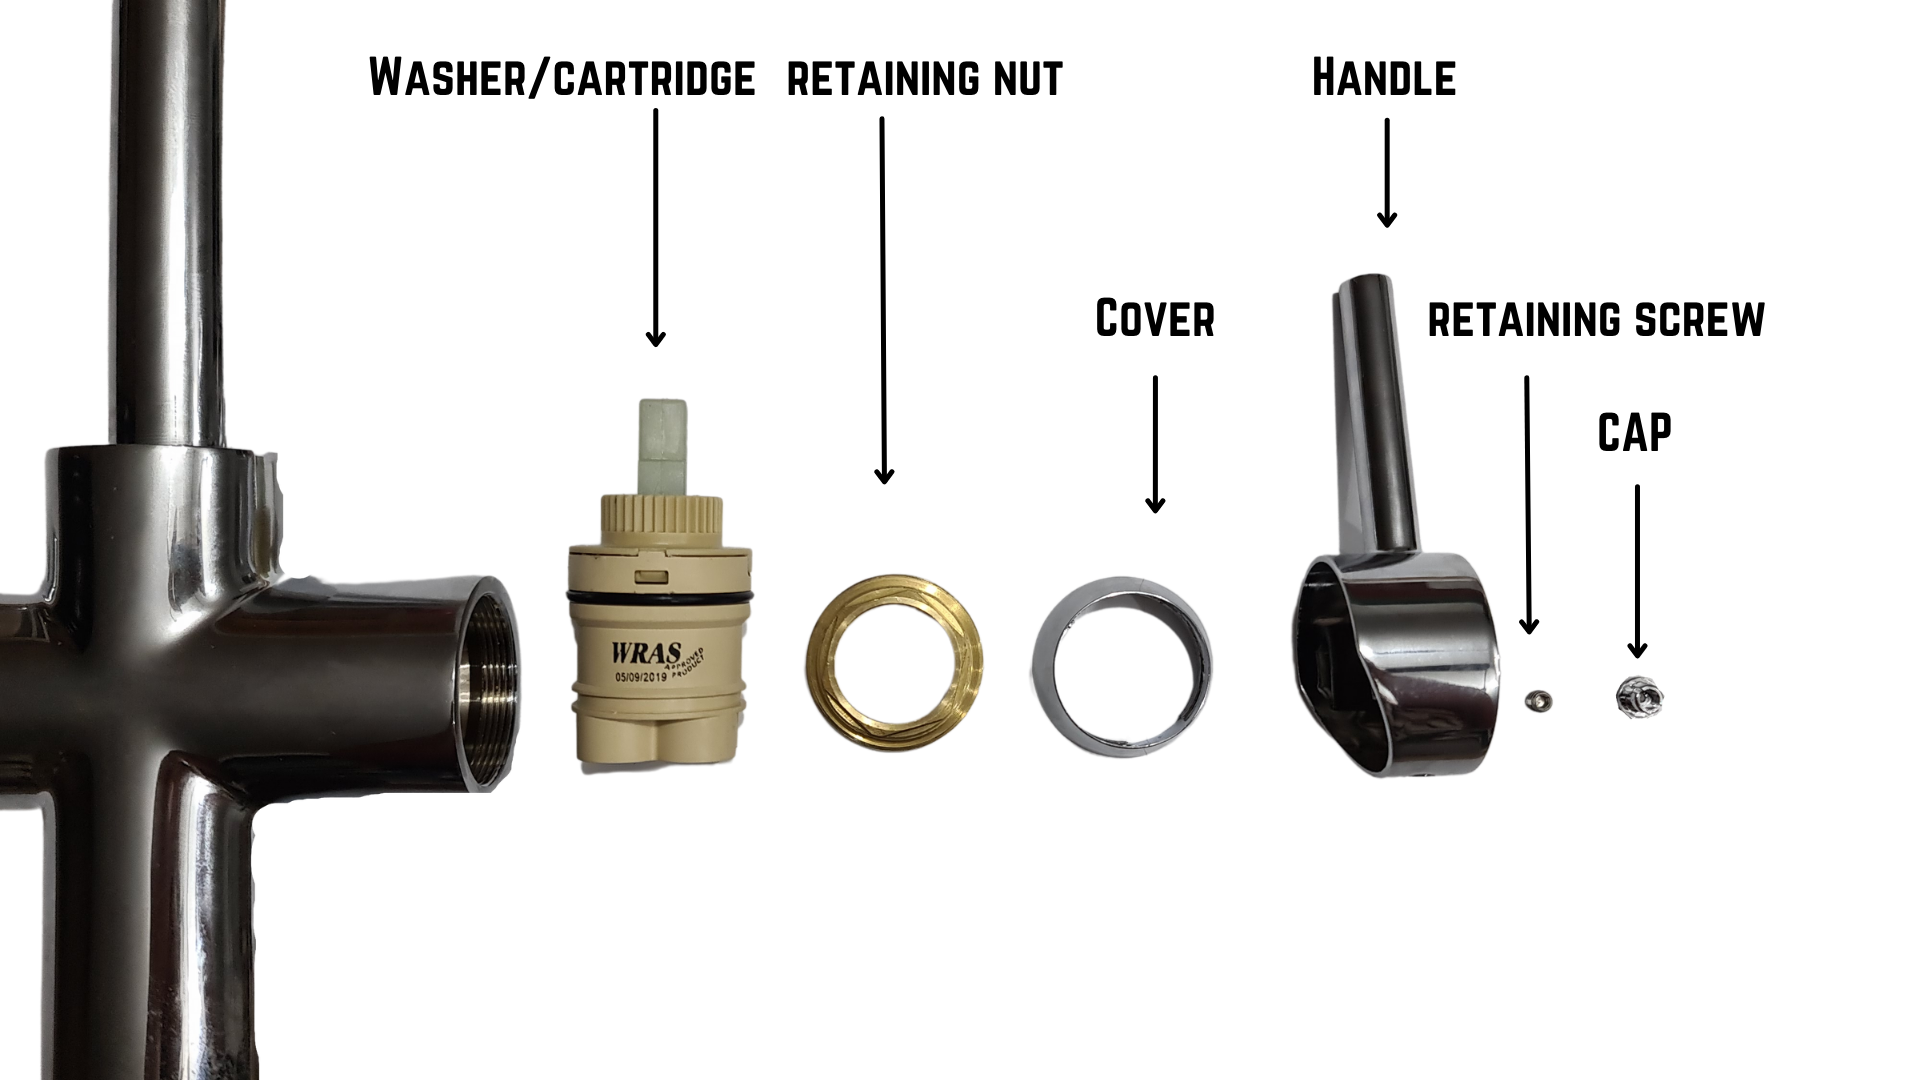
Taps come in all shapes and sizes, but their basic make-up has the same core components. For a mixer tap, the tap is made up of one combined unit.
Bring your dream home to life with expert advice, how to guides and design inspiration. Sign up for our newsletter and get two free tickets to a Homebuilding & Renovating Show near you.
For this reason, when isolating it (this is shown in later steps) you may want to isolate both the hot and the cold supply, even if you are only working on one side.
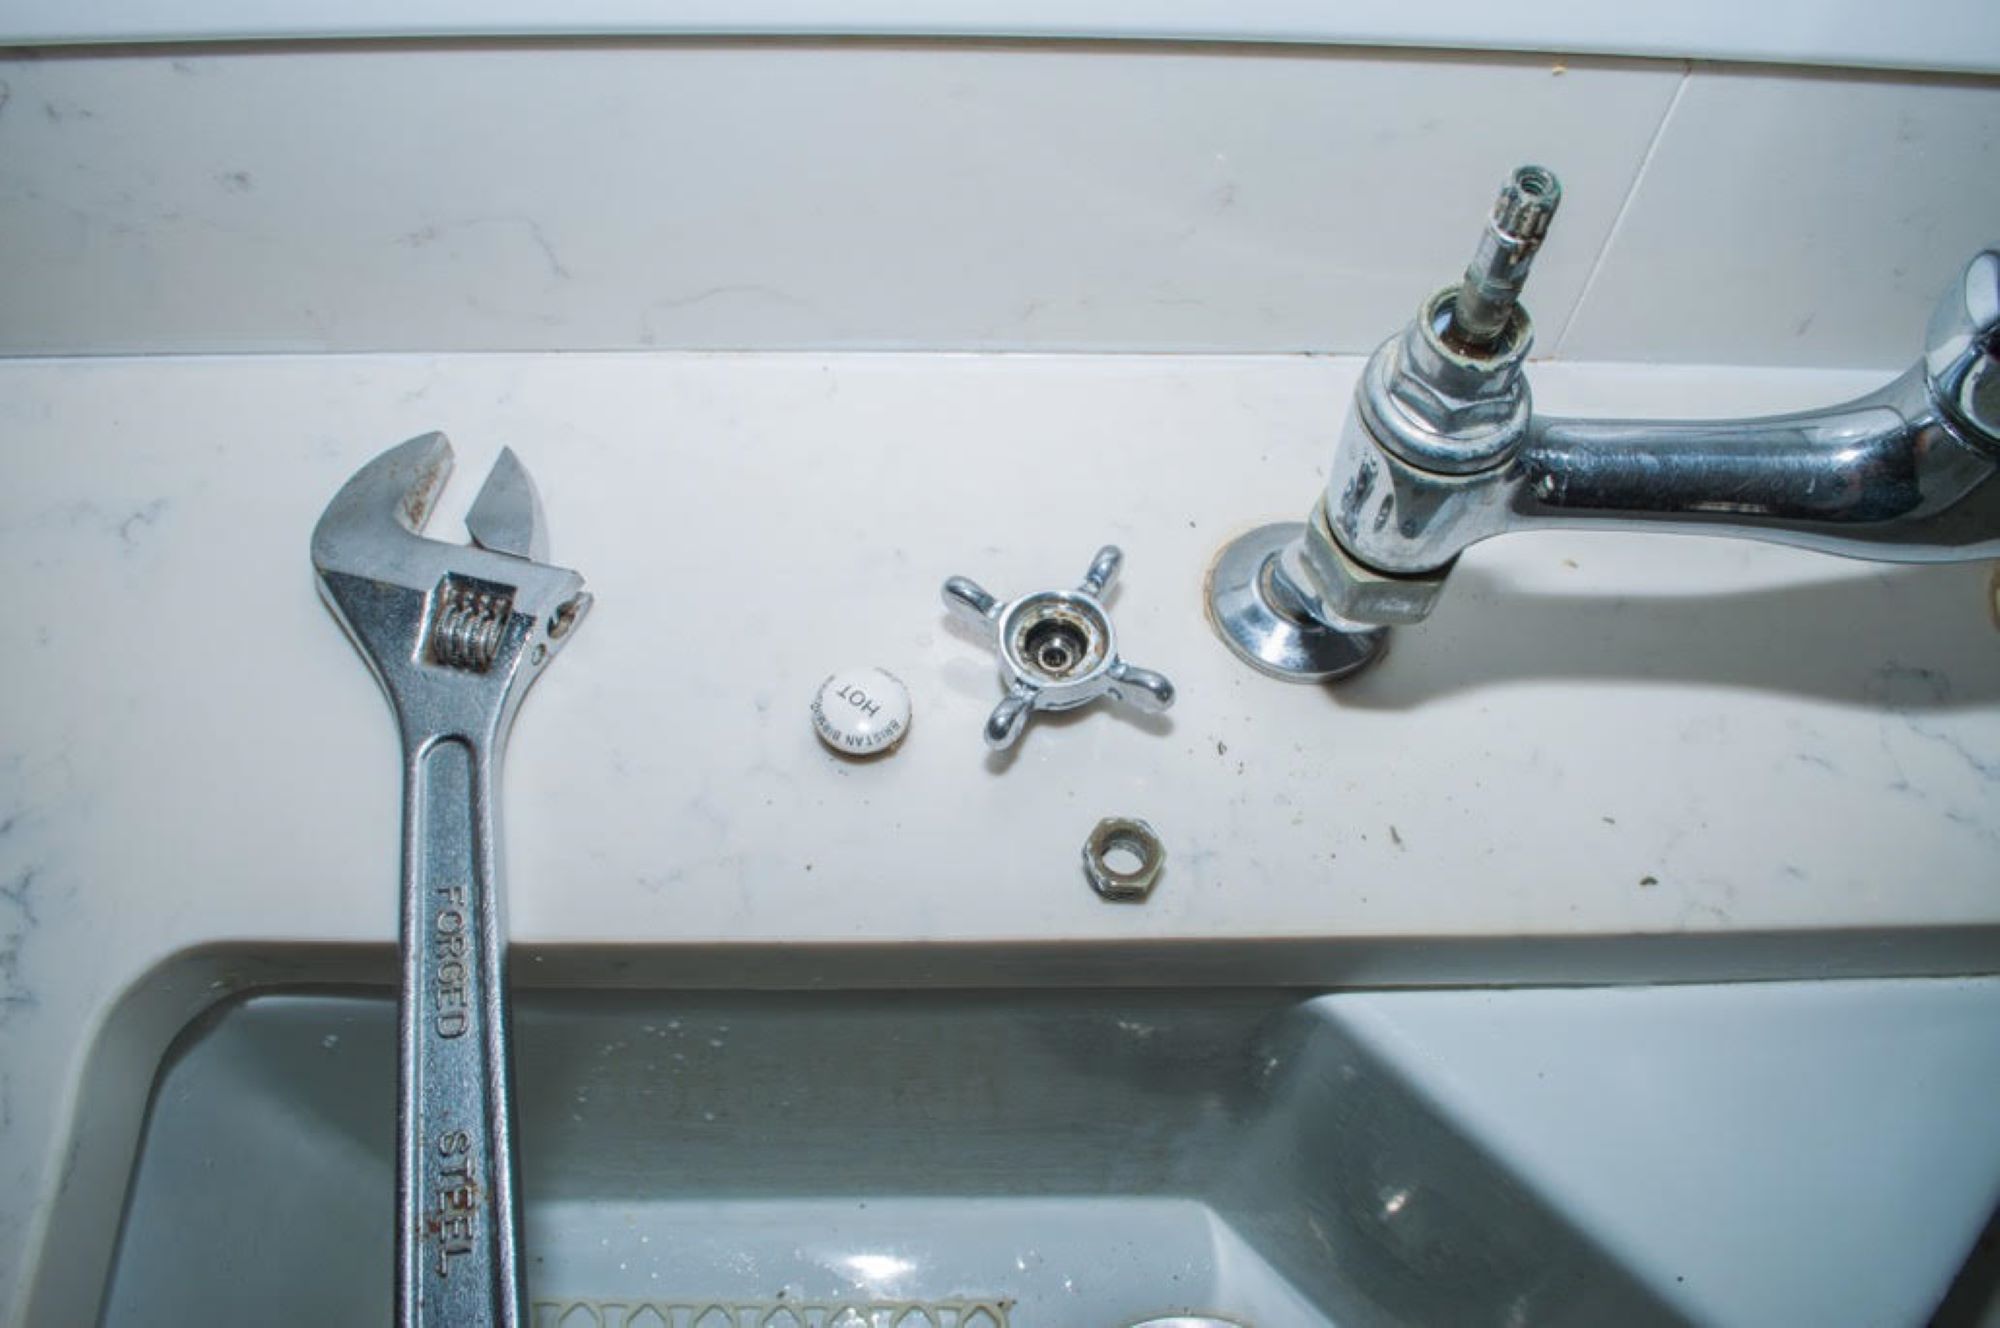
After removing the cap, you'll find a screw that holds the handle in place. Underneath this is usually a gland nut, cover and cartridge with a spindle that turns inside. The cartridge houses the tap's valves.
How to Fix a Dripping Tap: Pillar Taps
The other main type of tap is a traditional pillar tap. This usually has two separate taps for hot and cold, that work completely separately.
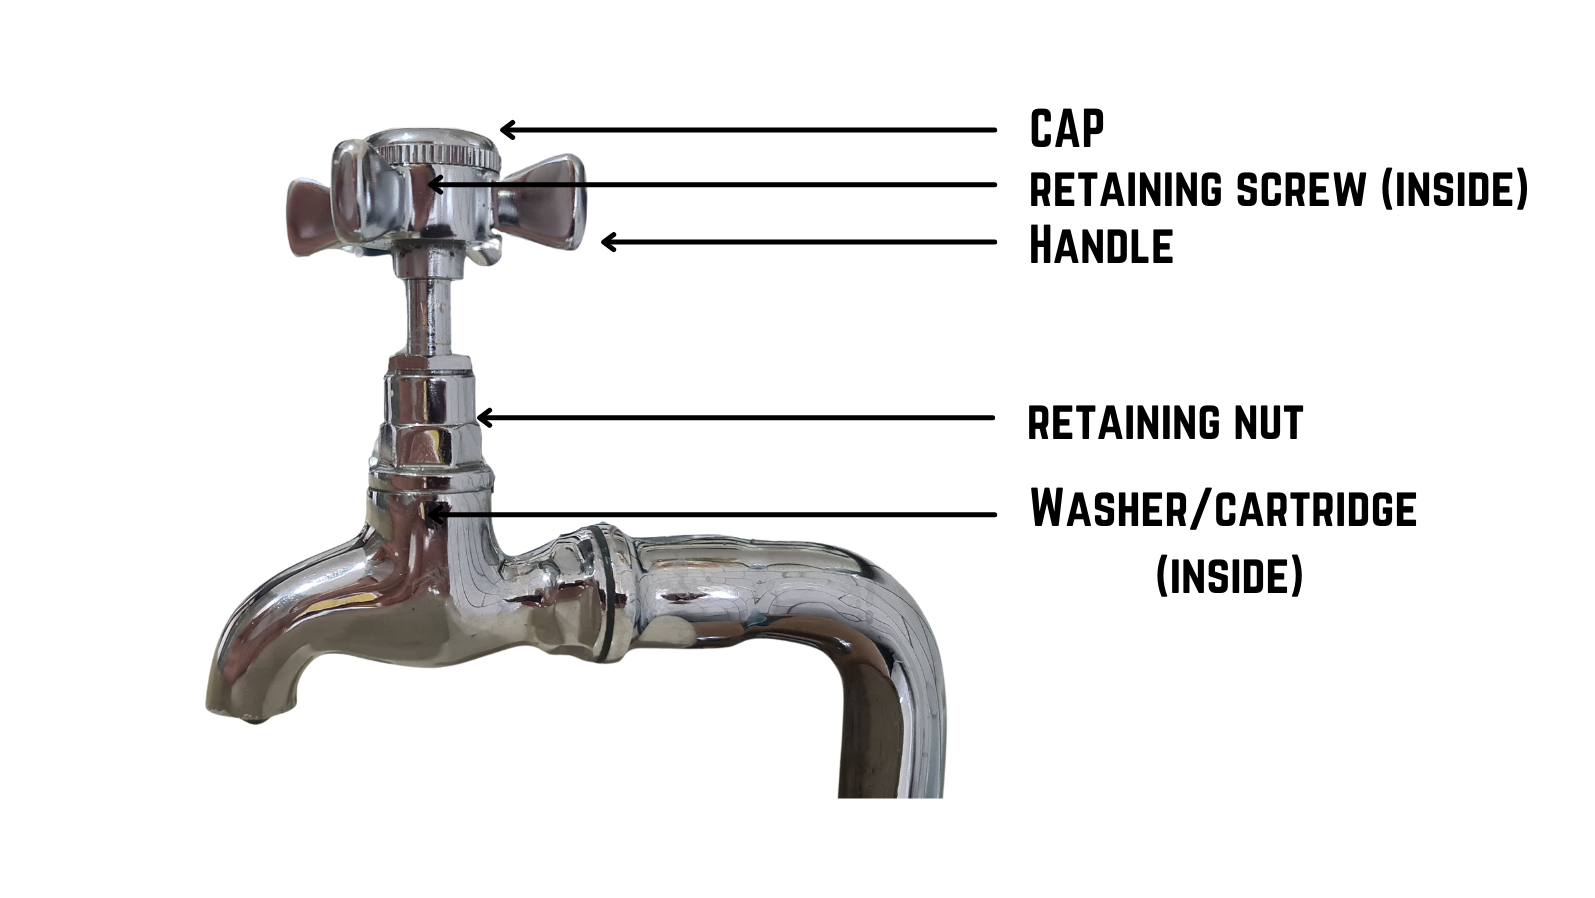
The anatomy of a pillar tap is similar to a mixer tap in that it has a cap with a retaining screw underneath that holds the handle on. Underneath this is a gland nut or retaining nut, a cover, and a cartridge with a spindle.
How to Fix a Dripping Tap: Tools List
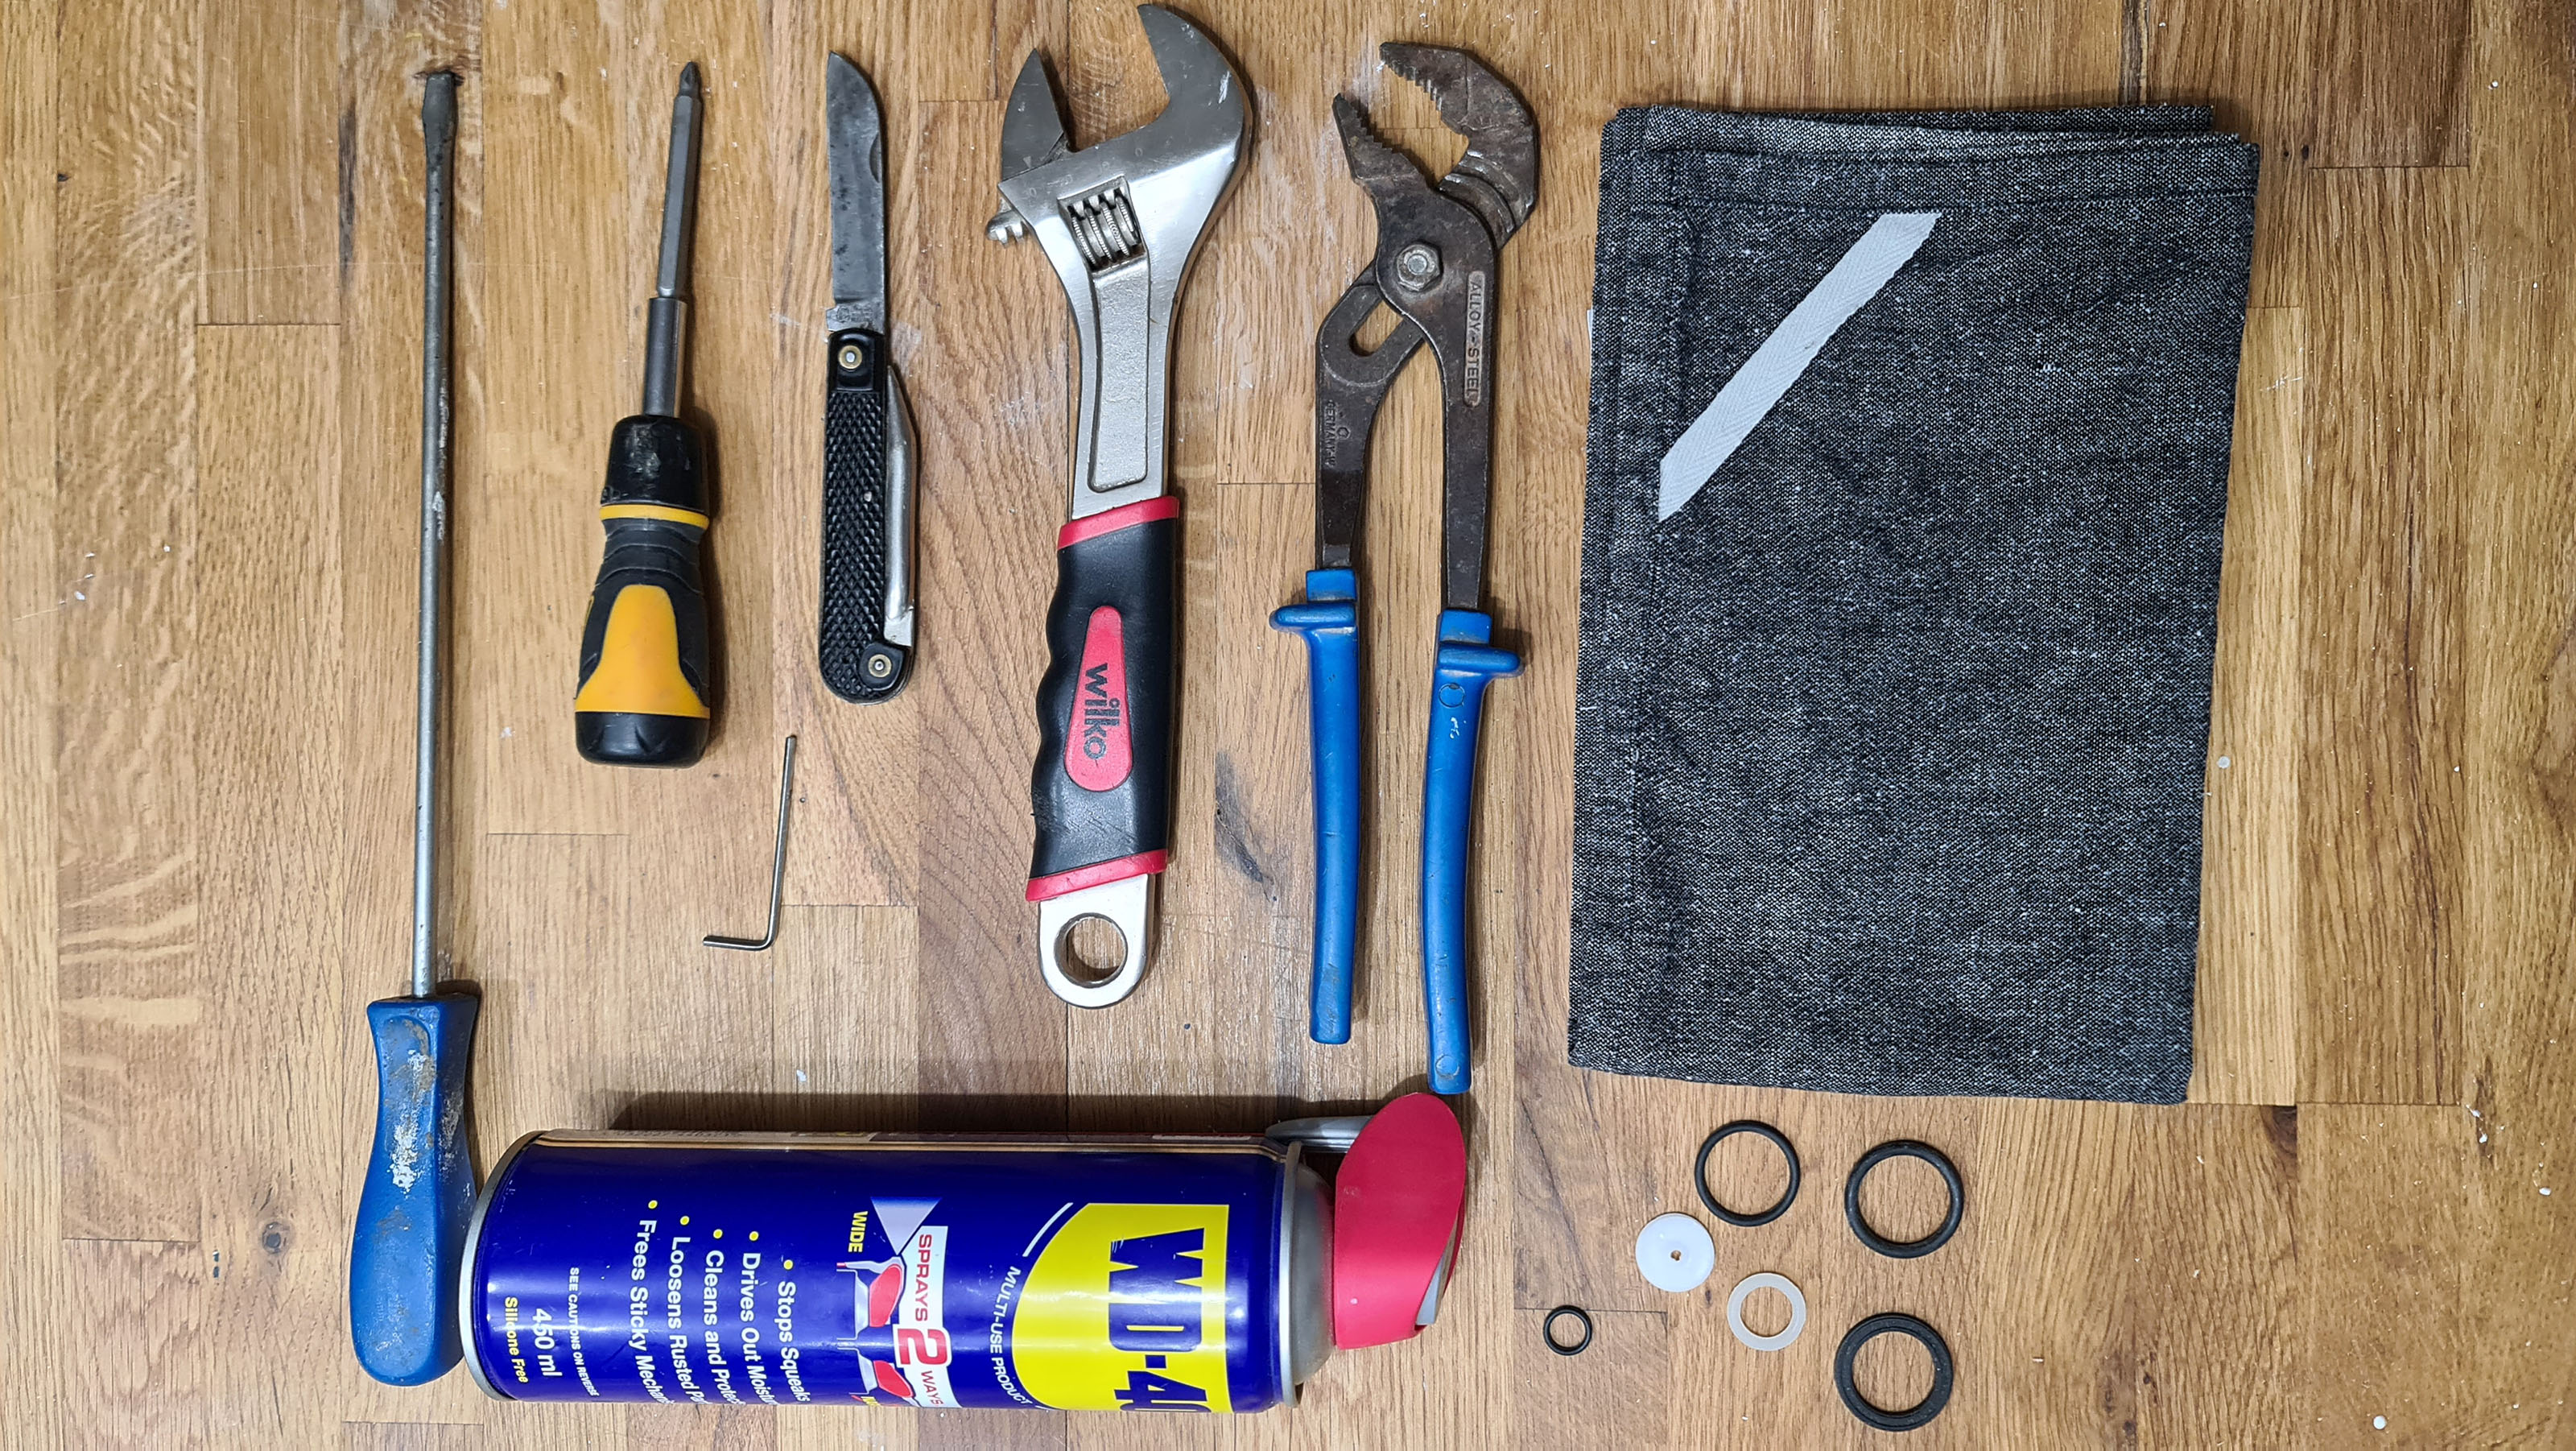
You'll need the following tools and materials in order to fix a dripping tap.
Tools
- Adjustable spanner
- Adjustable pliers
- Flathead screwdriver
- Crosshead screwdriver or allen key
- Sharp edged tool
Materials
- Washers
- Cartridge
- Cloth
- Solvent
Preparation
The washer or cartridge inside of the tap is the most common cause of tap dripping, especially when it drips from the spout. Depending on the design of the tap it may be possible to replace just a washer, or a washer and a cartridge, or just a cartridge.
Step One: Isolate the Water
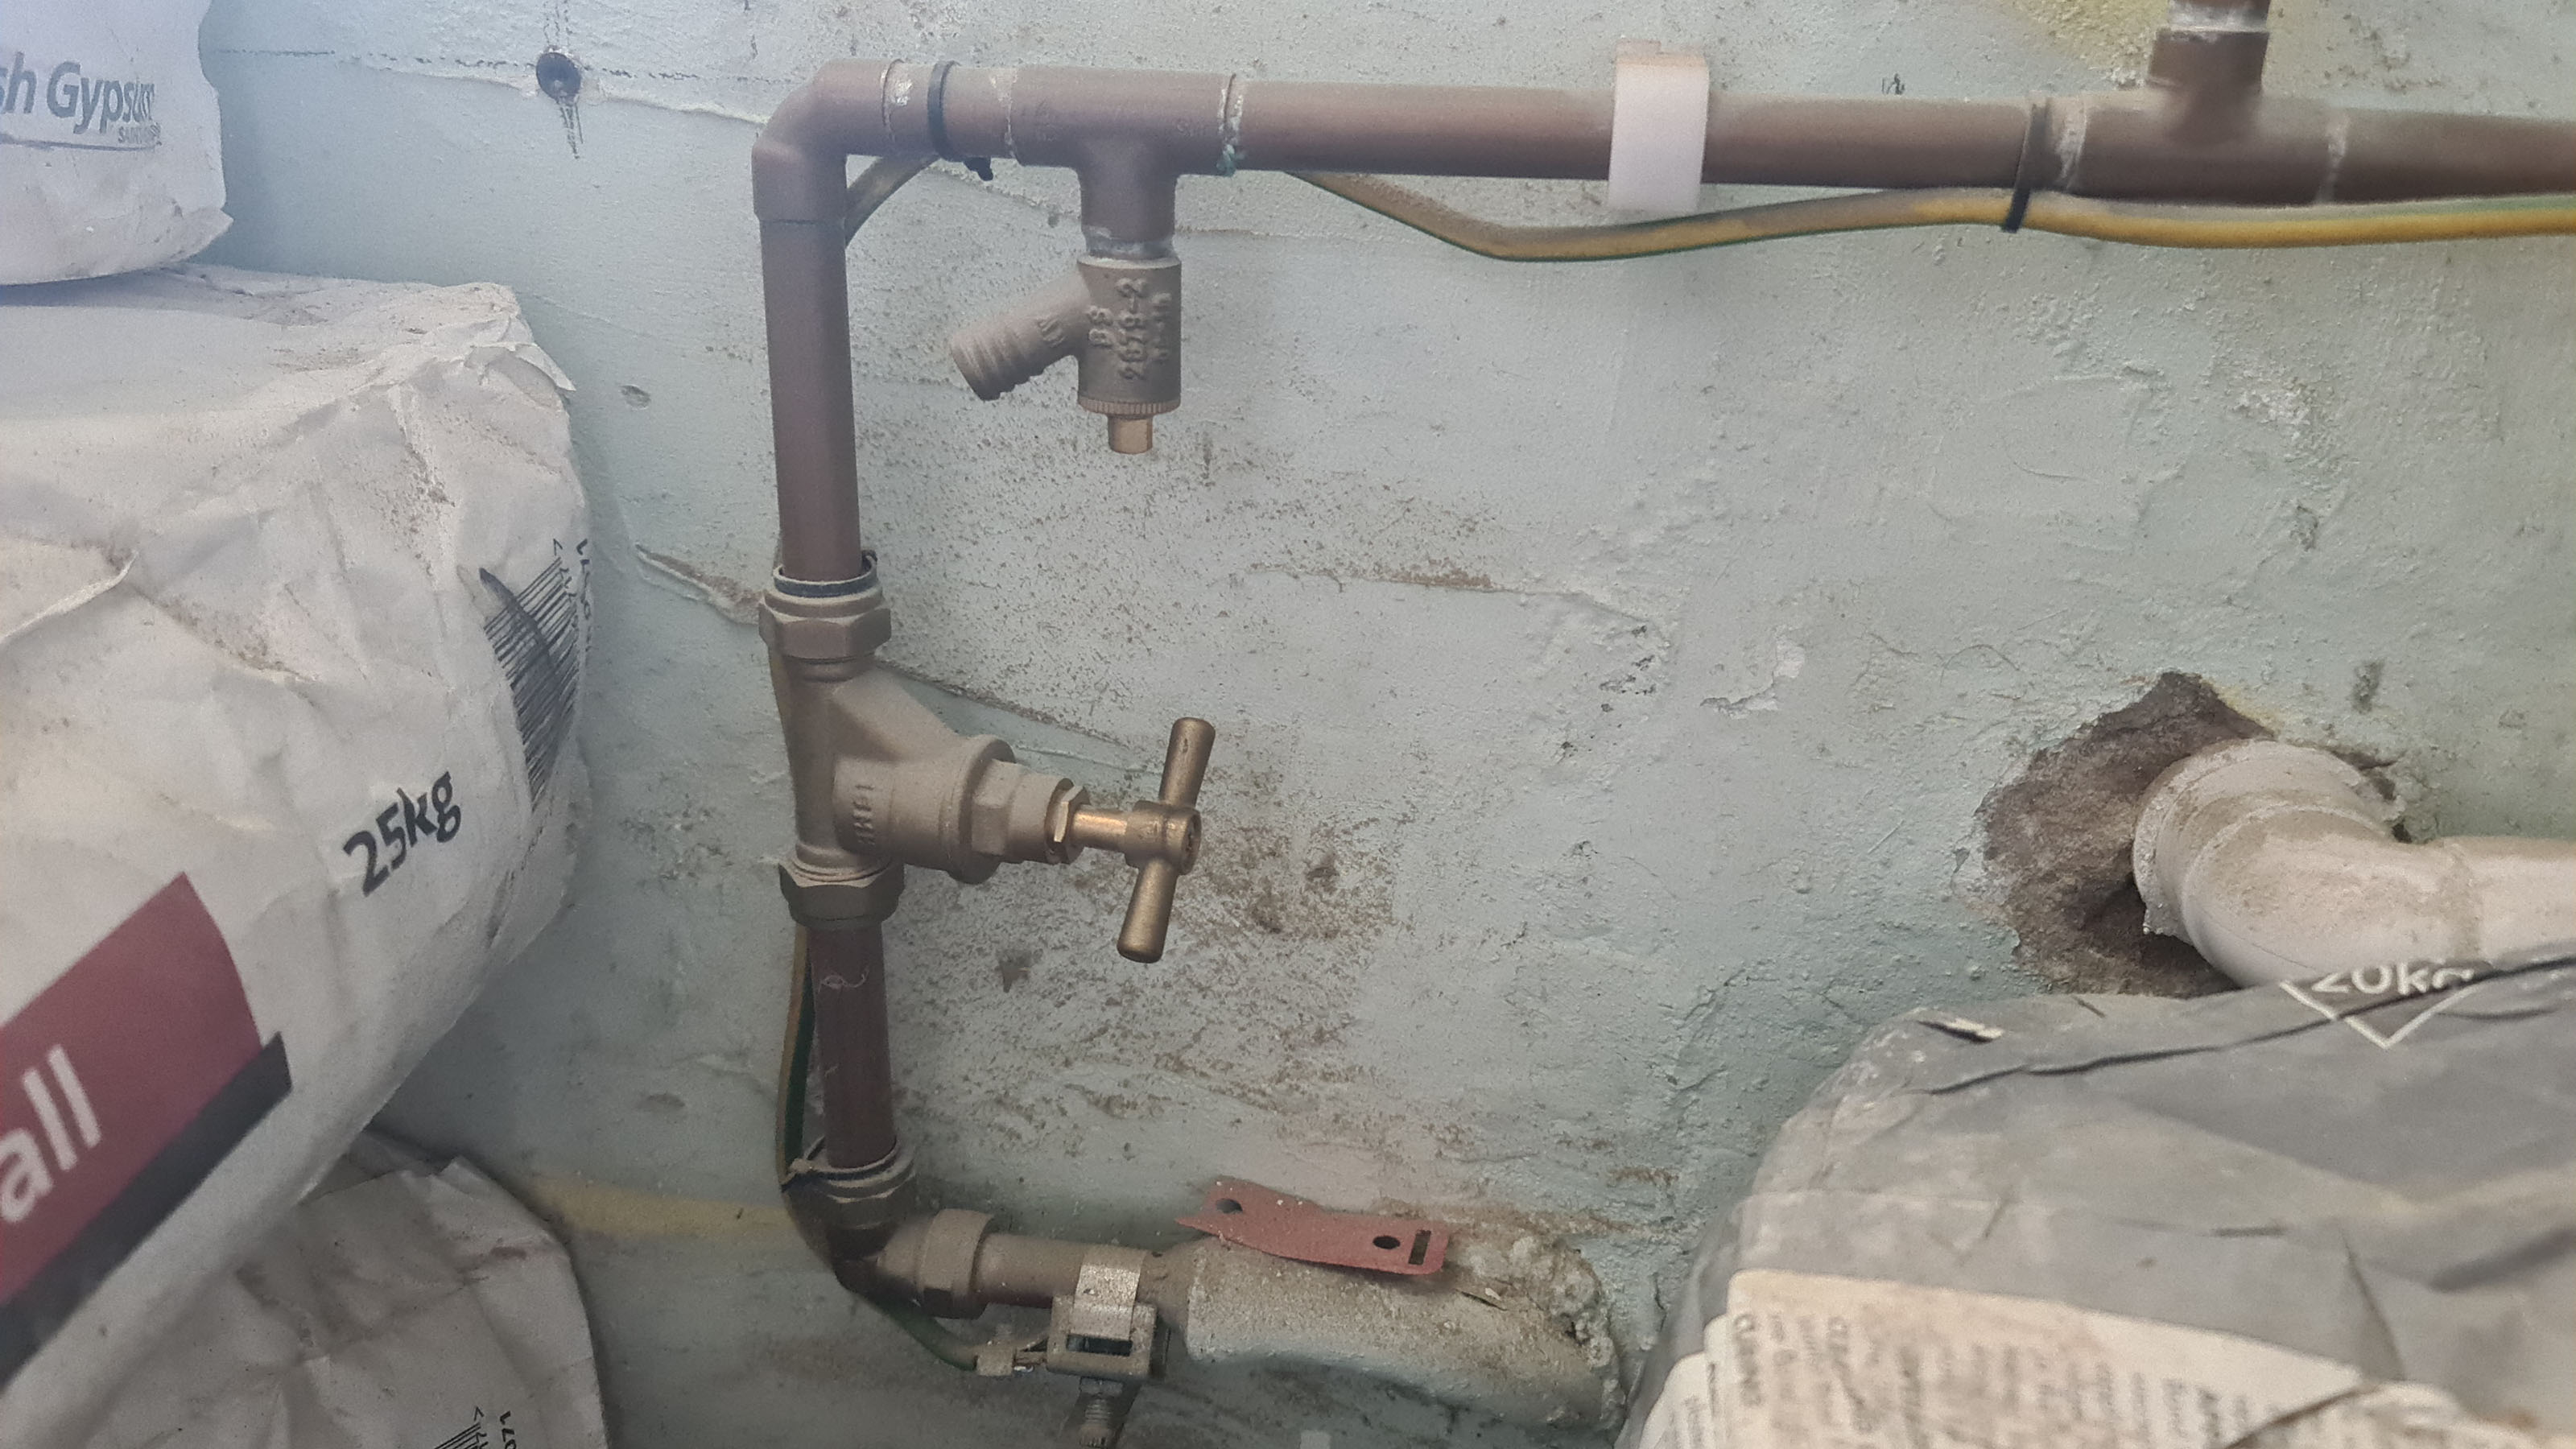
The quickest way to turn off the water is via the isolation value located on the pipework connected to the taps. Sometimes the valves come with their own plastic handle to turn, but more commonly you will need a flathead screwdriver to make the quarter turn from vertical to horizontal to switch off the flow.
If you cannot locate an isolating valve you can turn off the water to the whole property via the stopcock, which is often located under the kitchen sink or outside the property under a cover on the drive or path.
Run the tap to check the water has stopped. There may be some excess water in the pipes that will drain.
Step Two: Remove The Cap
You may find that your tap handle is quite tight on and takes some convincing to remove – you can use a solvent product like WD-40 to loosen it.
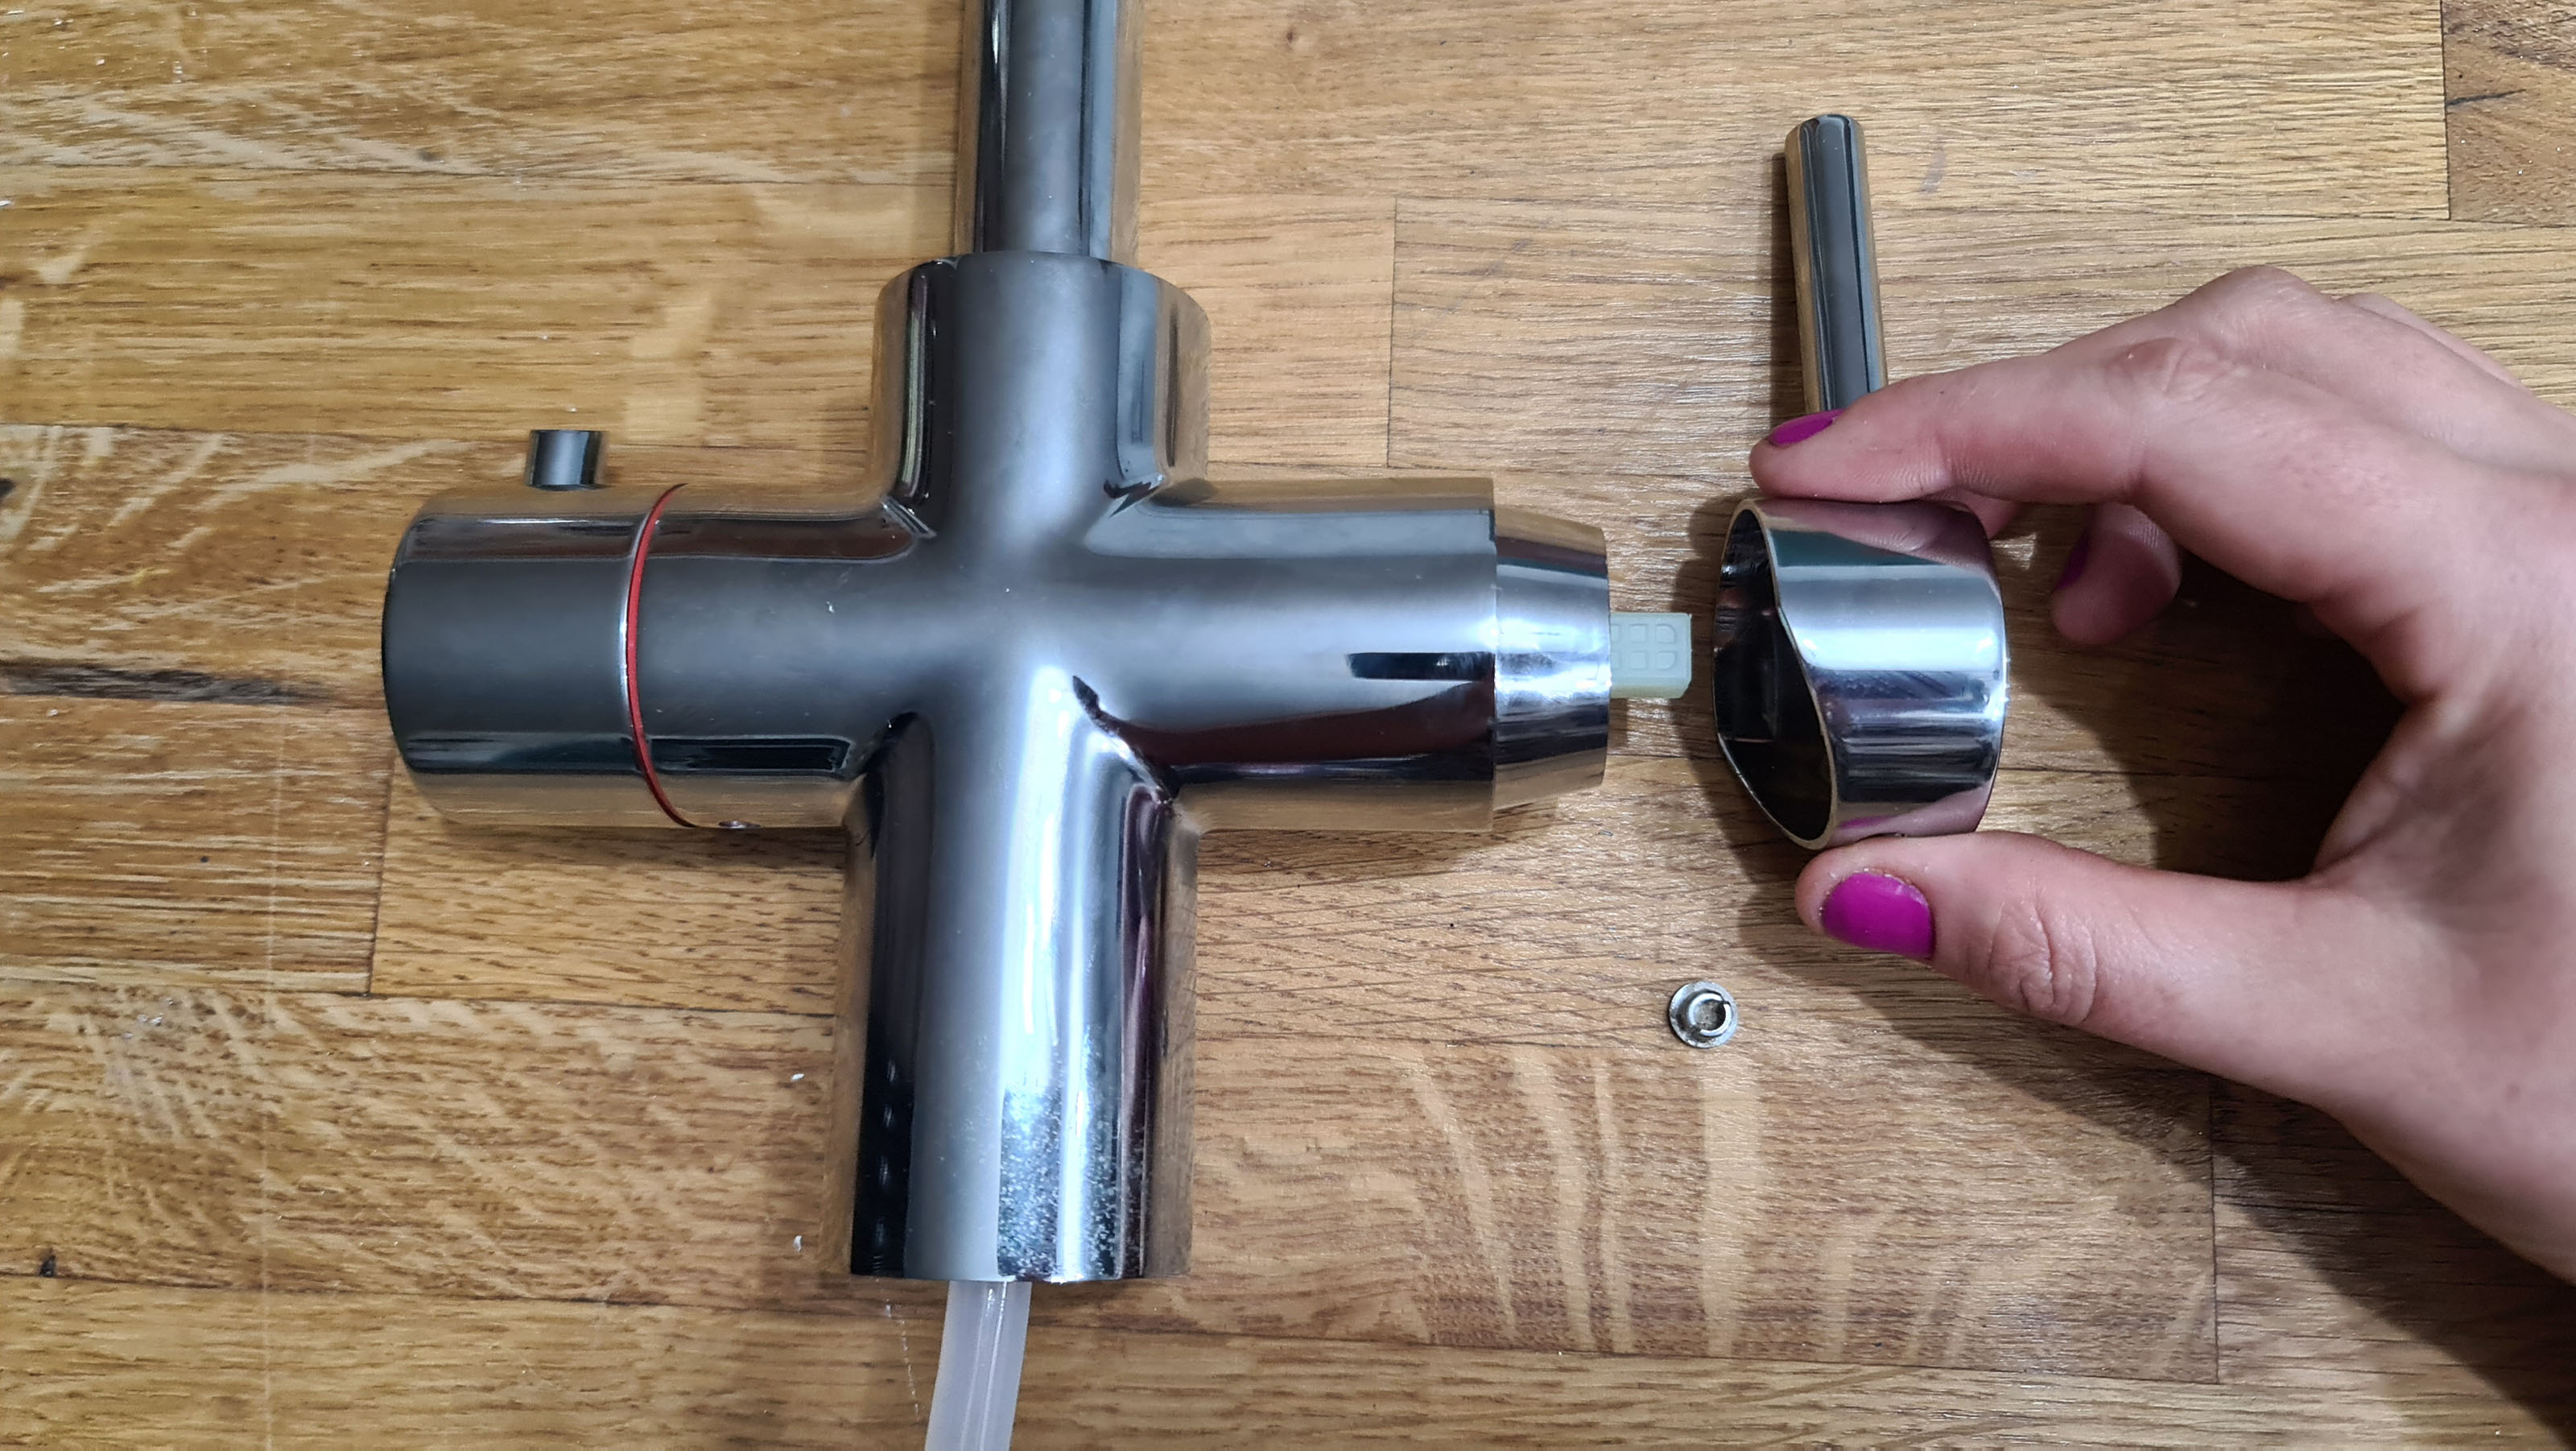
Locate the cap on the handle of the tap. It will either unscrew or you’ll be able to pop it off using a flat sharp-edged tool.
Inside there will be a screw. Use a screwdriver or allen key to remove it depending on the type of screw. You’ll then be able to pull the tap handle off.
Step Three: Locate The Washer or Cartridge
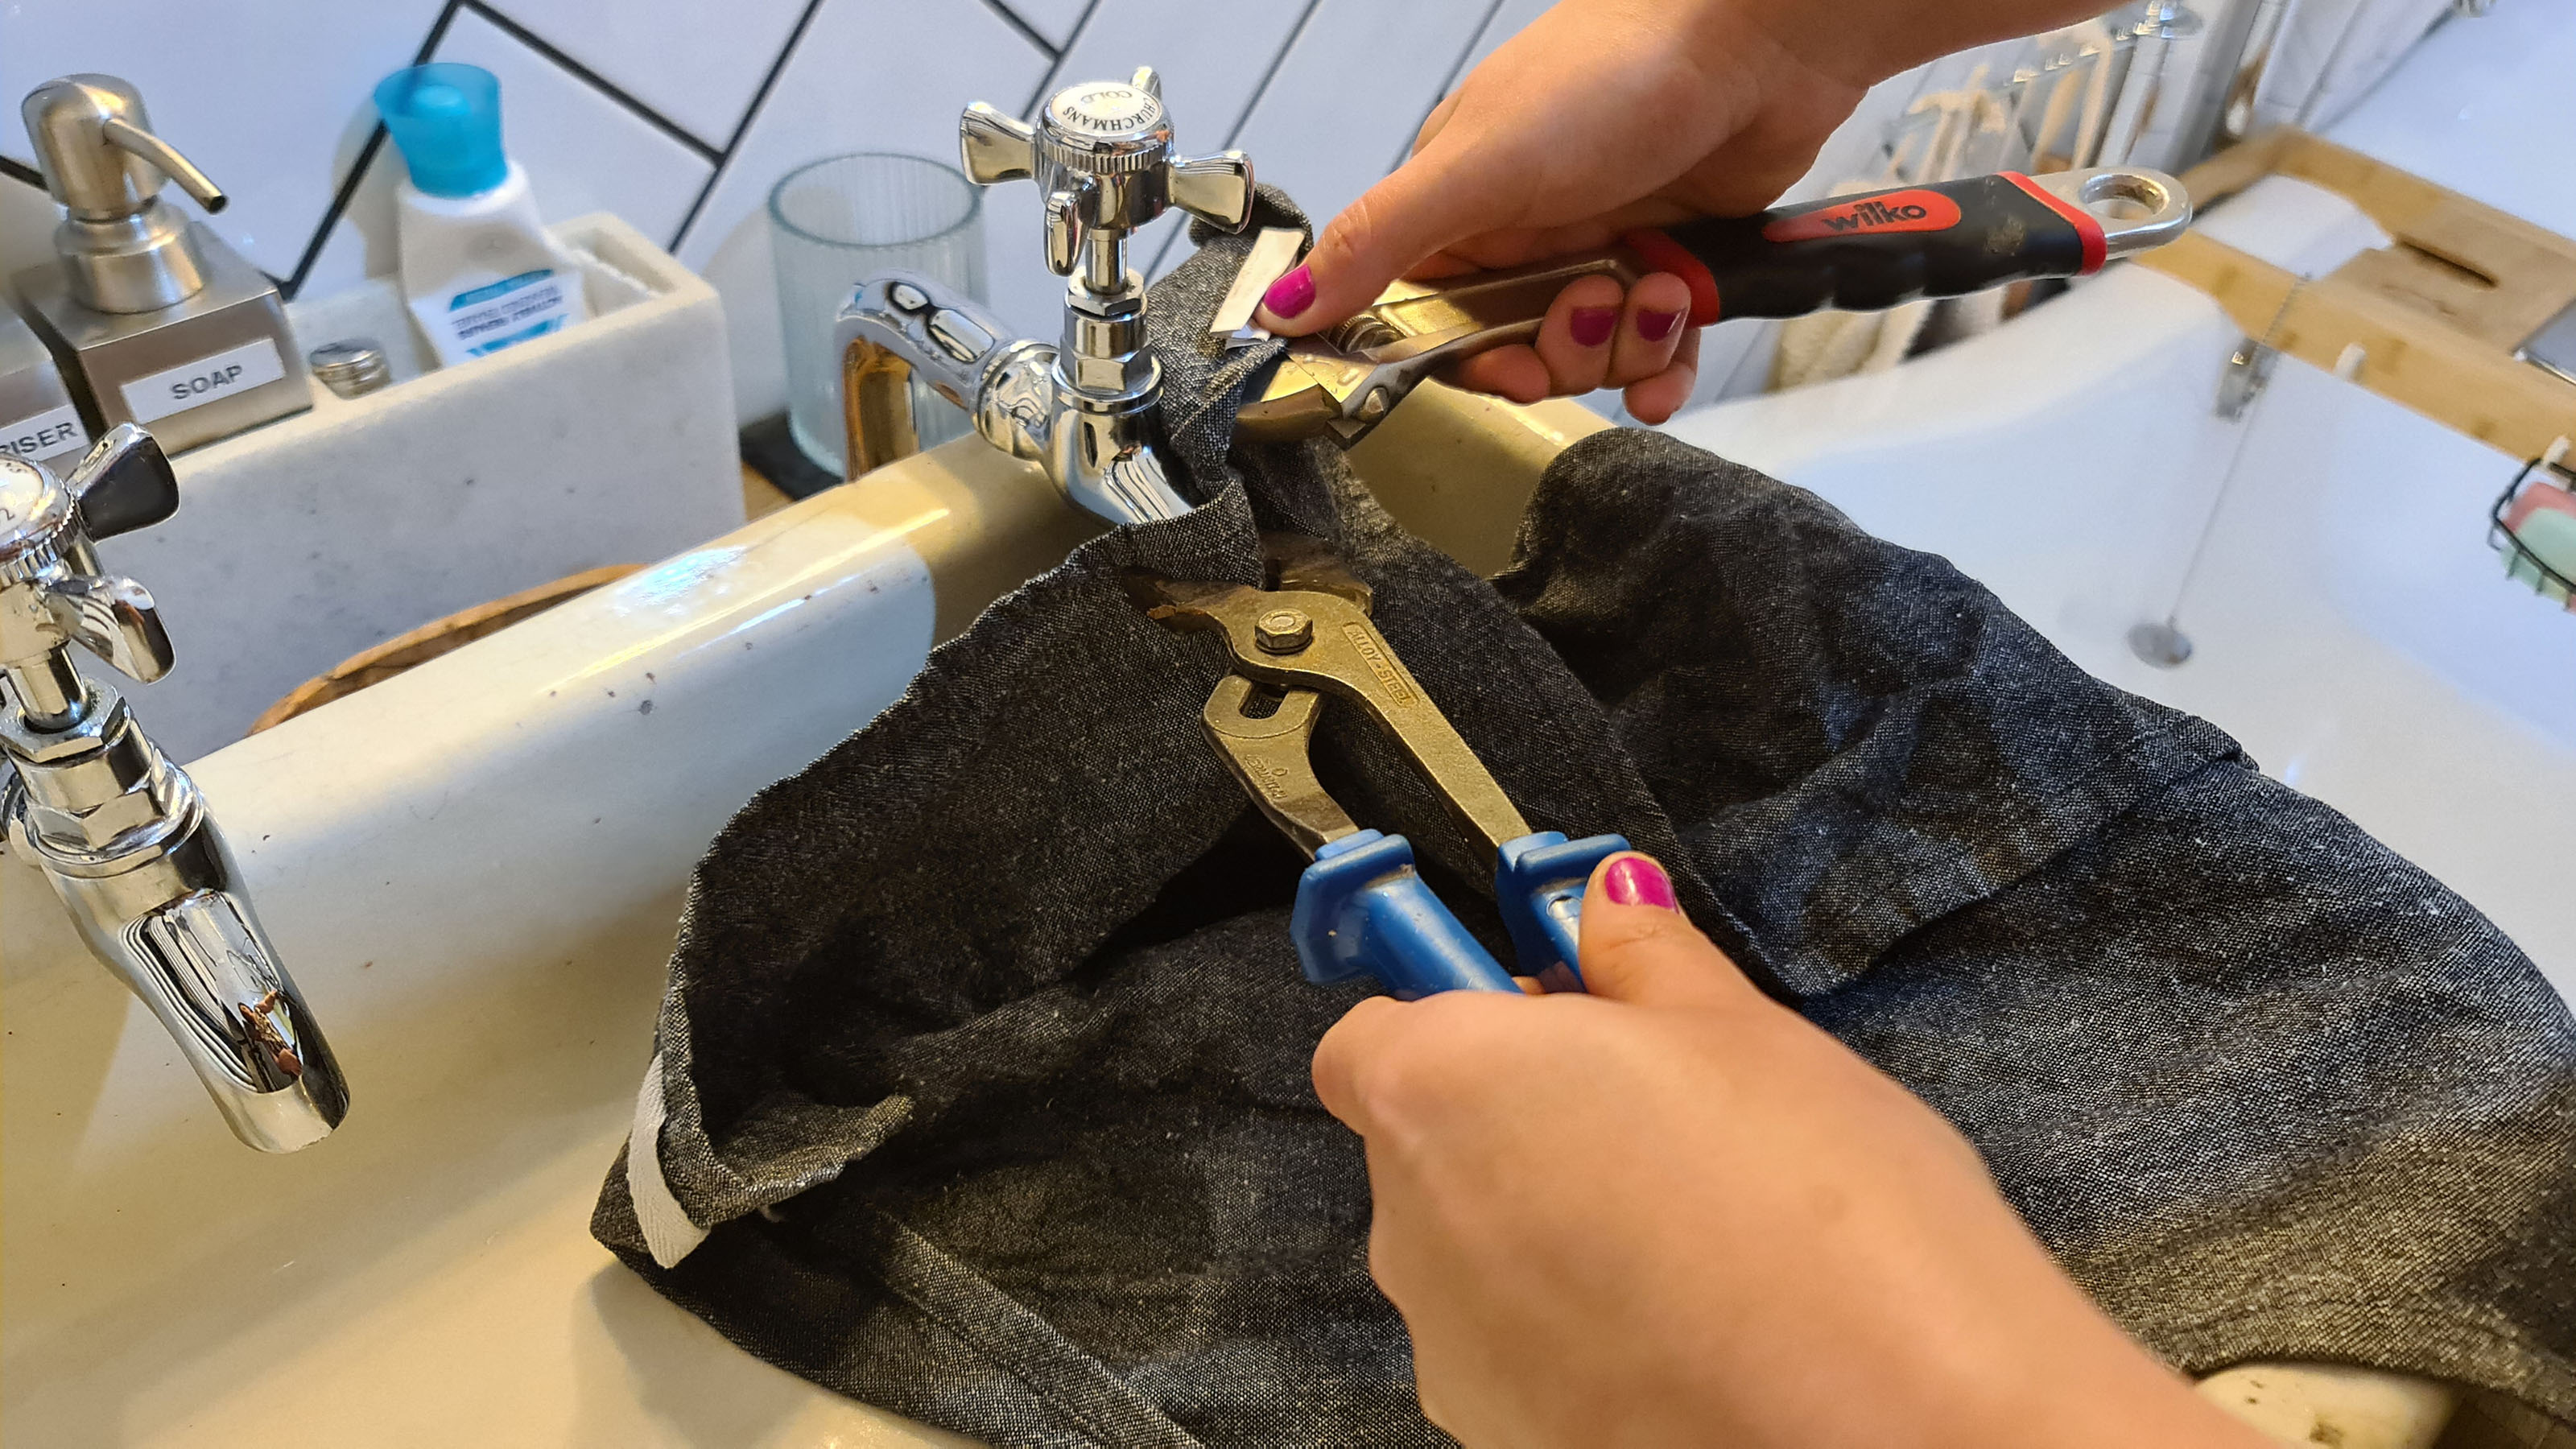
Unscrew the decorative cover by hand, if one exists, and then use the grips to hold the tap in place whilst loosening the retaining nut with a spanner.
If you need to use the spanner or grips on any of the shiny finished parts of the tap then try using some scrap cloth to grip the tap, to avoid scratching its surface.
If you have a traditional pillar tap you can remove the entire stem of the tap via the retaining nut to access the washer inside.
Step Four: Replace With a New Washer or Cartridge
Replace with a new washer or cartridge and complete the same steps in reverse to fix the tap back together again. Turn the water supply back on to check that your drip has gone.
Cartridges come in lots of shapes and sizes so make sure to pick up the right one for your tap. You could take the old one into the shop with you for an exact match, for example, or search for the model number online. Some taps have warranties on them so it can be worth getting in touch with the manufacturer for new cartridges if you still have the paperwork.
It's worth noting that occasionally the drip could be caused by dirt or limescale build up inside the valve assembly, which is inside the cartridge. Some manufacturers expect homeowners to carry out a small amount of maintenance on their taps by taking them apart and cleaning the washers and cartridges to stop leaking. This can remove the need to replace the cartridge.
How to Fix Leaking from the Spindle
Sometimes the leak comes out of the spindle of the tap, rather than dripping out of the spout. This requires a slightly different method to fix.
Start by tighten the gland nut on top of the valve.
If this doesn't fix the leak, you may need to take the tap apart and give it thorough clean. Limescale and grime can affect the tap's seals so by removing and cleaning everything, it can transform the tap so it works like new. If this doesn't work however, try replacing the gland nut entirely, or the cartridge as the components inside may be damaged or worn out.

FAQs
What causes a tap to drip?
Washers can naturally wear down over time. To improve longevity, avoid overtightening your tap. When a tap is overtightened, it increases the wear on the washers requiring the tap to be turned off ever tighter each time, eventually resulting in dripping.
Is it safe to leave a dripping tap?
Sometimes the drips can travel down the tap instead of landing in the sink or bath and this can cause damage to the worksurfaces, to anything stored below the taps and even rot the flooring, woodwork or the joists or foundations if left untreated for a long period of time.
Can a dripping tap get worse?
Yes, it can often get worse over time as a washer degrades. Not only is a dripping tap costly for your water bill it can also cause staining; when water drips in the same place repeatedly the mineral deposits in the water can stain the ceramic.
Emma is a UK-based DIY educator and director of the social media brand DIY With Emma, whose primary mission is to help more people get into DIY through sharing DIY hacks and how-tos. The DIY influencer, whose videos have received millions of views, has recently renovated her 19th-century cottage on a tight budget, has also created DIY content for Homebuilding & Renovating.

