Bring your dream home to life with expert advice, how to guides and design inspiration. Sign up for our newsletter and get two free tickets to a Homebuilding & Renovating Show near you.
You are now subscribed
Your newsletter sign-up was successful
When radiators get older they become less efficient at heating a room as sludge builds up inside. This can be treated by flushing the system through with a chemical solution, but if a radiator is too far gone the results won’t be that effective.
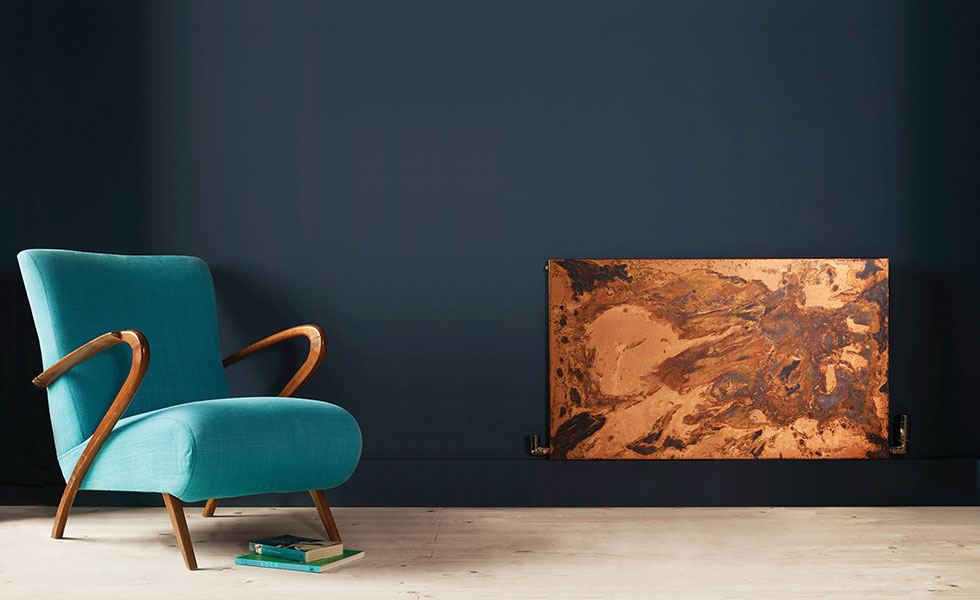
Replacing a radiator not only results in more heat being pumped into a room, but by using a stylish replacement it can also really alter the appearance of the room. The newest designs of modern radiators take up far less space than their older counterparts but deliver the same output. And, compared to the functional designs found in many older properties, modern radiator panels are pretty good looking, too.
Before you buy a replacement radiator, you’ll need to work out what size panel you need. Radiator output is measured in British Thermal Units (BTU) and this figure is found on the radiator packaging. To work out the BTU figure for the room, multiply the height by the width and length (in feet) and then multiply this figure by four. Alternatively, you can tap the room dimensions into an online BTU calculator and have all the hard work done for you.
Perhaps most importantly, replacing a radiator does not have to be a complicated job and so can carried out on a DIY basis meaning you won’t have to pay a penny for labour.
Tools and equipment list
- Bucket
- Butane Torch
- Pipe Cutter
- Adjustable Spanner
- Radiator Valve Key
- 17mm Spanner
- Bleed Valve key
- Tape measure
- Drill
- Pencil
- Screwdrivers
- Spirit Level
- Flame Proof Mat
- 8mm Masonry Drill Bit
- 15mm Masonry Drill Bit
- 15mm Wood Drill Bit
- Rags
- Solder ring or Yorkshire- style 15mm bends, tees and straight connectors
- 15mm Copper pipe
- Radiator
- Flux
- Butane
- Spare 15mm olives
- PTFE tape
- Pipe clips
- Screws
- Rawl plugs
- Thermostatic radiator valve and matching lockshield valve kit
Step-by-step
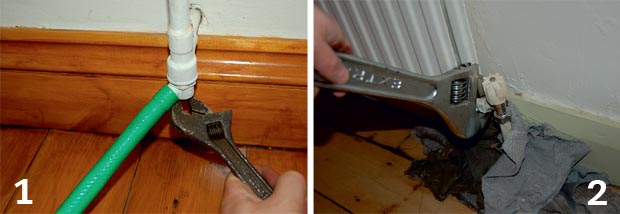
1. Turn the boiler off; check that the water supply to the boiler is off, too. Then drain the system. At least one of the downstairs radiators will have a draincock on it. Attach a length of garden hose to the draincock and run the hose outside to a point lower than the radiator and let the system drain down. Opening up the bleed valves on the radiators helps to drain the water out of the system.
2. Put some rags under each end of the old radiator to catch any drips and undo the valves. Get someone to give you a hand lifting the radiator off the wall; it will be heavy and is likely to contain some filthy water that should be drained into a bucket before you try to take it out of the room. Remove the old brackets.
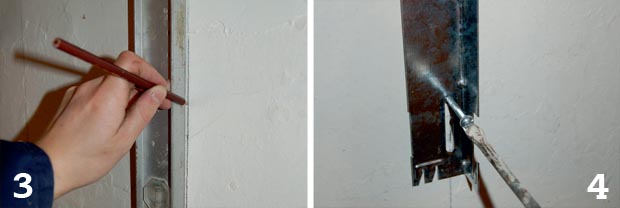
3. Decide on the position for the replacement radiator. Modern radiators are generally smaller than old-style units with the same BTU output, and normally its just a case of centralising the new radiator between the old valves before running new pipework to suit. To centralise the radiator, measure between the old valves, divide by two and mark this point on the wall with a vertical line. Find the centre line of the radiator and then measure out from this point to the centre of the bracket supports. Transfer these measurements to the wall. Use a spirit level to get all the lines vertical.
Bring your dream home to life with expert advice, how to guides and design inspiration. Sign up for our newsletter and get two free tickets to a Homebuilding & Renovating Show near you.
4. Use the template that comes with the radiator to mark off the bracket hole positions on the wall. Drill the holes, insert rawl plugs and screw the brackets to the wall.

5. Wrap PTFE tape around the threaded parts of the radiator valves. This helps to seal them and keep the radiator watertight.
6. Fit the valves. Do up the main body of the valve with the correct hexagonal key (available from DIY stores). Some valves have a hexagonal nut on the outside that can be done up with a 17mm spanner. Use an adjustable spanner to tighten the outer part of the valve onto the main body. Now hang the radiator on the brackets. Get someone to help if its a large panel.

7. If the pipework for the old radiator runs under the floor, as here, remove the old valves and lift the floorboard/s to get access to the pipes. If the pipes run through a wall you can either decide to extend them along the face of the wall, or, if you can get access to the other side of the wall, run new pipes to meet the radiator valves.
8. Measure up and run the new pipework to the radiator valves from the old radiator feeds. Use a copper pipe cutter rather than a hacksaw to cut the pipework to length. Check that everything fits together and that there are no stresses at any of the joints.We recommend that you use solder ring or Yorkshire-style joints (the pic shows a solder ring bend the bumps on each end contain the solder. The solder at each end melts when heat is applied, and makes the job of getting a watertight joint much easier for the DIY plumber).

9. Take the pipework apart and clean all the ends of the copper pipe with wire wool. Put a smear of flux on the end of each pipe and reassemble the joints.
10. Put a flameproof mat behind the parts to be soldered and then heat the joint evenly with a butane torch. The flux will burn off quickly and the solder will melt within 20-30 seconds. Stop heating the joint when you see the silver solder form a ring at both ends of the joint. As you can see from this picture, disturbing floor and skirting boards to get at pipes can create a bit more work in the form of wall repairs. This is particularly true in older houses.
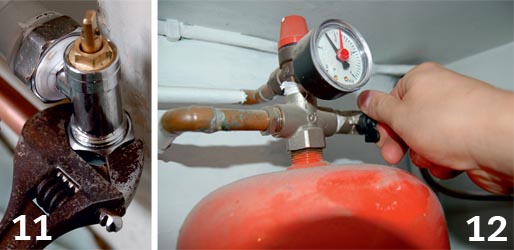
11. If the pipework is coming up through the floor, mark off and cut holes for the pipes to come through the floorboard. Put the board back in position but dont fix it in place yet. To connect the radiator, slide a nut and olive over each pipe, feed the copper pipes into the bottom of the valves and tighten the nut with an adjustable spanner.
12. Refill the system with water and check for leaks at the soldered joints and at the valves.
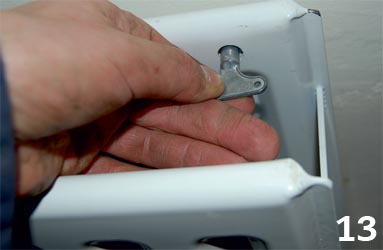
13. Switch the boiler back on and turn on the central heating system. As the system heats up, check again for leaks. If you lifted a board this can be nailed back in place now mind the pipework. The last job is to bleed the air out of the new radiator. In some cases you’ll need to top up the system (as in step 12) as the air is replaced by water in the radiator. As soon as water starts to bubble out of the bleed valve, tighten it up. Modern double radiators have a bleed valve in each panel, so don’t forget to bleed from both.
Ben is a writer and a keen DIYer, and has undertaken a multiple of tasks from installing loft insulation, tiling, painting windows to fitting garden fences and reviving period fireplaces. He has also converted his loft on a DIY basis.
