How to Hang a Door: A DIYer's Guide
Need to know how to hang a door? Builder Bruce Bendall details the necessary steps

Bring your dream home to life with expert advice, how to guides and design inspiration. Sign up for our newsletter and get two free tickets to a Homebuilding & Renovating Show near you.
You are now subscribed
Your newsletter sign-up was successful
Knowing how to hang a door can be a great skill to have, and taking on some DIY can help to keep your project costs under control. Here, in this quick guide, I’ll be sharing some of these tips to help you tackle the job yourself.
While hanging a door is a relatively simple task for a competent DIYer, there are some that are best left to the professionals.
When it comes to hanging a door and attaching door furniture, you’ll need:
- a saw
- sharp chisels
- a plane
- a magnetic screwdriver
- a tape measure
- a sliding set square
- a mallet
- a drill
- a workbench
- a Stanley knife
- a 20p piece.
Remember, the procedure will depend upon whether you are hanging a new door and frame, or fitting onto an existing frame. I will cover both where necessary.
How to Hang a Door: Step by Step
1. If you are fitting a new door to a new frame then it is easier to fit the doorstops (which stop the door being knocked from its hinges) last. First measure the opening and check the door will fit — also check which way the door will open and where the light switch is! Measure the thickness of the door and transfer this to the frame in four places. Tack four small blocks of wood as temporary doorstops. If you are careful you can just tack four nails in — as an alternative, I find wire or pipe clips work well. (If you are fitting into an existing door frame then your doorstops will already be in place so you will have to work around them.)
2. Now look at the top of the door. If it is a hollow core moulded type it will have a mark, key symbol or the word ‘lock’ printed on it. This means that there is a solid block within the door that will enable you to fit the door handle and/or lock on this side. Make sure you remember which side is which!
3. Offer the door up to the frame. Don’t expect it to go in first time — this has only happened to me a handful of times in 30-odd years. Try to rope in a willing helper to hold the door against the frame while you mark the top and sides of the door. If you can’t get anyone to help, measure where the door handle is going to be and put a temporary screw in that you can hold while you mark around the door.
Bring your dream home to life with expert advice, how to guides and design inspiration. Sign up for our newsletter and get two free tickets to a Homebuilding & Renovating Show near you.

4. Clamp the door in your workbench while you plane it down to the marked line. You may need a few test fits before you get it right, but always remember it is easier to plane off a bit more than to stick it back on. The perfect fit is when you can run a 20p between door and frame.
5. Decide how much clearance you need to allow for any floor coverings and mark this on the door.
6. Measure 150mm down from the top of the door for the top of the first hinge and mark both the door and frame together. Then measure 225mm up from the bottom. This is to correct an optical illusion that makes the bottom hinge appear nearer to the floor if you space them equally. If you are fitting a third hinge it generally gets installed centrally, between the two hinges.
7. If you are fitting to an existing frame, mark the door from the cutouts that are already there. Use a hinge as a template to mark below your top line on the door and above your bottom one. It helps to shade between the two to make sure you cut out the same side on both the door and hinge.
8. Clamp the door in your workbench and use a hinge folded back on itself as a template to transfer the marks to the edge of the door — a Stanley knife works well for this.
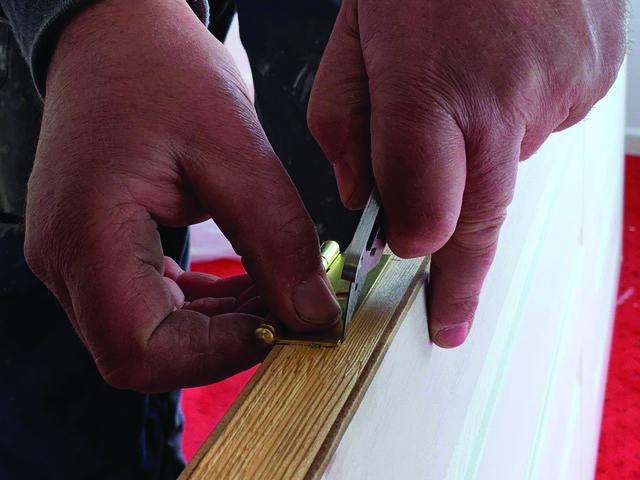
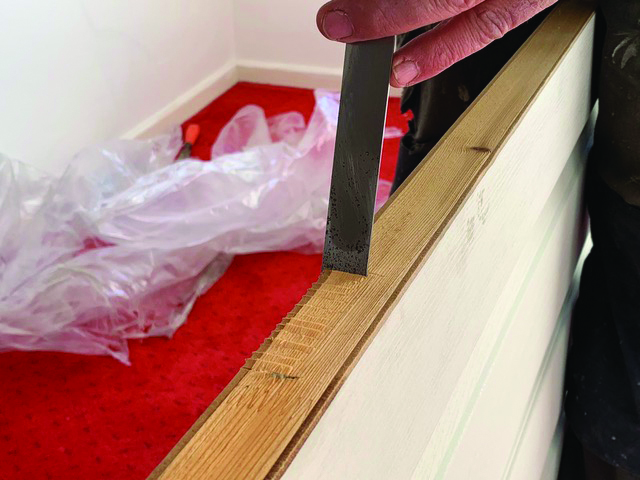
9. Use a sharp chisel the same width as the cutout and do a series of cuts using a mallet. The idea is to try and use the same force with each tap so the cuts are an even depth. You should then be able to use the chisel alone to even out the depth.
10. Do this until your hinges fit perfectly flush, then do the same with the door frame (you won’t have to do this if you’re fitting to an existing frame). This is the point at which it is easy to cut the wrong side of the mark, so offer the door up again to check before you do any chiselling.
11. Next you need to fix the hinges. The best way to drill hinges is with a self-centring, spring-loaded drill bit, but a normal bit will suffice if you are careful to drill in the centre of each hole. I will usually bin the supplied screws (if there are any) and replace them with a quality brand, such as Spax or Bullet. Don’t forget to drill the frame as well before screwing the hinges to the door — and try to get the writing on the hinges the right way up!

12. If you marked the door to allow for a new floor covering cut it to size now.
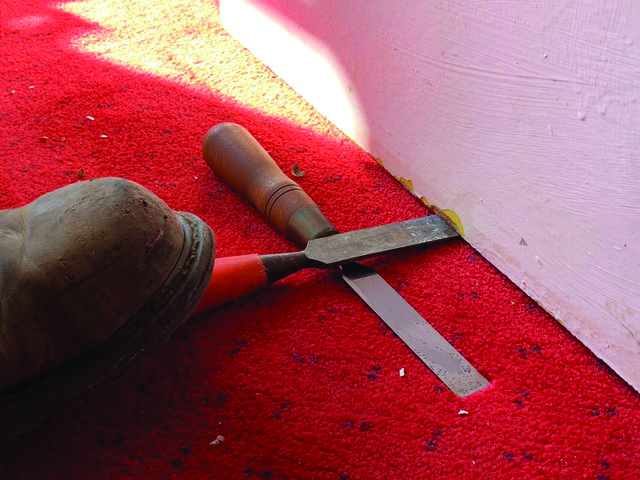
13. Offer the door up to the frame in its open position and screw it into place. This, again, is a lot easier with a willing helper, but it can be done with the help of a board lifter, or two chisels arranged like a seesaw under the door so you can lift the door into place with your foot while screwing the hinges into place.
14. Close the door and do the 20p test again. If it needs adjusting away from the hinges use a thin card packer cut to fit behind the hinge. To go toward the hinge side you will need to shave a bit more out of the cutout. Repeat the 20p test until you are happy with the fit and the door opens and closes easily.
15. Decide on the height of the door handle (usually halfway up the door) and mark this position on the edge of the door. Find the centre and mark with a sliding square, then use the square to transfer the door height around both sides of the door.
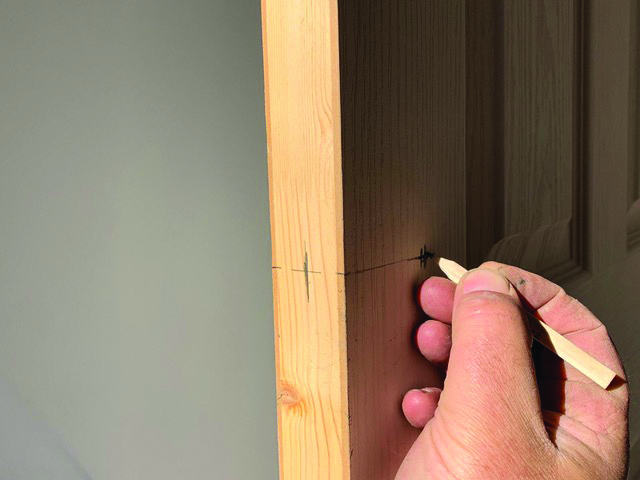
16. If you are fitting a barrel latch then you need to measure the length and diameter. Most chippies use a drill and either a spade or auger bit to drill the latch hole, but I maintain that an old-fashioned brace with a nice sharp bit is still the best tool for this job. Mark the drill bit with a piece of tape or a cable tie to the depth of your latch.
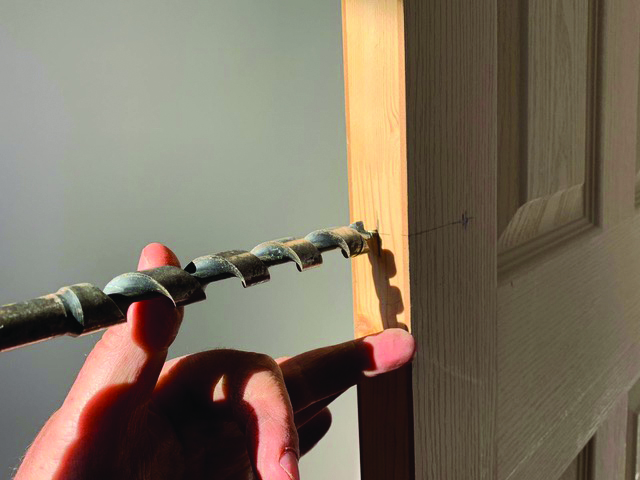
17. Chock the door half open with a wooden wedge and drill the latch carefully, taking care to stay parallel to the door. Use the square to measure the barrel from the face to the centre of the handle shaft and transfer this on both sides.
18. Drill carefully from both sides into the centre. Don’t attempt to drill right through from one side; you will be out of line at best and the breakout as the drill comes through can often be outside the area that the handle will cover.
19. Slide the barrel into the hole as far as it will go, line the faceplate up with the door and carefully score around it with the Stanley knife.
20. Use a chisel the same width as the faceplate and cut out the scored area using the same technique as hinges.
21. To fit the handles, slide the shaft through the hole and hang the handles on both sides. If they don’t slide flush to the door you need to measure the gap and then remove that amount from the end of the shaft with a hacksaw. Align the handles and drill and screw them on.

22. Rub a pencil on the end of the latch and then close and open the door a couple of times to leave a mark on the frame. Use this to align the keeper plate correctly and then use the same cut out method as before.
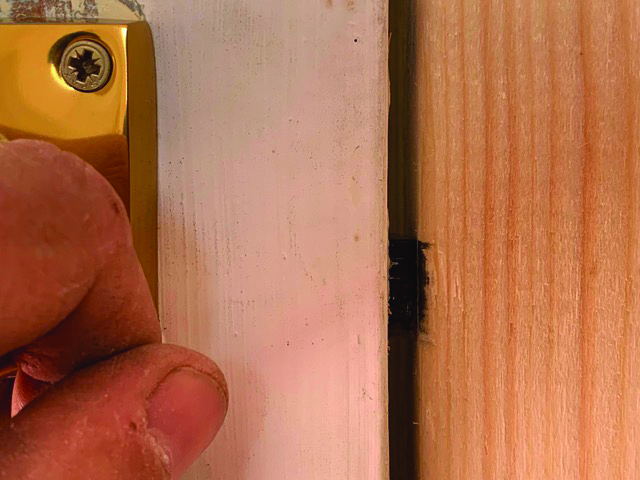
23. Close the door again, make sure it opens and closes easily and the latch works smoothly. If you are fitting to an existing frame check that the door doesn’t pinch on the doorstops or rebate.
24. On a new frame remove the temporary stops or clips you fitted earlier. Measure the top of the frame and cut the doorstop to length. Go inside and click the door shut. Fit the doorstop so it is barely touching the door and tack it on. Go back out and check the door shuts flush. When you’re happy, nail it home. Repeat for the two sides and you’re done!
25. Fitting a mortice lock on an external or bathroom door is similar to fitting the tubular latch as described above. However, you will need to chain drill multiple holes and then chisel between them to make a slot (mortice). This takes longer and requires a lot more trial fitting, but is no more difficult if you are patient and take your time.
Bruce is a third generation builder, based in the South West, with over 30 years’ experience in the building industry. He specialises in new build homes, extension and renovation projects, and his even built homes for self build industry guru David Snell. Bruce has recently completed his latest self build.

