Cutting plasterboard: Pro tips for the perfect finish
What’s the best technique for cutting plasterboard? We reveal the best tools and approach for getting clean cuts on plasterboard

Bring your dream home to life with expert advice, how to guides and design inspiration. Sign up for our newsletter and get two free tickets to a Homebuilding & Renovating Show near you.
You are now subscribed
Your newsletter sign-up was successful
Cutting plasterboard is all part and parcel of any DIY project that involves plasterboard. Whether you're building a stud wall or working on a new partition, at some point you will find that your boards simply won’t fit directly into the desired wall space and will need trimming. It could be plug sockets, light switches, doors, windows or uneven walls that you will have to navigate.
If you are doing a job such as plasterboarding a ceiling you will also need to be cutting around light pendants or cutting circular holes for downlights. So it is a skill, while not difficult to learn, you need to get right. Get it wrong and you could be splashing out on new sheets of plasterboard. No one wants the extra expense or inconvenience.
Here we give you some expert tips on the cutting techniques and tools you need to know to get a neat clean fit.
When cutting plasterboard what is the best tool to use?
Before you start cutting plasterboard you need to make sure that you have the right tool or tools to hand to get the job done properly.
There are a few options to choose from when cutting plasterboard but the most commonly used is a sharp Stanley knife as Gary Blackburn, Plaster Support Manager at Saint Gobain reveals: “When it comes to the cutting of plasterboards the most common method is to score with a knife.” So if you are looking to do standard straight line cuts you need to invest in a Stanley knife. Make sure that it has a sharp blade, blunt blades will tear at the plasterboard giving a poorer quality cut.
But not all plasterboard is made equal, so in some cases you may need to call upon a different tool to get the cut you want. For instance, if you are using an extra strong plasterboard, such as Habito board, you might need the services of a saw as Blackburn explains: “Habito boards can be scored on one side, folded down and lifted back up and they will snap off but this can only be done above 150mm and anything below that a hand saw is best suited.”
Which side of the plasterboard do you cut?
There is some debate about which side of the plasterboard you should score. In reality it doesn't make a great deal of difference as you have to cut both sides.
But typically the front of the plasterboard (the grey part) where the paper doesn't have any joins is considered the better choice.
How to cut plasterboard: Three steps to a clean cut
Cutting plasterboard can be straightforward, but it depends on how many cuts you need as Blackburn tells Homebuilding & Renovating: “Score with a knife, fold from the other side and cut through the paper on the reverse side of the board for straight cuts. Any cuts that are required with more than one line in them a hand saw should be used.”
Bring your dream home to life with expert advice, how to guides and design inspiration. Sign up for our newsletter and get two free tickets to a Homebuilding & Renovating Show near you.
Here we are going to quickly run through the process in more detail.
1. Measure and mark up
Before you make a cut you need to measure up to ensure you get an accurate cut. For a straight line, get a tape measure and measure the distance where the plasterboard is to be fitted.
Take a measurement on the left side and the right side of where the board is going to go as the cut might not be a straight 90 degree cut. For example, if you are going to put up dot and dab plasterboard or a partition wall you may have obstacles, i.e. steps or sockets that need marking.
Mark both sides of the face of the plasterboard with a pencil. You'll need a straight edge; typically a long spirit level like the Silverline 1200mm Spirit Level is a good choice. Line up both measurements and draw a line. If you have more than a single straight line, measure and mark up accordingly.
2. Score and snap
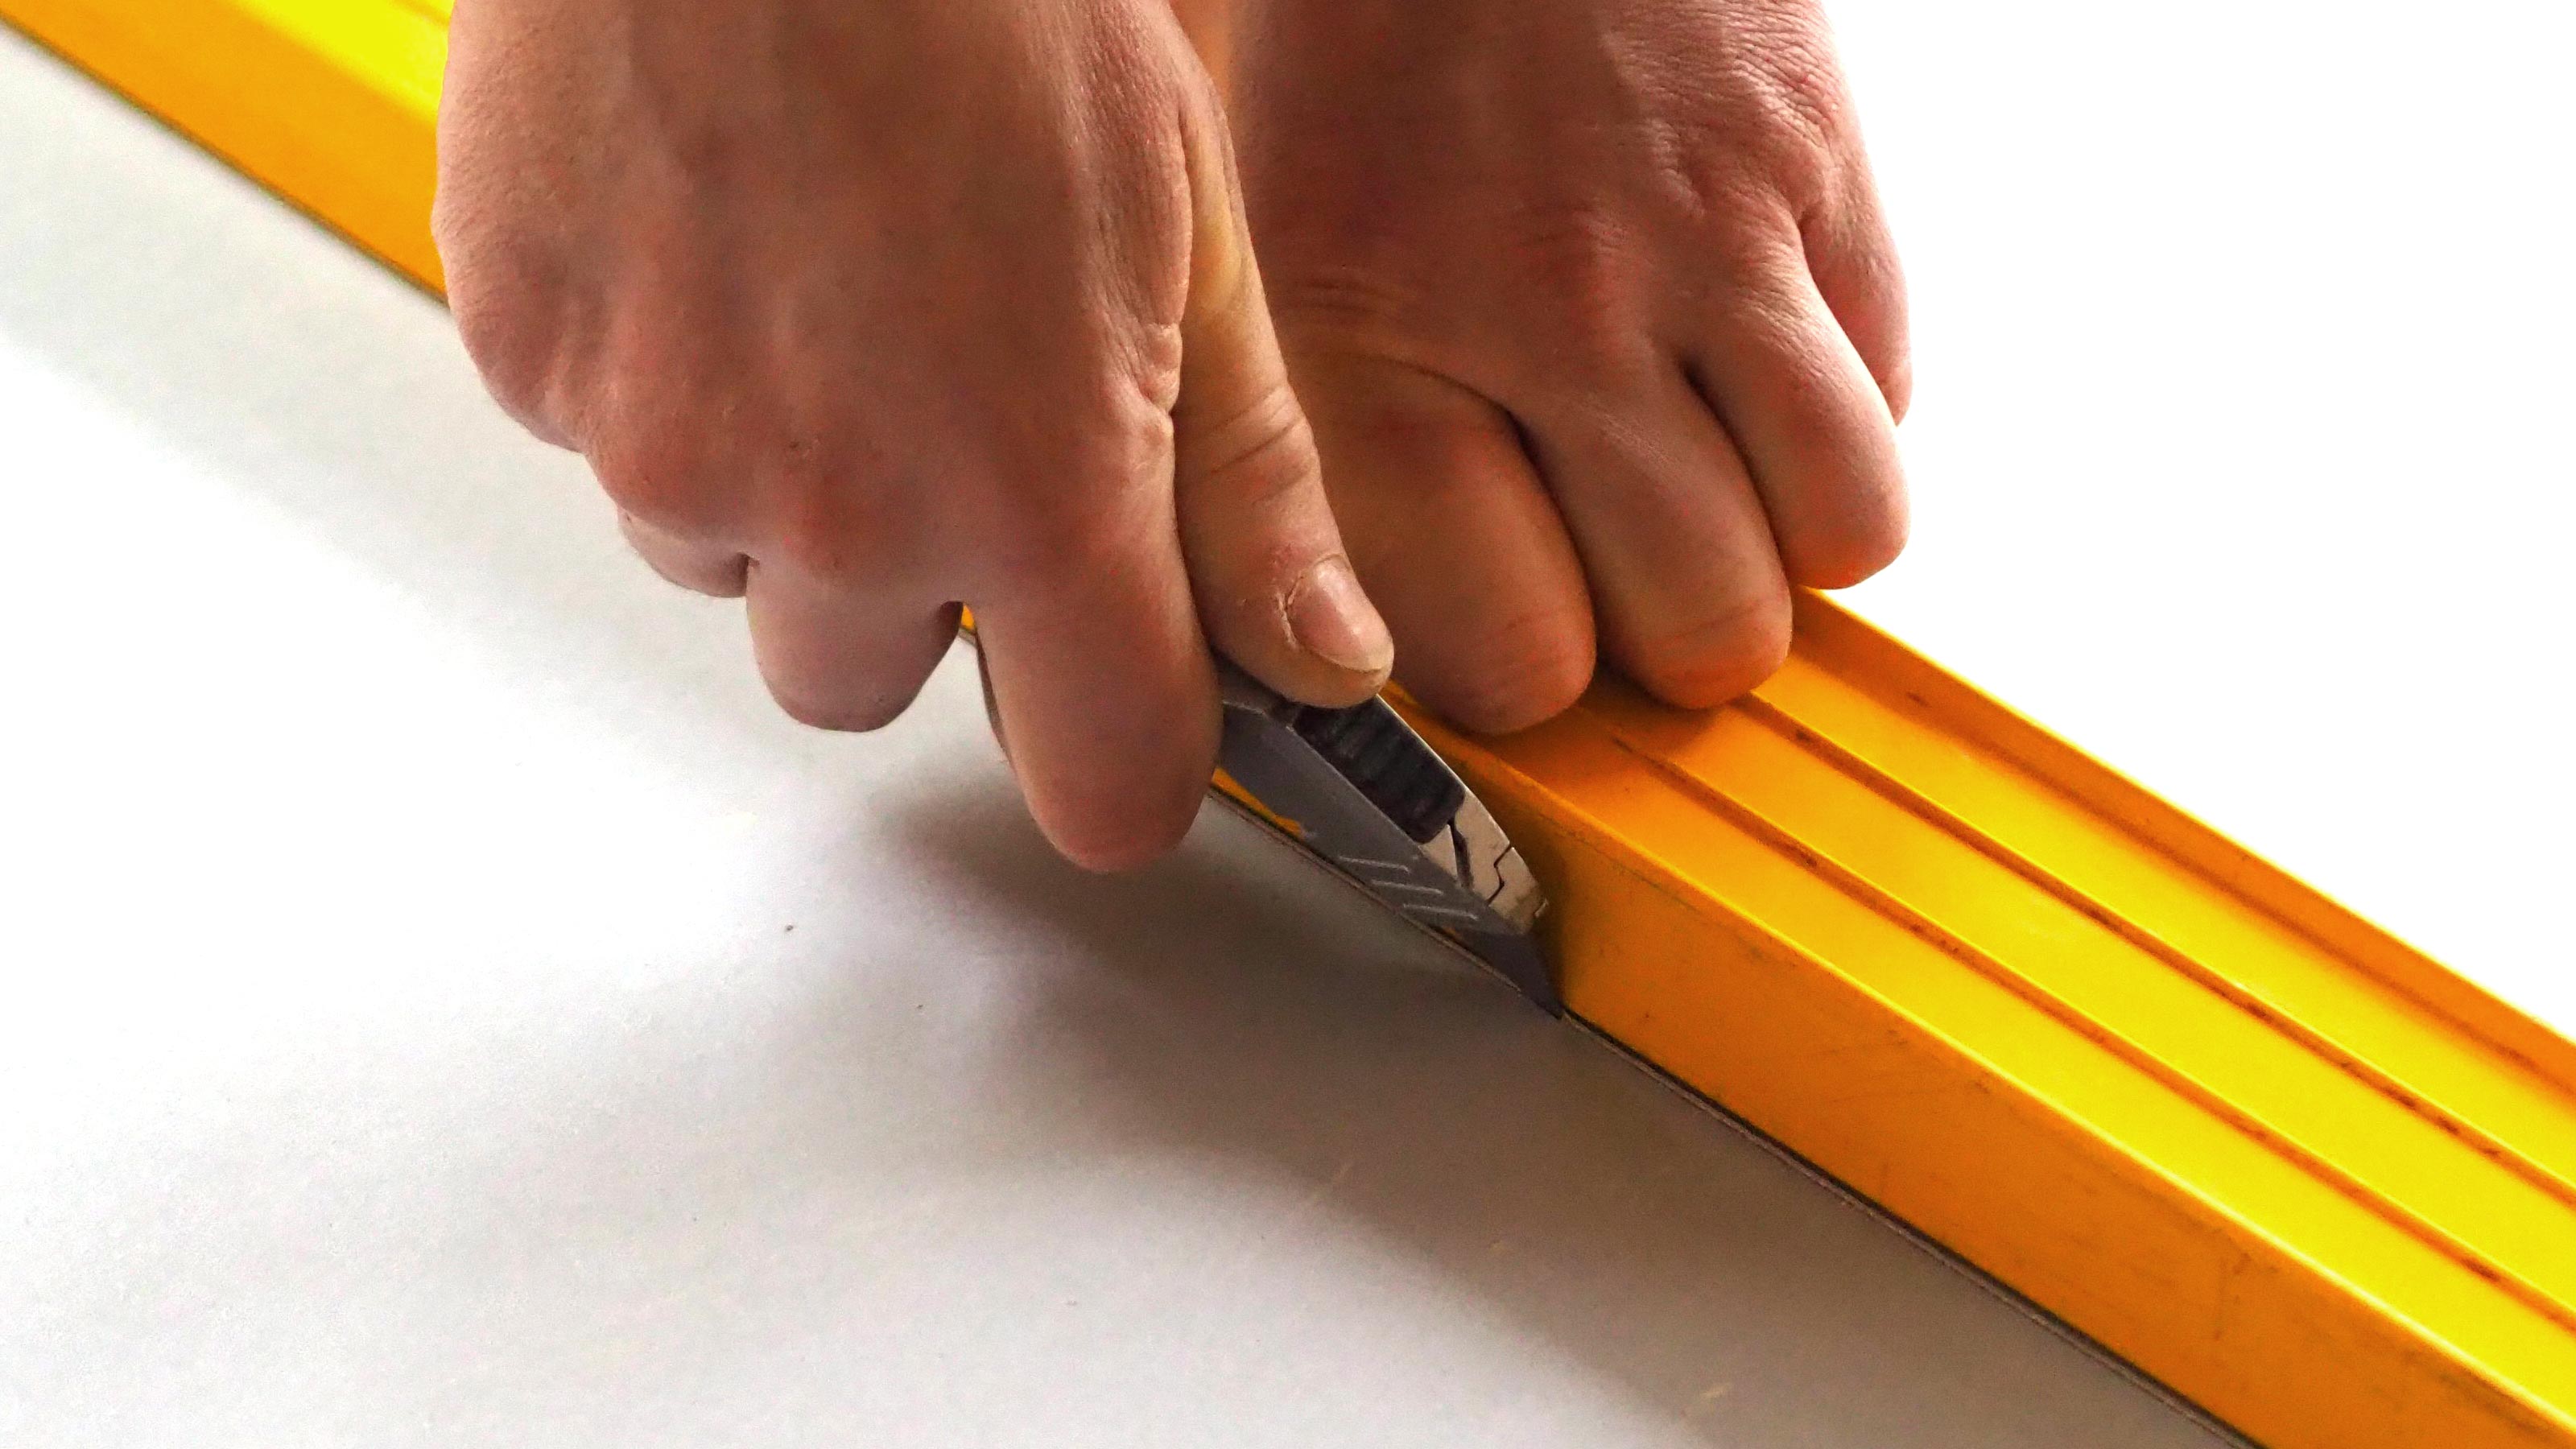
Now place your straight edge where you marked on the plasterboard and hold it in place. Make sure it is secure, place a knee on one end and a hand on the other and drag the blade of the knife along the edge of your straight edge i.e spirit level. Make sure it goes through the paper and someway into the plaster.
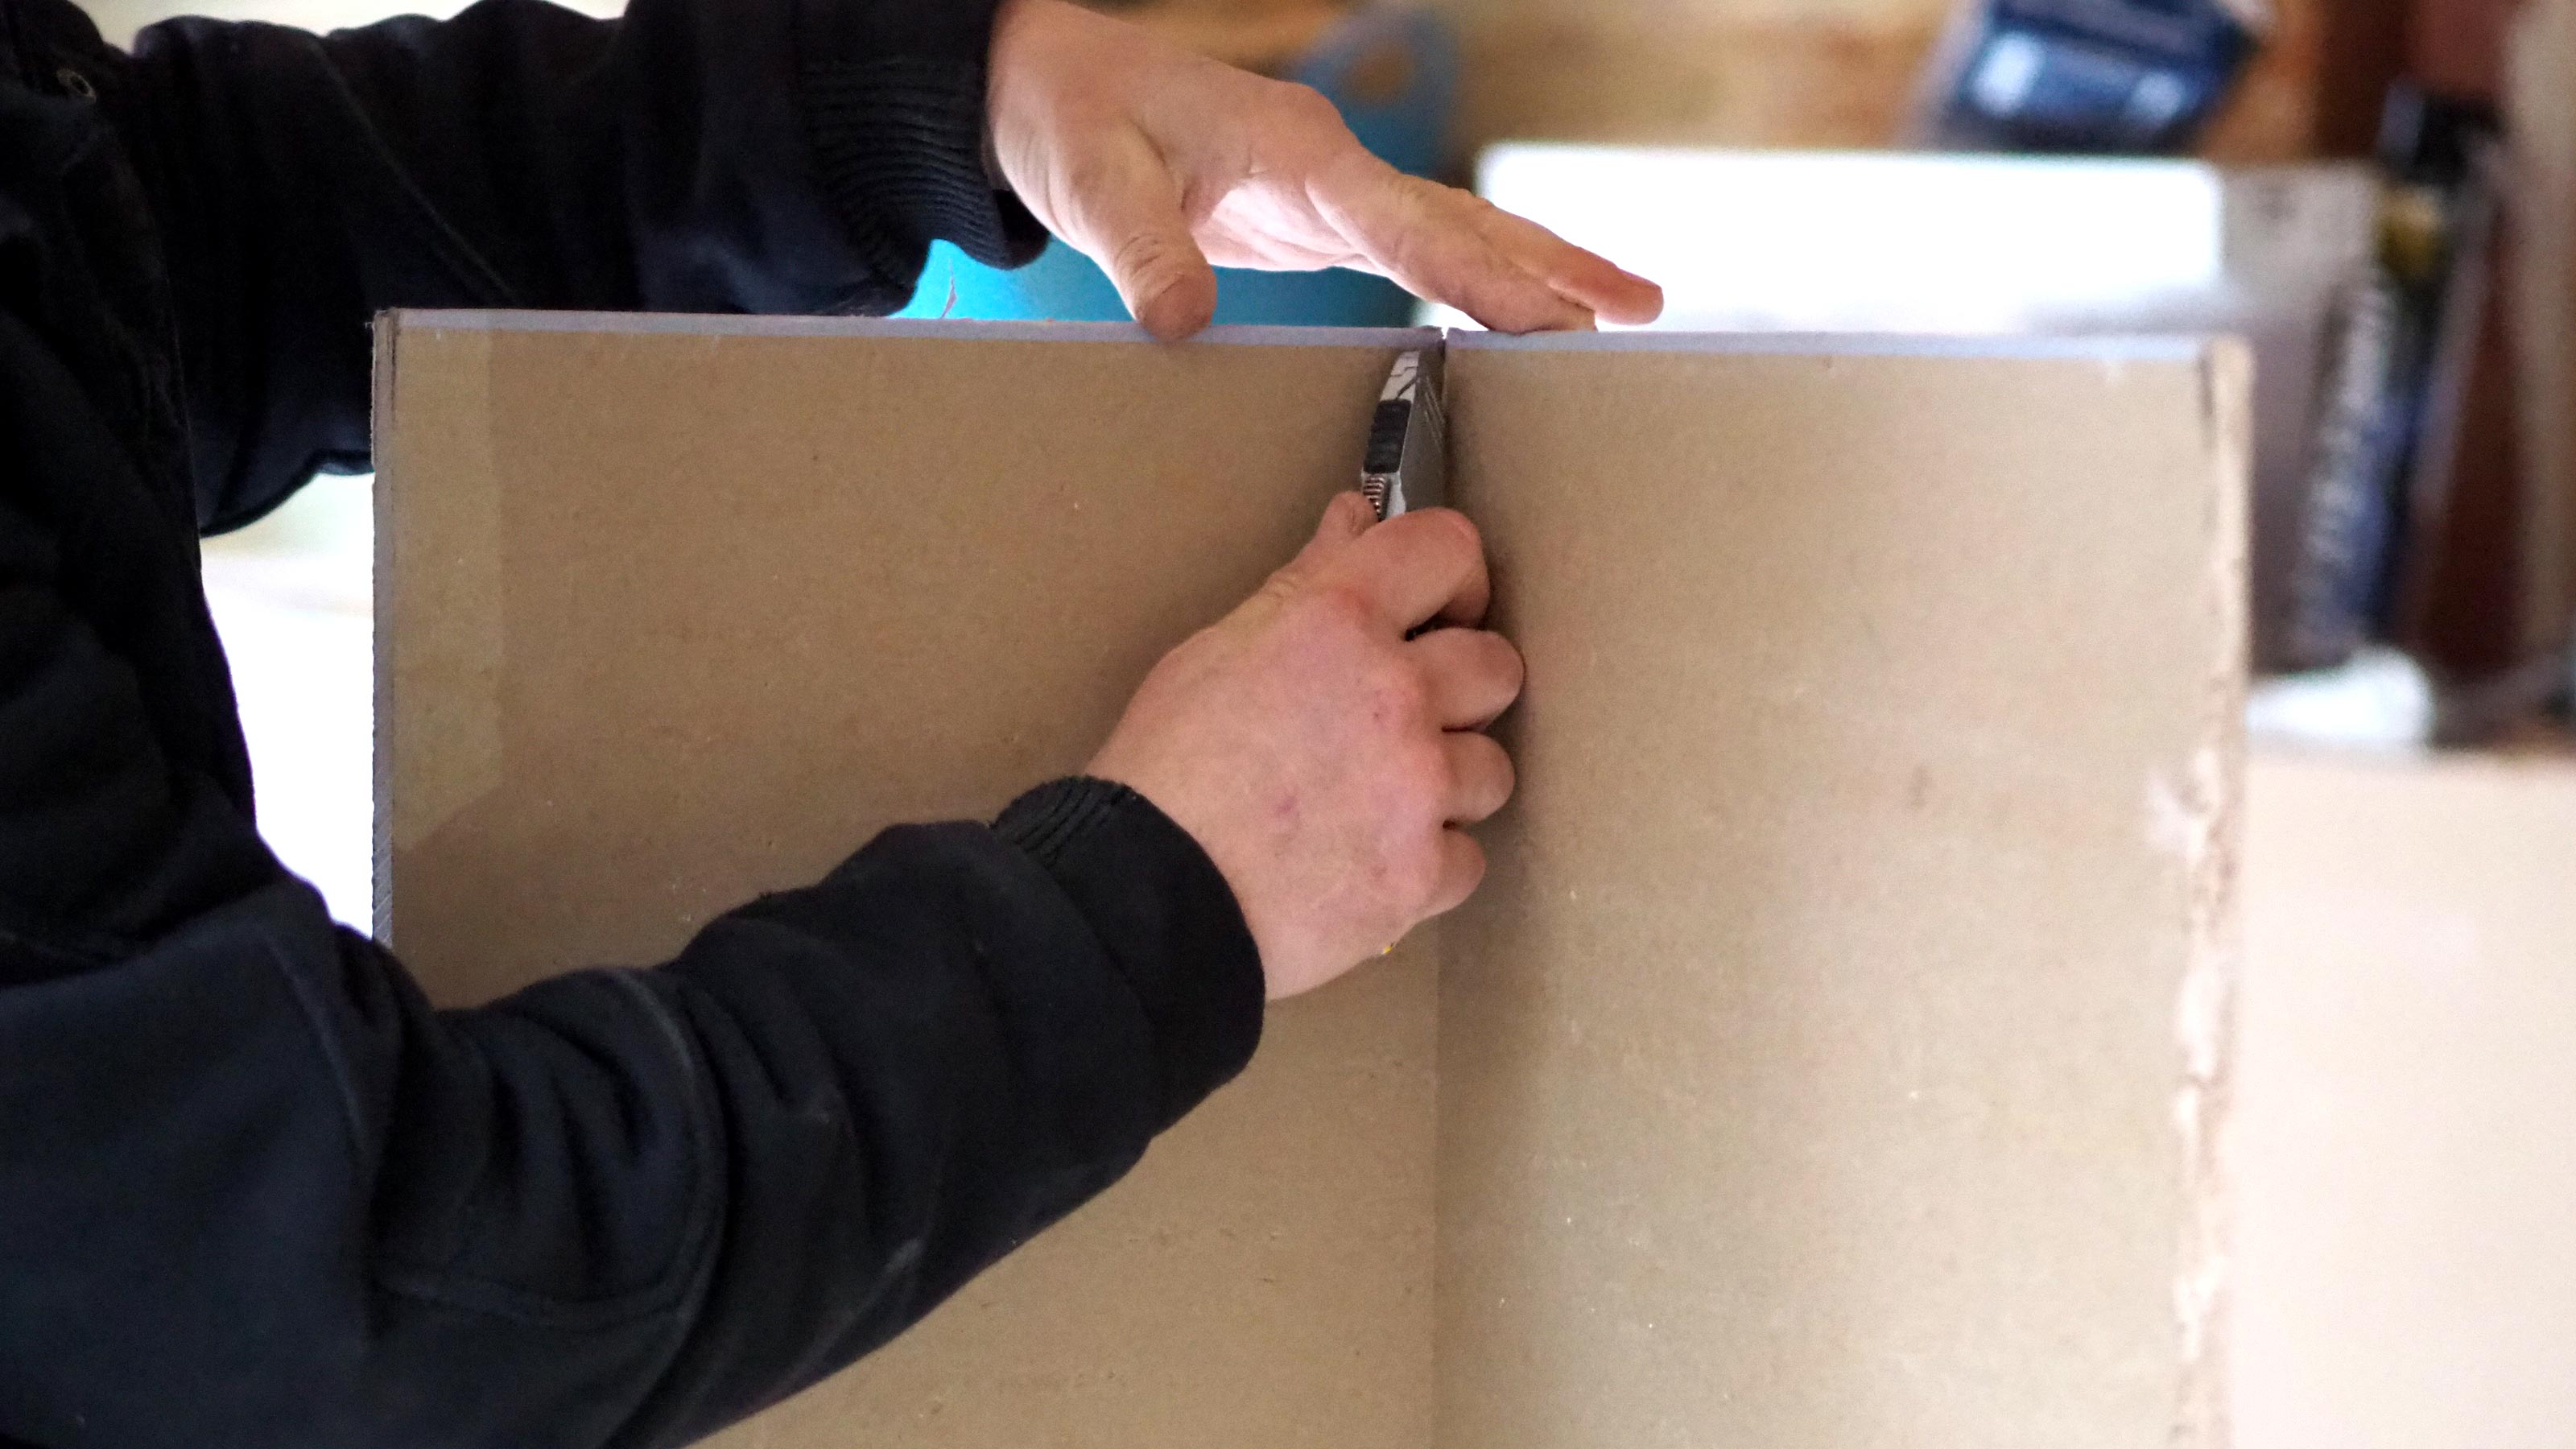
Now lift the plasterboard from the end along the end with the shortest depth. This will snap the board along the scored line. Now move the board to get access to the back of the board and cut the paper along the score line.
3. Cutting different shapes
Score and snap is only good for straight lines along the width or depth of the plasterboard. If you have more than a single line to cut, i.e you need to cut around a window sill, you need to use a different method. Mark out the different areas that need cutting using a straight edge where appropriate.
Now get a jab saw or a pad saw and cut along the marked areas. This will cut through both sides of the plasterboard so there is no need to score the paper, and is good for cutting all angles and shapes.

How do I cut around electrical sockets?
There are two options here. One is to place the plasterboard in position against the wall and give it a tap near where the socket is. This leaves an imprint on the back of the plasterboard so you know where to cut.
The other is to mark out before putting up the plasterboard. To do this, get a long spirit level, line up level on the top of the socket and mark on the corner of the nearest wall. Do the same on the bottom of the socket. Ensure your marks a couple of inches long so they don't get hidden when you put the plasterboard against the wall.
Now use the spirit level vertically and mark the floor where the two ends of the socket meet the floor. Put the plasterboard up and use your spirit level and marks to draw your lines. Where they meet will be where the socket is. This could be a good time to swap a socket or install a new one, before the board goes up.
So how do you cut them out? Expert Gary Blackburn reveals how he does it: “To cut out for services etc. (plug or switch back boxes) the best method is either a pad saw or a multi tool for example, this is best practice for all types of plasterboard.”
Can I use a jigsaw for cutting plasterboard?
Yes you can — it is good for cutting plasterboard where a curve is needed and you have two lines to cut, e.g to fit around a door frame. A jigsaw can be used when plasterboarding a ceiling and cutting out holes for the downlights. Finally, it is also good for cutting straight lines, but isn’t always as accurate as using a Stanley knife and a straight edge, and it's not as quick.
If you do decide to use a jigsaw to cut plasterboard, run the jigsaw at high speed and choose a blade with a medium tooth to help stop the paper tearing.
A jigsaw is also suitable when you are looking to fix holes in plasterboard. Just make sure there are no wires behind the wall. Note a jigsaw will chuck up a lot more dust than a knife or saw so it's a good idea to wear a mask.
Steve Jenkins is a freelance content creator with over two decades of experience working in digital and print and was previously the DIY content editor for Homebuilding & Renovating.
He is a keen DIYer with over 20 years of experience in transforming and renovating the many homes he has lived in. He specialises in painting and decorating, but has a wide range of skills gleaned from working in the building trade for around 10 years and spending time at night school learning how to plaster and plumb.
He has fitted kitchens, tiled bathrooms and kitchens, laid many floors, built partition walls, plastered walls, plumbed in bathrooms, worked on loft conversions and much more. And when he's not sure how to tackle a DIY project he has a wide network of friends – including plumbers, gas engineers, tilers, carpenters, painters and decorators, electricians and builders – in the trade to call upon.

