Want to know how to fit a toilet? Our step-by-step guide to installing a toilet yourself
Our expert explains the tools, materials and know-how you need to fit a new toilet in your bathroom, plus when to give up and call in a professional
Bring your dream home to life with expert advice, how to guides and design inspiration. Sign up for our newsletter and get two free tickets to a Homebuilding & Renovating Show near you.
You are now subscribed
Your newsletter sign-up was successful
There will come a time when a new toilet is a must. It might simply be that it doesn't match your bathroom style or you could be looking to upgrade to a newer model. Alternatively, the flush may have failed, or the cistern may be cracked and needs replacing.
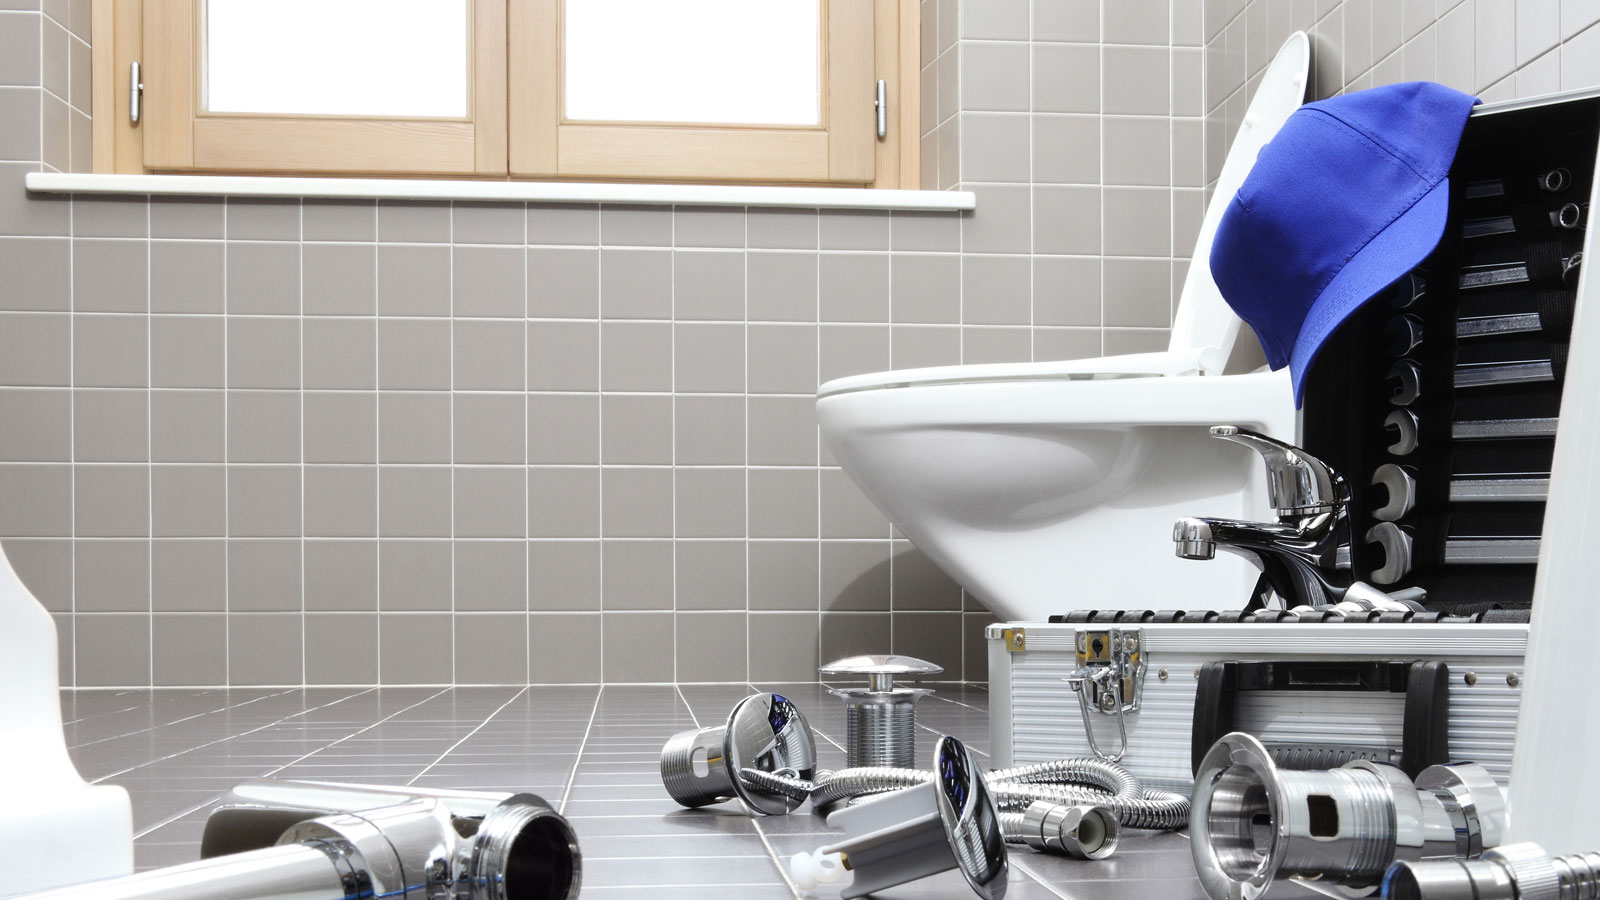
Whatever the reason, fitting a new toilet can be a challenge, whatever type of toilet you are installing. Despite this, it can still be a task that an experienced DIYer can handle, especially if it's a straightforward like-for-like switch. If all the pipework is already in place, you can start straight away. Just remember to turn off the water supply before you get started.
Tools you'll need to fit a toilet
- Adjustable spanner – like this Crescent Adjustable Spanner from Amazon
- Pencil
- Tape measure – like this STANLEY Tape Measure 5M from Amazon
- Drill
- Masonry drill bits – DEWALT Masonry Drill Bit Set from Amazon
- Tile drill bits or glass drill bits
- Spirit level
- Long flat-bladed screwdriver
- An assistant for steps six and nine
- Plastic pipe cutter
- Copper pipe cutter
Materials you'll need to fit a toilet
- Twin-flush toilet - like this Metro Rimless Close Coupled Modern Toilet
- Plastic pipe (15mm)
- Threaded toilet connector
- 15mm plastic pipe connectors - like these JG Speedfit Plastic Push-Fit Equal Couplers
- 15mm pipe inserts
- Masking tape
- Two 50mm number 8 screws
- Rubber washers
- Wall plugs
- Toilet feed connector with shut-off valve
Try these tools to help fit a toilet
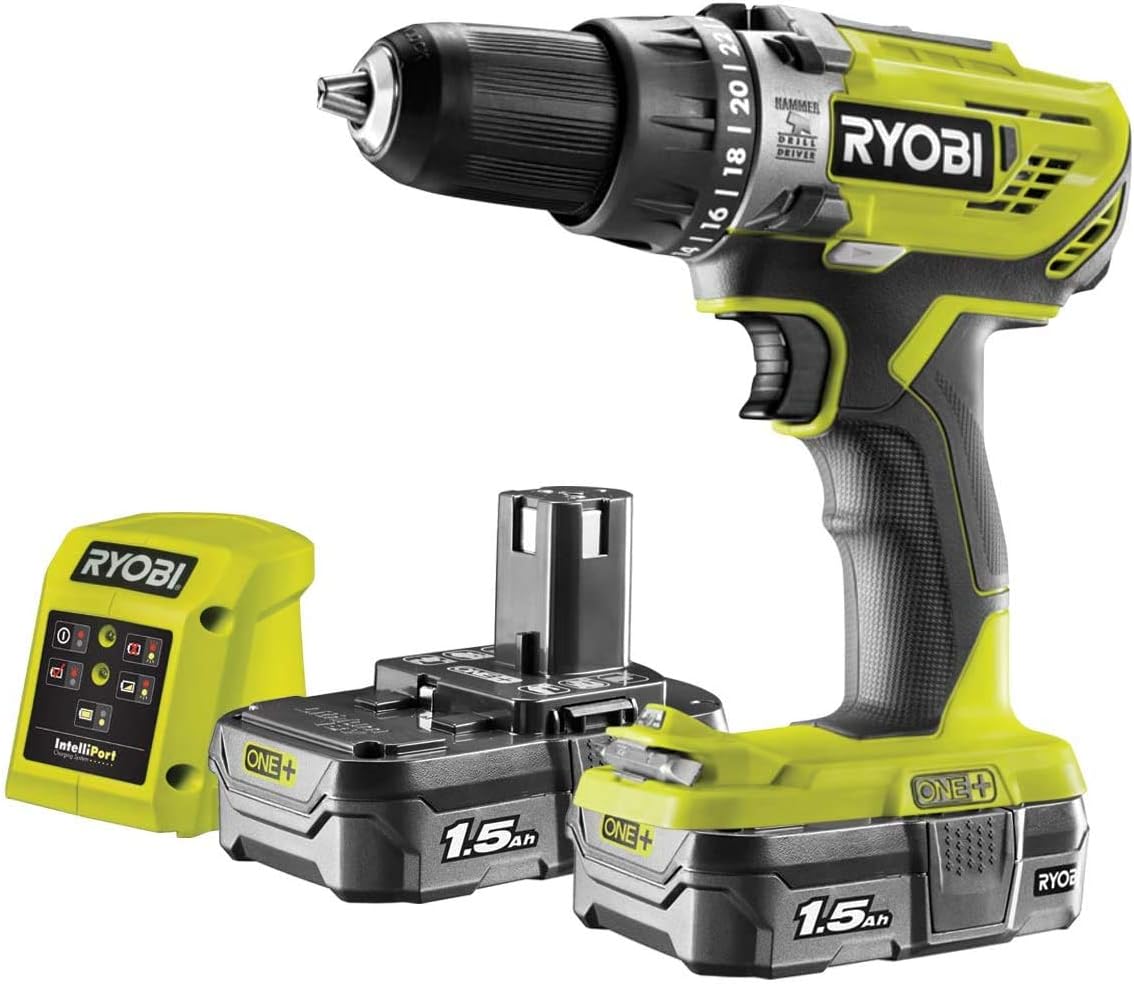
This cordless combi drill set includes a drill body, battery, charger, and a 46-piece mixed accessory set, including three masonry drill bits. An LED light makes it ideal for work in poorly lit areas.
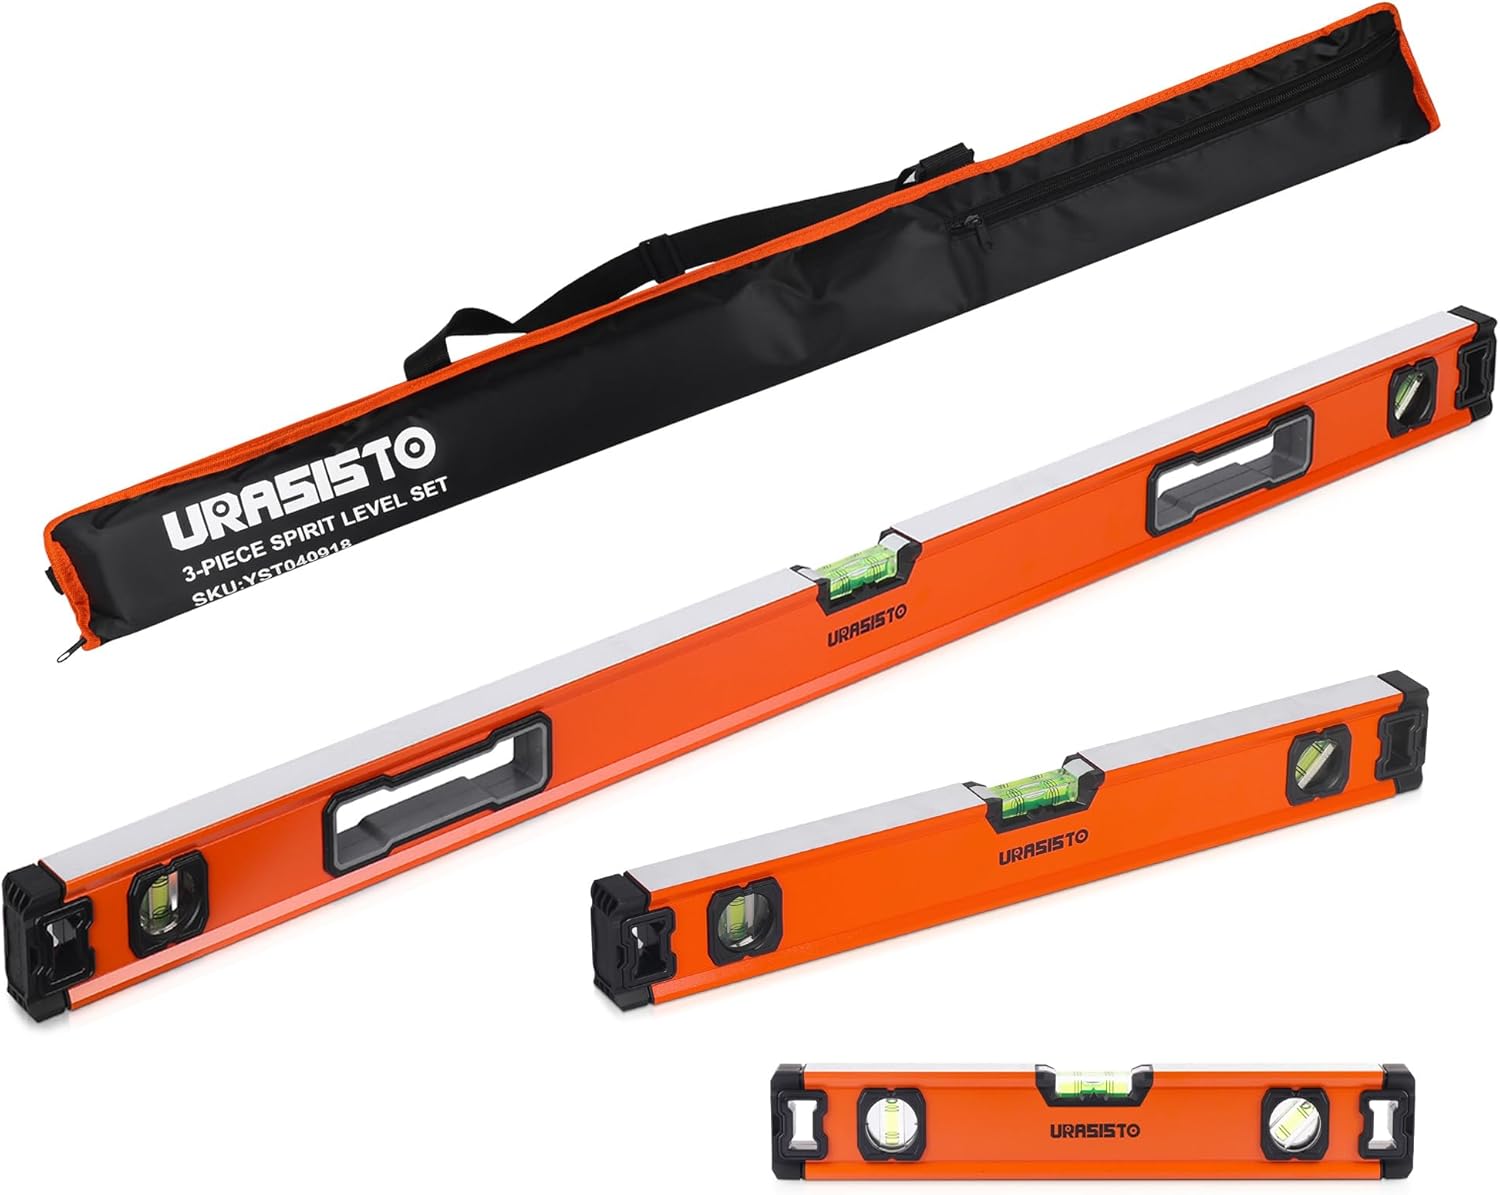
A set of 300mm, 500mm and 1000mm spirit levels with 45-degree, 90-degree and 180-degree bubbles for easy reading. Plastic ends offer protection and comes with own carry bag.
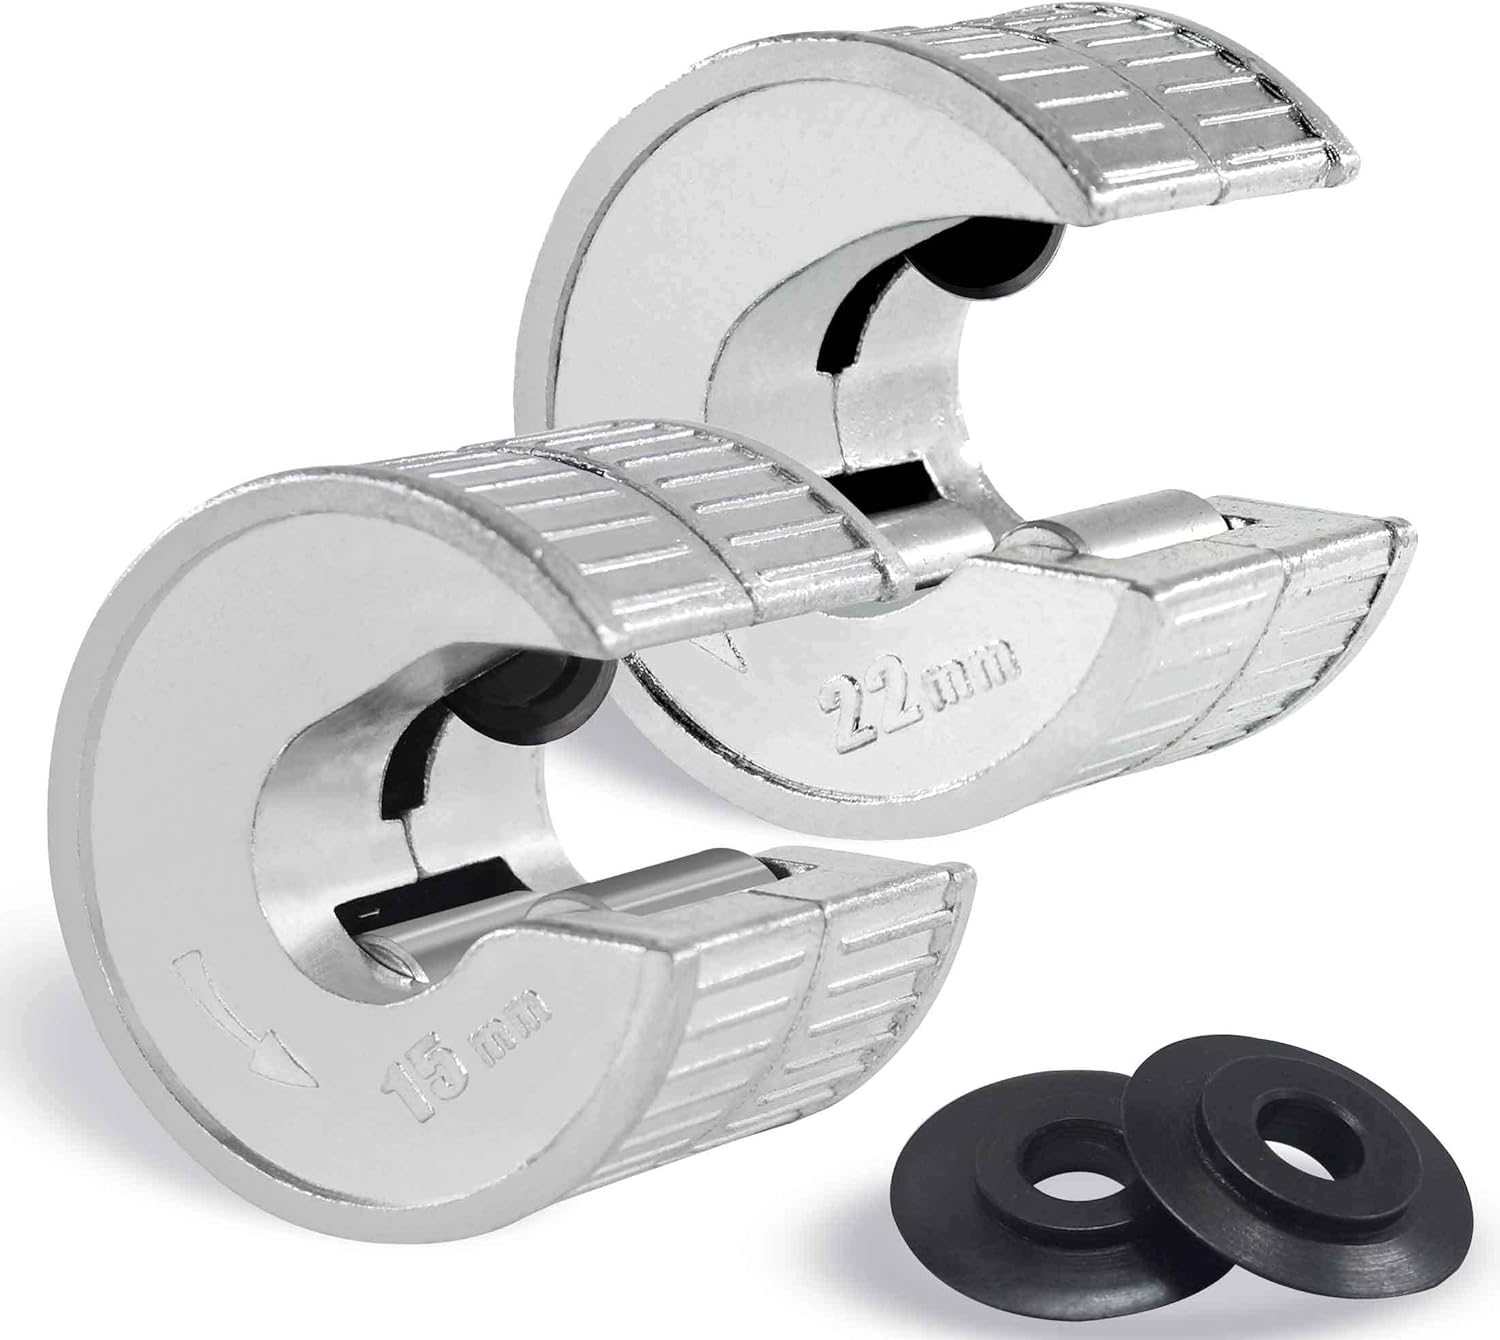
A set of 15mm and 22mm copper pipe cutters ideal for most internal plumbing tasks. A spring loaded cutter wheel provides a constant pressure on pipe providing fast and straight cuts.
Installing a toilet away from the main waste pipe
Yes, you can, but there may be issues depending on placement. Andy Bray, construction expert and managing director of Access Platform Sales says, “You can install a toilet away from the main soil stack if you can maintain a continuous fall on a 110 mm soil pipe and provide proper venting.” He adds, “The practical test is whether you can route a pipe with enough gradient to the stack without sharp bends, tight notches, or excessive runs under floors.”
Bray points out, “Gravity systems are quieter, simpler, and lower maintenance than pumped options, so they are the first choice where the route allows.” However, if this isn’t realistic, there are other choices continues Bray, “If you are in a basement or loft where falls are tight, feasibility drops and a macerator may be more realistic.”
As you might expect, installing a toilet away from the main waste pipe will cost. Bray says, “For short, straightforward internal runs of 3–5 metres, it's £600–£1,200, assuming minimal alterations. Where the route is longer, involves external runs, a new soil stack, core drilling and boxing‑in, totals often land between £1,500 and £3,500+.”
An alternative is to fit a macerator/ shredder on the back of the toilet. The unit sits behind the pan and pumps the waste away in a pipe just 22mm in diameter. Small piping is easy to box in or run between floorboard joists.
Fitting a macerator isn’t difficult, but because there are electrical connections involved and the area you are installing it in is restricted under Part P of the Building Regulations, you will need to employ an electrician to wire it in. Prices for a macerator start at around £150-£200. An electrician will charge around £50 for the wiring.
Bring your dream home to life with expert advice, how to guides and design inspiration. Sign up for our newsletter and get two free tickets to a Homebuilding & Renovating Show near you.

Andy Bray is a DIY and construction expert with over 20 years’ experience helping homeowners, renovators, and small businesses tackle projects safely and efficiently. He advises on everything from loft conversions and exterior painting to garden maintenance and seasonal property projects.

Steve Jenkins is a freelance content creator and a keen DIYer with over 20 years of experience in transforming and renovating the many homes he has lived in. He specialises in painting and decorating, but has a wide range of skills gleaned from working in the building trade for around 10 years.
Steps to fit a toilet
1. Unpack and check the components
You should have (clockwise from left): the pan with pan-to-cistern sealing ring and connecting bolts on top; cistern; cistern lid; flush button; flush valve; and fill valve. These parts are from a close-coupled toilet (where the cistern sits directly on top of the pan), but other twinflush systems use very similar components.
2. Put the fill valve into the cistern
Make sure the thick rubber washer goes on the inside and the plastic washer on the outside (picture 2 below). Steven Jenkins, DIY expert, says, "Start by hand tightening the securing nut and to finish, tighten with an adjustable spanner. But do not overtighten; if needed, you can tighten a little more later on."
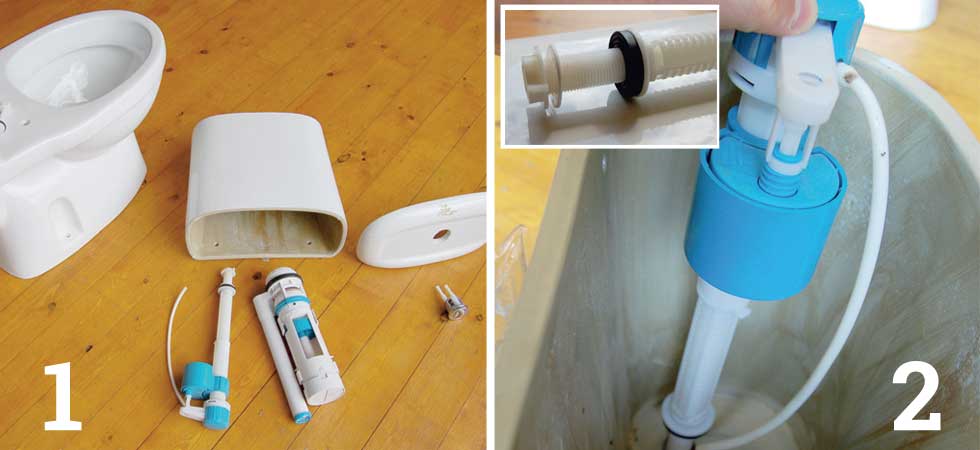
3. Put the flush valve into the cistern
Be careful not to obscure the cistern-to-pan bolt holes and ensure the rubber washer goes on the inside and the plastic washer on the outside. Hand-tighten the nut and nip up with an adjustable spanner.
4. Add sealing ring
Push the pan-to-cistern sealing ring over the retaining nut and threads of the flush valve underneath the cistern.
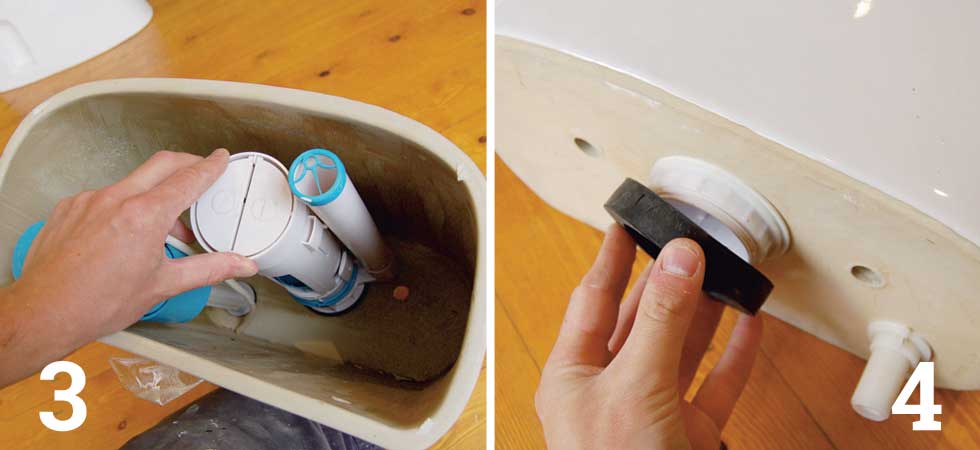
5. Put the cistern on top of the pan
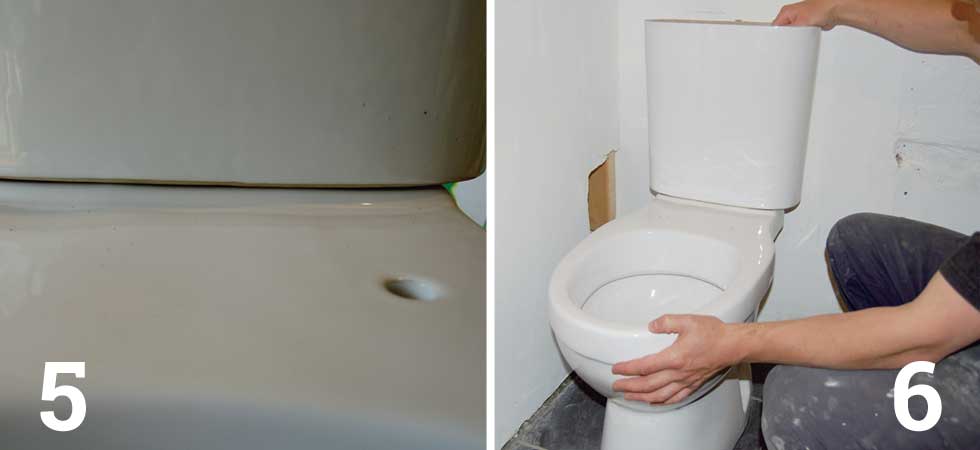
Push the connecting bolts through and tighten the nuts. Jenkins says, "The rubber washers on the bolts must go on the inside of the cistern, the plastic washers on the outside." He adds, "This helps create a watertight seal."
Check everything is aligned and, holding the nuts with an adjustable spanner, tighten the bolts down a little at a time using a long flat-bladed screwdriver to turn them. On a close-coupled toilet, the bolts should pull the cistern down as shown in picture (5).
Jenkins says, "Some toilets will have wing nuts that can be tightened by hand."
6. Move toilet into place
The toilet is now ready to be moved into place. Because the bolts just pinch the cistern and pan together for water tightness, rather than structural rigidity, the assembly is actually quite weak until it is screwed to the wall and floor. It's also pretty heavy. Get someone to help you move the pan and cistern.
Once it's roughly in position, send the assistant off to make some tea and make the final adjustments so the pan will line up with your existing waste pipe. Ideally, you want a clear 600mm square area forward of the pan for comfortable seating.
Jenkins says, "This shouldn't be a problem if this is a like-for-like replacement."
7. Check the toilet is level
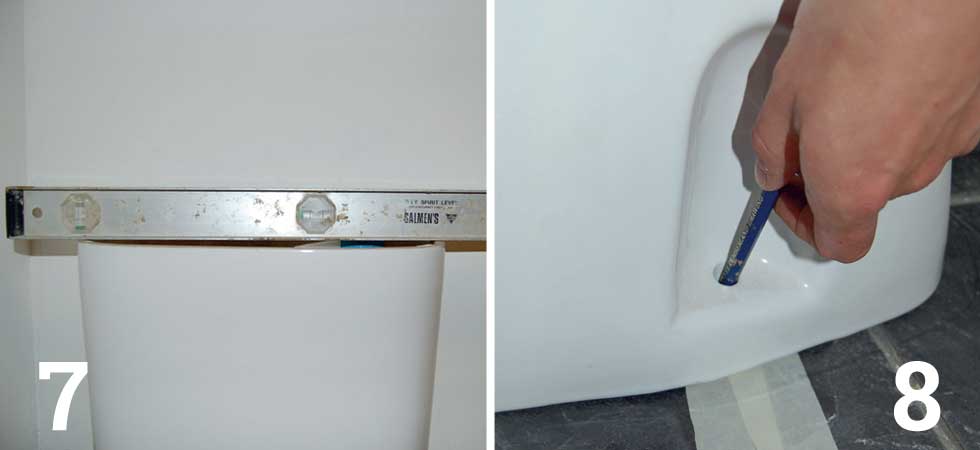
With the toilet in place, check that the cistern and toilet are level. Get a spirit level and place it on the cistern without the lid on.
8. Mark the mounting holes
Mark the mounting holes through the back of the cistern onto the wall and through the base of the pan onto the floor. If you are marking onto a dark surface, put some masking tape behind the cistern or under the pan to help the marks show up. Tape also stops the drill from skittering when drilling through tiles.
Jenkins adds, "Double-check that there isn't any pipework running under the floor, where the toilet is going to be placed, especially where the screws/bolts go into the floor." Don't panic, this shouldn't be a problem, but it's always best to check.
9. Drill holes
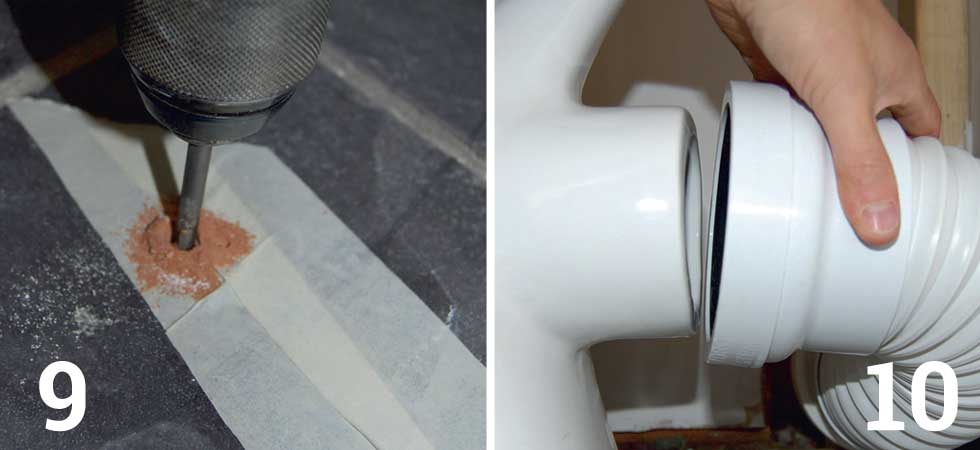
Drill the holes. If you are drilling into tiles, you can buy a special tile drill kit from most DIY stores for about £12. A cheap and effective alternative is to buy a drill bit designed for glass for about £4. When drilling through tiles, keep the drill on its lowest speed setting. Fill the holes with plastic wall plugs.
10. Connect to waste pipe
Reposition the pan so it lines up with the waste pipe, then connect the two. Jenkins says, "Cleaning the waste pipe connector and lubricating it with a little soapy water or washing-up liquid makes the connection easier."
11. Fix toilet into place
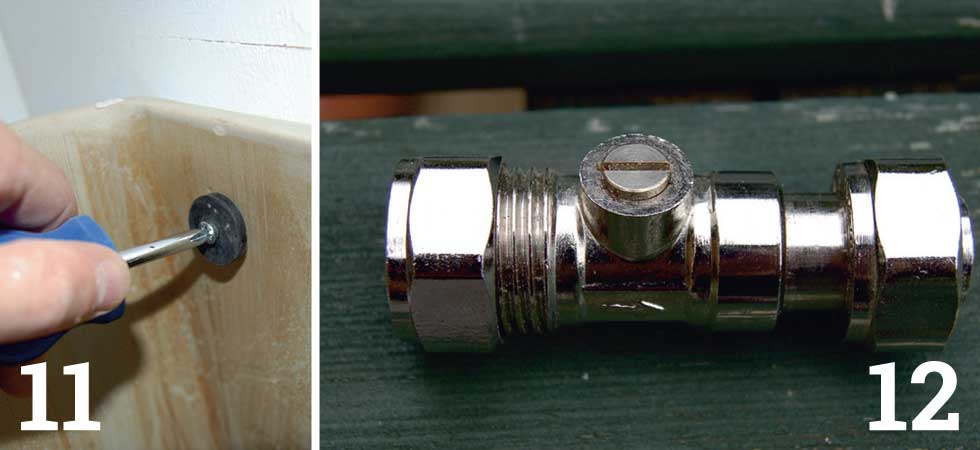
Now screw the toilet to the floor and wall. Most toilets come with screws and caps to secure the pan to the floor, but you may not get anything to secure the cistern to the wall.
A pair of rubber washers will help to cushion the screws against the ceramic cistern. The washers also stop the screws pulling through holes that are normally bigger than the average screw head. Dont over-tighten the screws you risk cracking the ceramic cistern and pan.
12. Sort the cold water supply
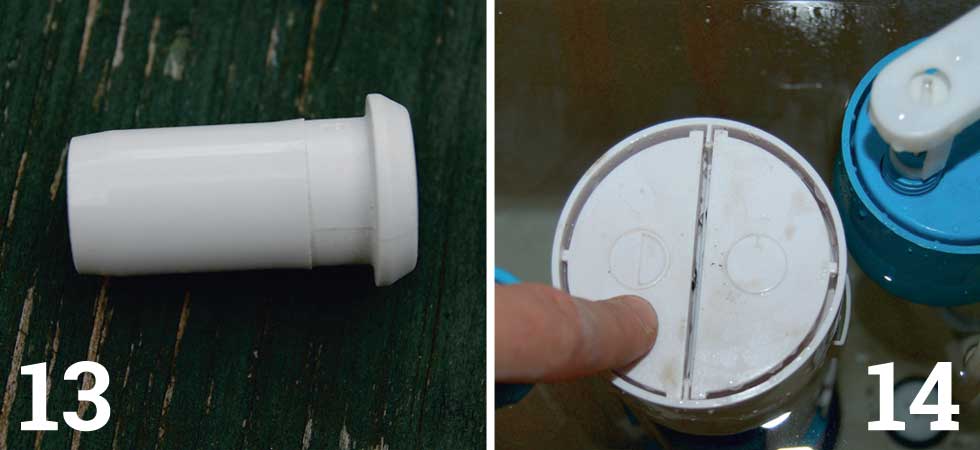
You may need to re-route the cold water supply. First, screw on a new toilet feed connector to the threaded section of the fill valve that protrudes below the cistern. This one has a built-in shut-off valve so you can turn the water supply off in an emergency without affecting other fittings and appliances.
13. Turn off the water
Turn off the water at the stop cock (often below the kitchen sink). Jenkins points out, "If you have an isolation valve on the water supply to the toilet, simply get a screwdriver and turn the screw to switch off the water supply."
Now, run the pipe from the old feed position to suit the new toilet. This may entail chopping back the old pipe to get a straight run to connect to. Alternatively, Jenkins says, "Use a flexi tail pipe with the right connectors; this will make it much easier and quicker." He adds, "Just make sure that you get a flexi tail that's long enough."
If you use plastic pipe and want to join into the metal connector shown in picture 12, you must use a plain pipe insert in the end of the pipe. This allows the olive in the connector to crush and grip the plastic pipe to prevent leaks. For other plastic-to-plastic connections (tees, straights and elbows), you can use the standard insert.
14. Turn on water and test
Once you have made your connections, turn the water on and check for leaks. Test the twin flush. The button on the left is the short flush, the button on the right, the long flush.
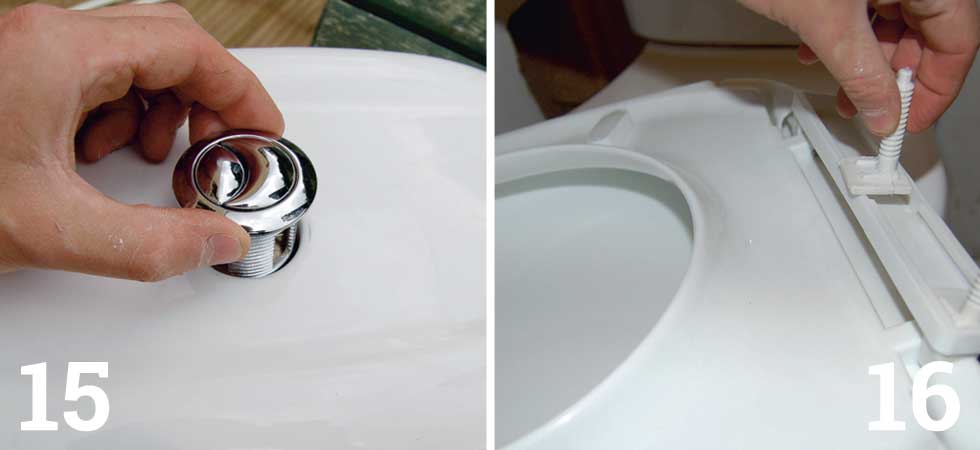
15. Fit flush button
Push the flush button through the cistern lid. Before you tighten up make sure the buttons correspond with the short- and long-flush buttons on top of the flush valve. Now fit the cistern lid and check the toilet flushes correctly.
16. Finish up
Nearly done. Now assemble, fit and tighten the toilet seat as per the manufacturers instructions. Finally, have a clean up and the jobs done.
If you're going to replace your old toilet, you will want to know what a new toilet will cost. It's also a good time to check out our smart bathroom design ideas and where to buy bathroom flooring that matches your new toilet.
Ben is a writer and a keen DIYer, and has undertaken a multiple of tasks from installing loft insulation, tiling, painting windows to fitting garden fences and reviving period fireplaces. He has also converted his loft on a DIY basis.
